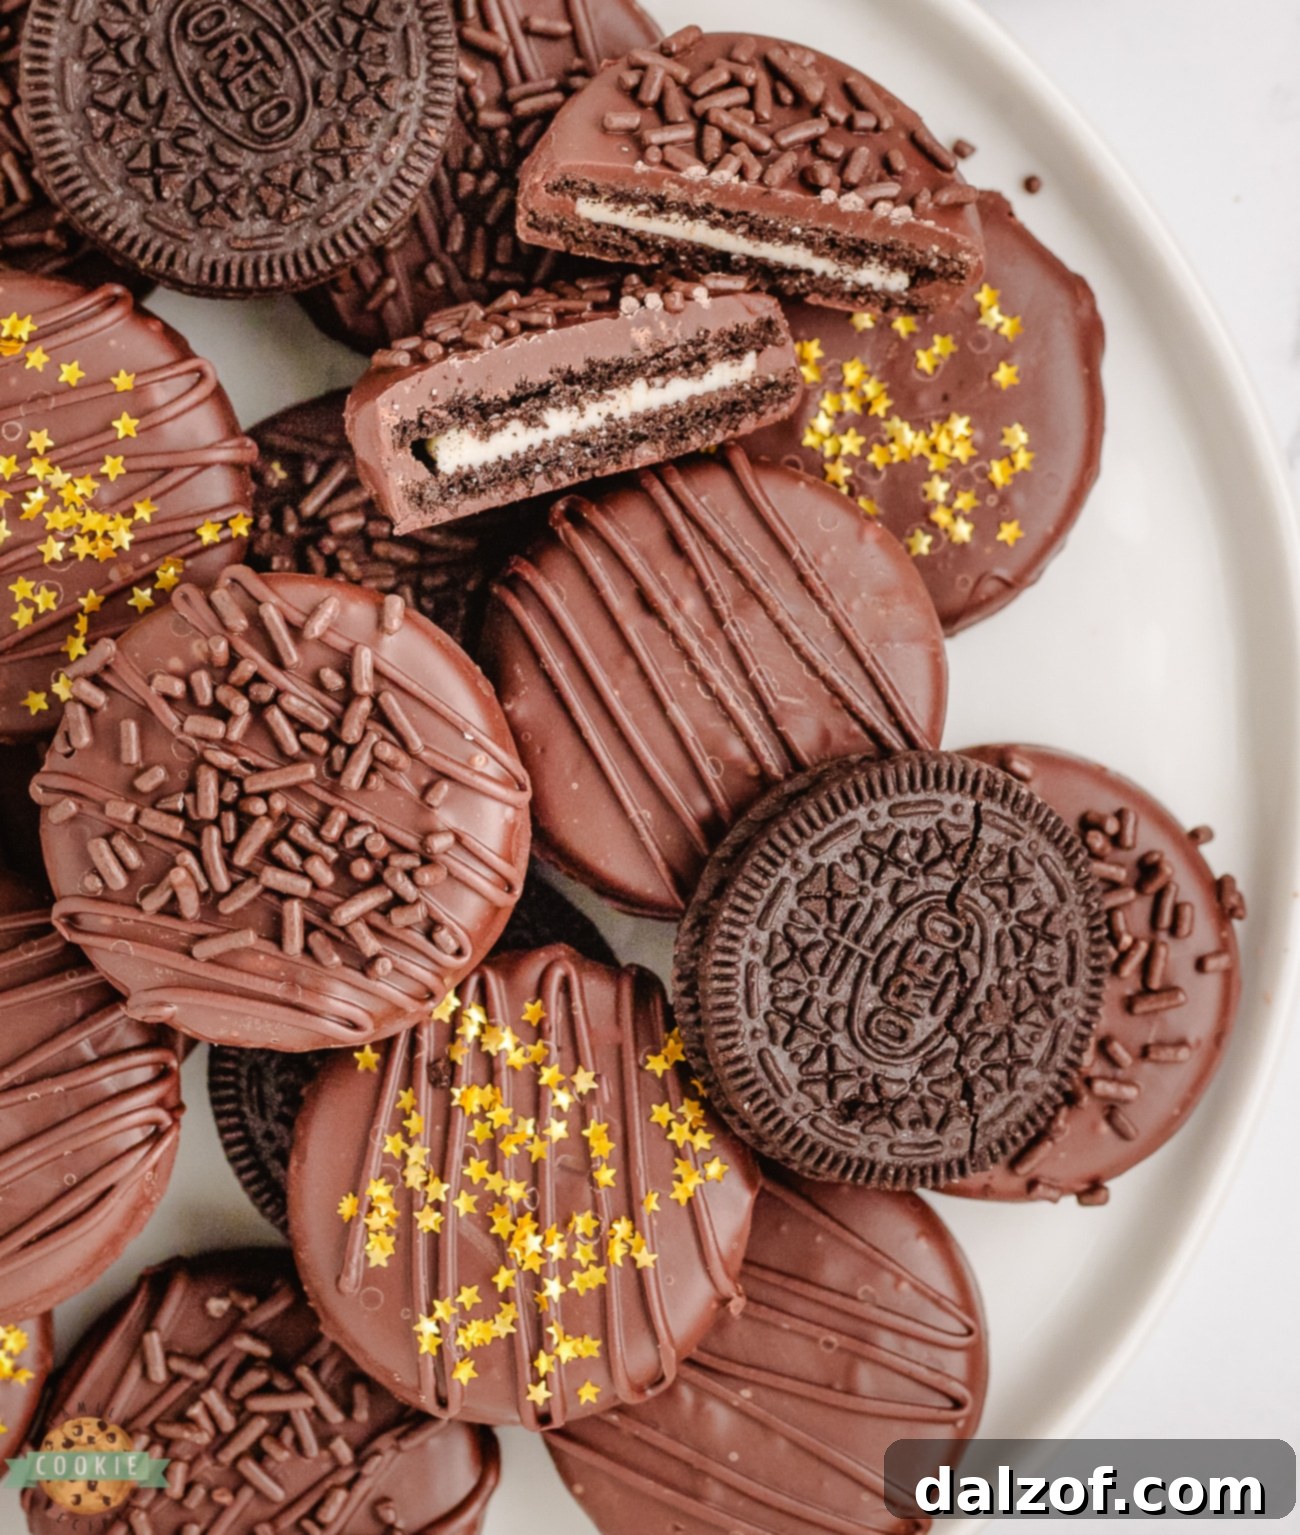
Chocolate Dipped Oreos: Your Guide to Crafting Irresistible Treats
Delight in the simple pleasure of homemade chocolate dipped Oreos. This comprehensive guide will show you how to transform classic Oreo cookies into elegant, decadent treats perfect for any occasion. Whether you’re a seasoned baker or a beginner, our easy-to-follow recipe, expert tips, and creative decorating ideas will help you create stunning chocolate-covered Oreos that are sure to impress. Get ready to drizzle, sprinkle, and enjoy these universally loved confections!
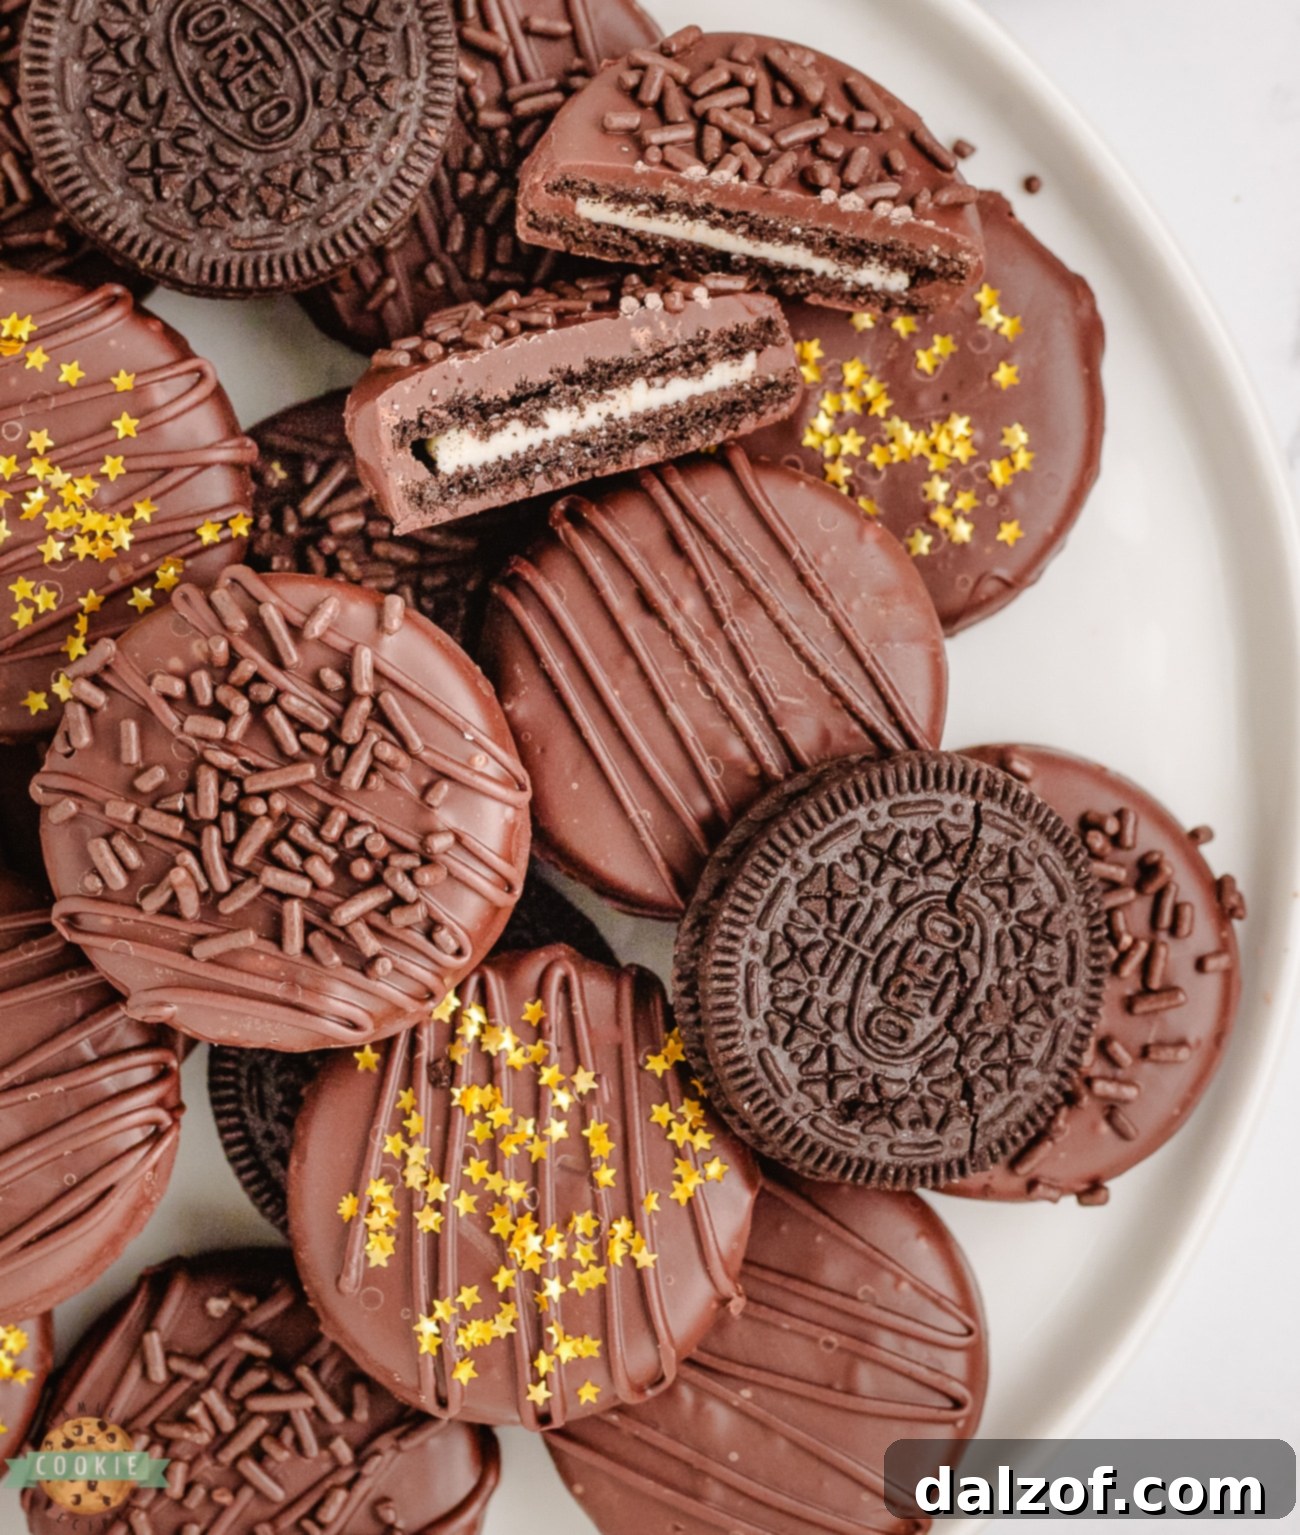
What Are Chocolate Dipped Oreos?
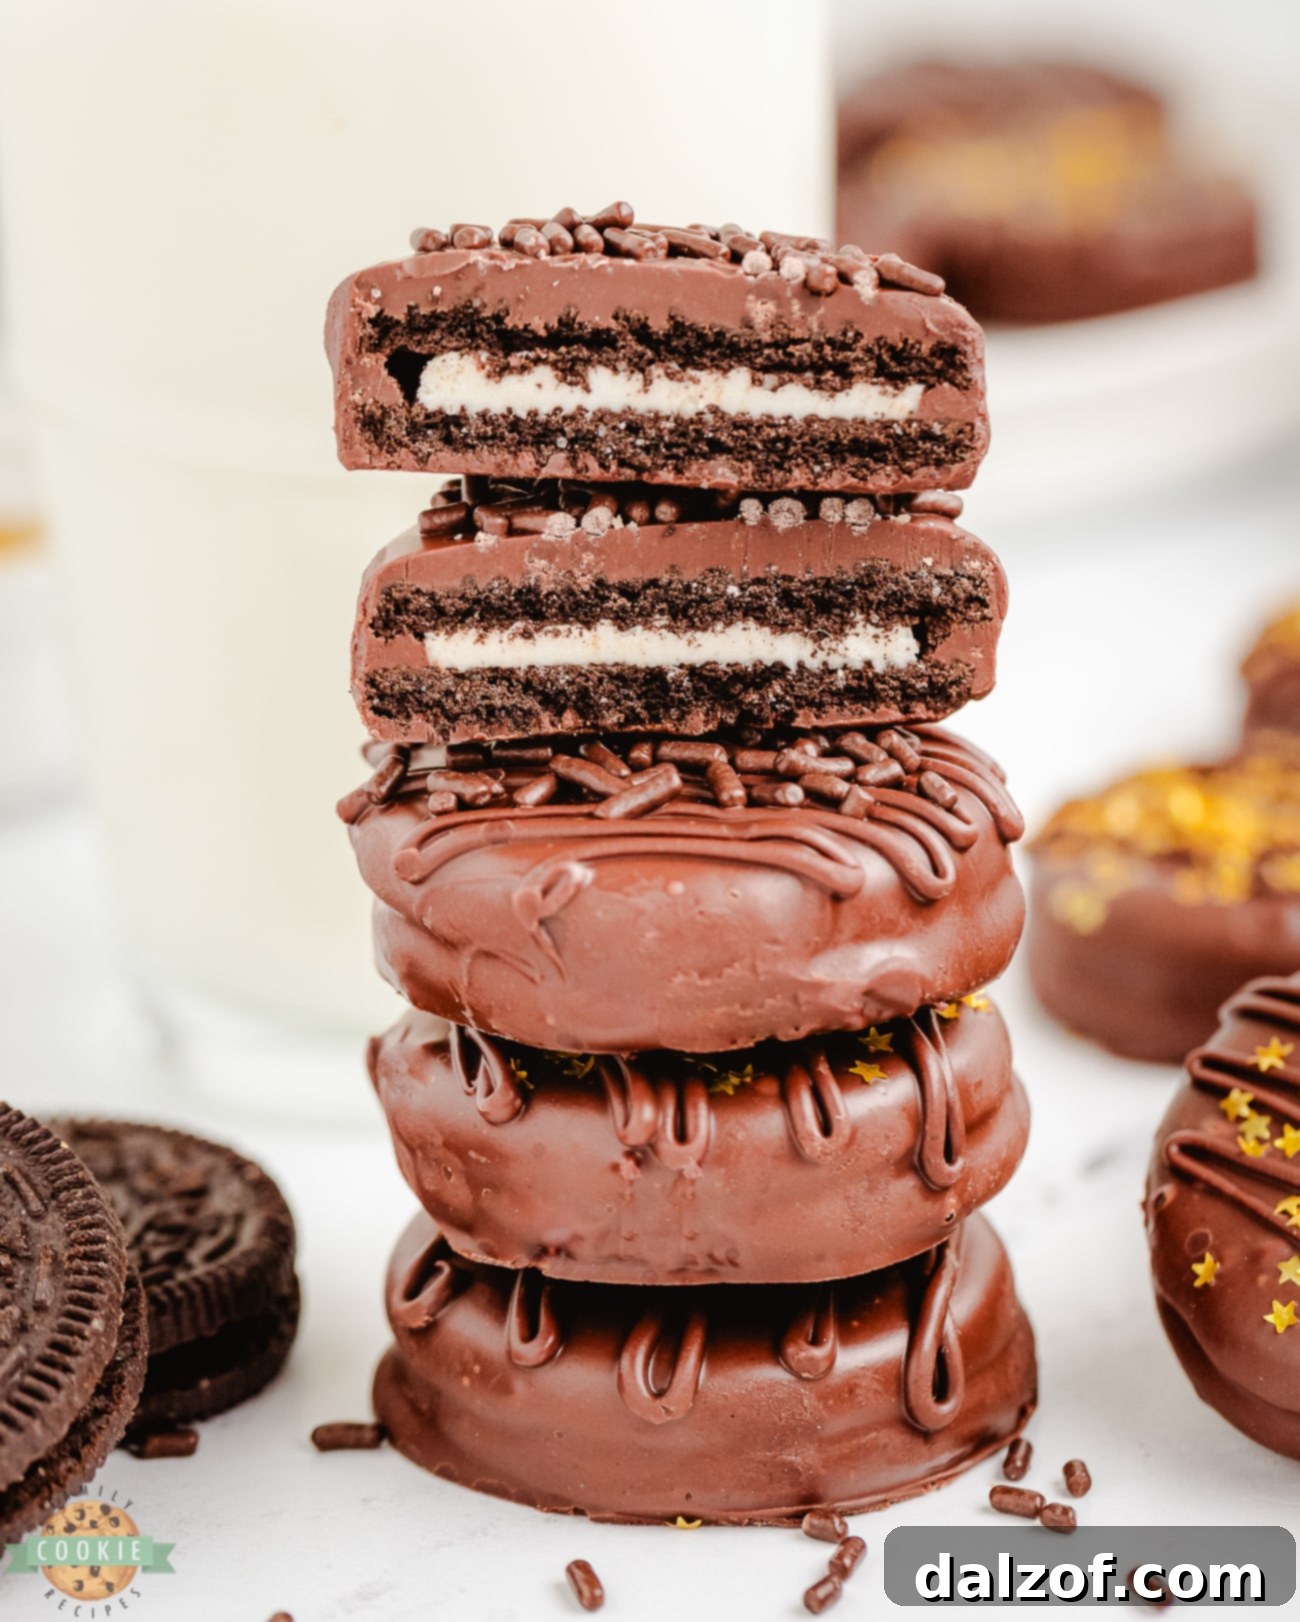
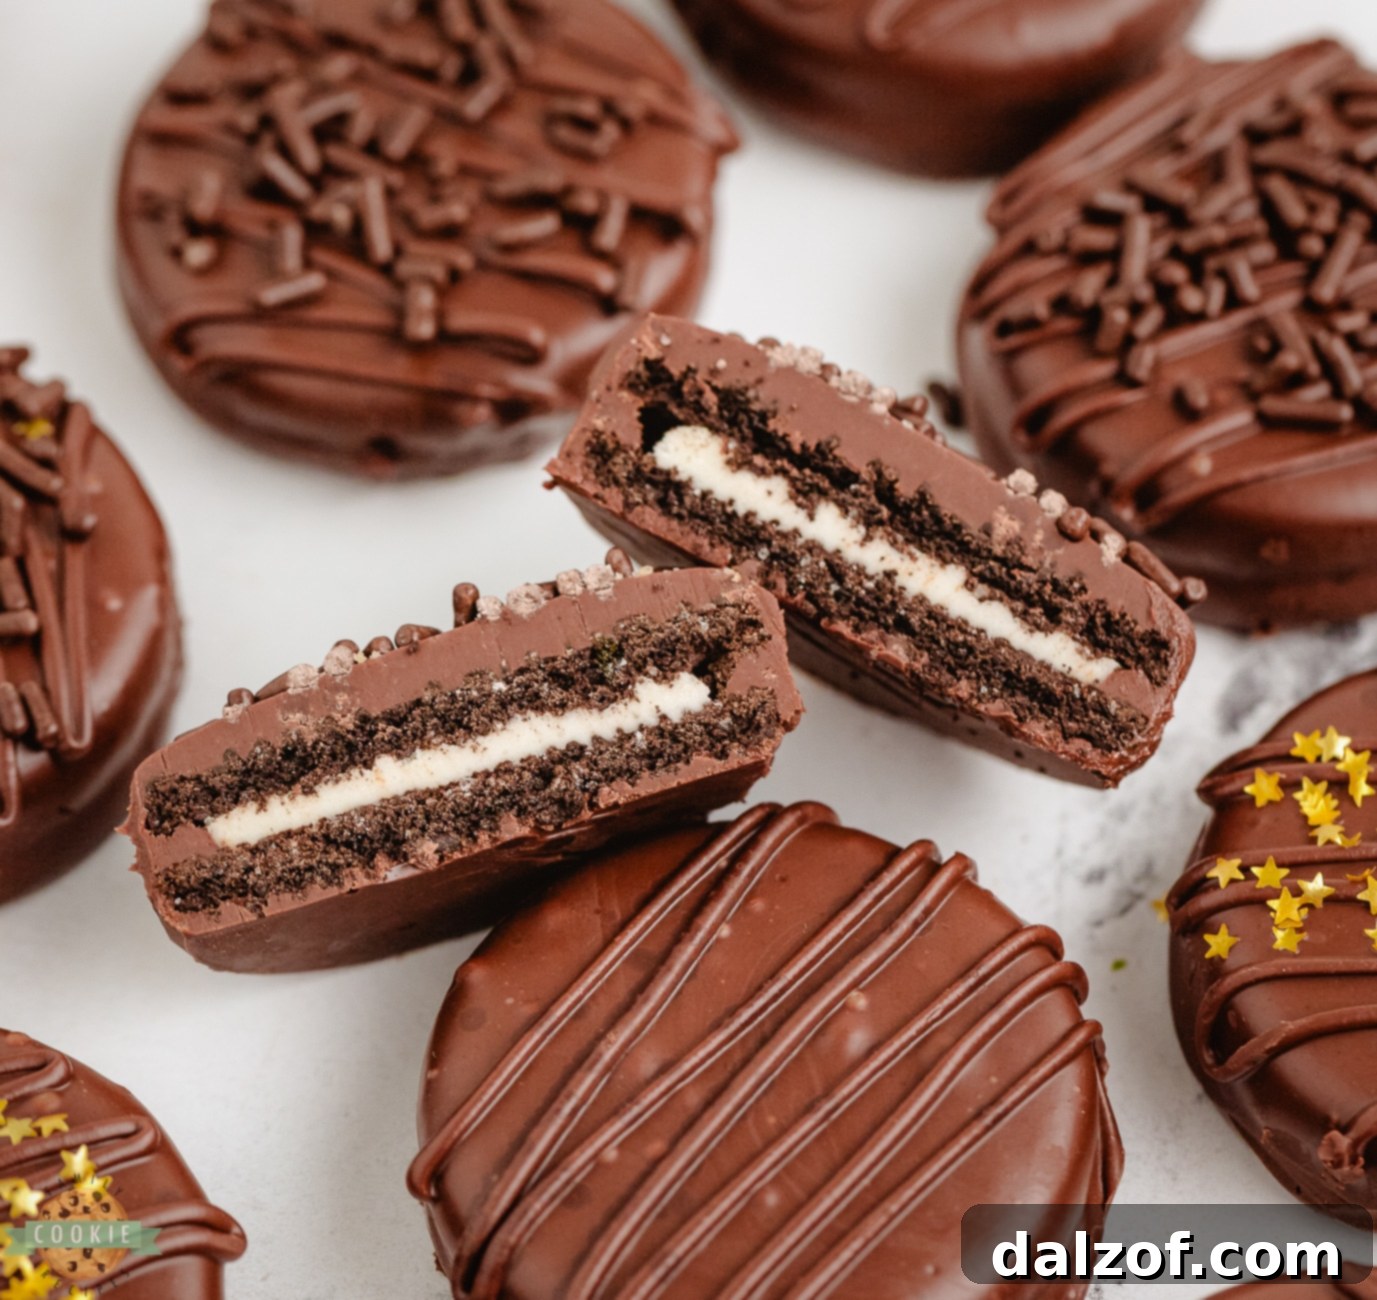
Chocolate dipped Oreos, also widely known as chocolate covered Oreos, are a beloved confectionary treat that combines the iconic crunch and creamy filling of an Oreo cookie with a smooth, luscious coating of chocolate. This simple yet sophisticated dessert is typically created by submerging the entire Oreo cookie into melted chocolate, allowing the chocolate to enrobe it completely, and then letting it set until firm. The result is a delightful contrast of textures and flavors – the crispness of the cookie meeting the rich, melt-in-your-mouth chocolate.
These versatile treats are much more than just a cookie; they are miniature works of edible art. Their universal appeal stems from the perfect marriage of two classic sweets: the humble Oreo and the decadent allure of chocolate. They are incredibly customizable, offering endless possibilities for personalization through various chocolate types, toppings, and decorative flourishes. From holiday parties and family gatherings to elegant dinner desserts and thoughtful homemade gifts, chocolate dipped Oreos fit seamlessly into any setting, always bringing a smile to those who enjoy them.
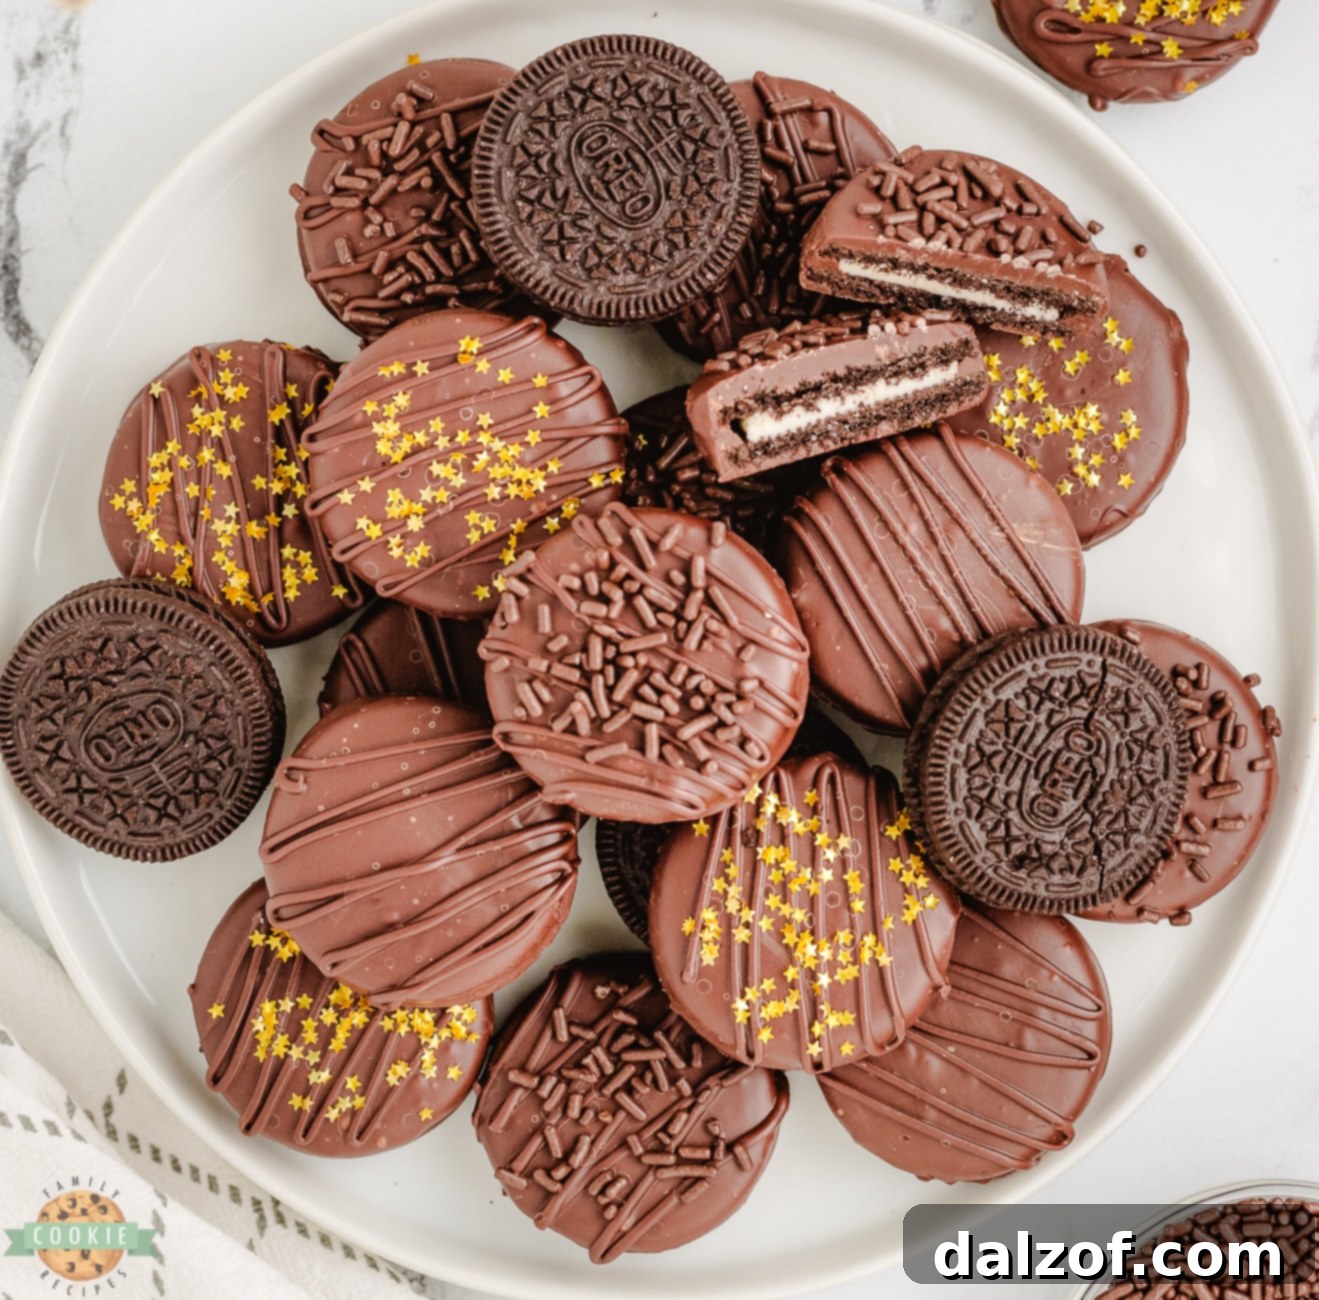
Why Make Homemade Chocolate Dipped Oreos?
While store-bought chocolate covered Oreos are certainly a convenient option, making them at home offers a multitude of advantages that elevate the experience from good to extraordinary. Crafting your own chocolate dipped Oreos allows for unparalleled freshness, customization, and a fun, rewarding culinary adventure. Here’s why going the homemade route is truly the best way to enjoy these delightful treats:
- Unmatched Freshness: There’s nothing quite like a freshly dipped Oreo. The chocolate is smoother, the cookie retains its perfect crunch, and the flavors are at their peak. You control when they’re made, ensuring they’re served at their absolute best.
- Endless Customization: Homemade means you’re the boss! You can choose your favorite type of chocolate – from rich dark chocolate to creamy milk chocolate, or even vibrant candy melts. You can experiment with different Oreo flavors beyond the original, such as Golden Oreos, Mint Oreos, or Peanut Butter Oreos, to create unique taste combinations.
- Personalized Decorations: This is where creativity truly shines. With homemade chocolate dipped Oreos, you can add any toppings your heart desires. Think colorful sprinkles, crushed nuts, festive candy pieces, a drizzle of contrasting chocolate, or even edible glitter for a touch of glamour. Tailor them to match any holiday, party theme, or personal preference.
- Quality Ingredients: You have complete control over the quality of your ingredients. Opt for premium chocolate chips or bars for a truly luxurious coating, and choose organic or specific brand Oreos if that’s important to you.
- Cost-Effective: Making a batch of chocolate dipped Oreos at home is often significantly more economical than purchasing pre-made versions, especially when you want a larger quantity for a party or as gifts.
- Fun and Engaging Activity: This recipe is simple enough for bakers of all skill levels, making it a fantastic activity for families, especially with kids. Dipping and decorating can be a fun, hands-on experience, creating not just delicious treats but also cherished memories.
- Perfect for Gifting: Homemade chocolate covered Oreos make incredibly thoughtful and impressive gifts. Package them in decorative boxes or bags, and you have a personalized present that shows you put in extra effort and love.
Embracing the homemade approach for chocolate dipped Oreos allows you to craft a treat that is not only delicious but also a true reflection of your taste and creativity.
Chocolate Dipped Oreo Ingredients
Creating these delightful chocolate-covered Oreos requires just a few simple ingredients, proving that extraordinary treats don’t always demand a lengthy shopping list. Focus on quality for the best results, especially when it comes to your chocolate.
Here’s what you’ll need:
- 20 Oreo cookies: The classic original flavor is a perfect choice, but feel free to experiment with other Oreo varieties like Golden, Mint, or Peanut Butter for unique flavor combinations.
- 2 cups semi-sweet chocolate chips: High-quality chocolate chips will melt more smoothly and provide a richer, more satisfying flavor. Semi-sweet offers a balanced taste, but you can also use milk chocolate, dark chocolate, or even white chocolate or candy melts depending on your preference and desired color scheme.
- 1 tsp shortening: A small amount of shortening (like Crisco) helps the chocolate melt smoothly, creates a thinner, more manageable consistency for dipping, and gives the finished coating a lovely glossy shine. It also helps prevent the chocolate from seizing and makes it easier to work with.
- Sprinkles (optional): Colorful sprinkles are a classic choice for decoration, adding both visual appeal and a fun texture. Beyond sprinkles, consider other optional toppings like crushed nuts, shredded coconut, sea salt flakes, or finely crushed candy pieces.
With these basic ingredients, you’re well on your way to creating a batch of delicious and beautifully decorated chocolate dipped Oreos!
How to Make Chocolate Dipped Oreos: A Step-by-Step Guide
Making chocolate dipped Oreos is a surprisingly easy and rewarding process. Follow these simple steps to create your own batch of irresistible treats with a perfectly smooth, shiny chocolate coating.
- Prepare Your Workspace: Begin by lining a baking sheet with parchment paper or wax paper. This crucial step prevents the dipped Oreos from sticking and makes cleanup a breeze. Set it aside within easy reach.
- Melt the Chocolate: In a microwave-safe bowl, combine the semi-sweet chocolate chips and shortening. Heat the mixture in the microwave in 30-second intervals. After each interval, remove the bowl and stir the chocolate thoroughly, even if it doesn’t look fully melted. The residual heat will continue to melt the chips. Continue this process until the mixture is completely smooth and free of lumps. Alternatively, you can use a double boiler over simmering water for a more controlled melting process, stirring constantly until smooth.
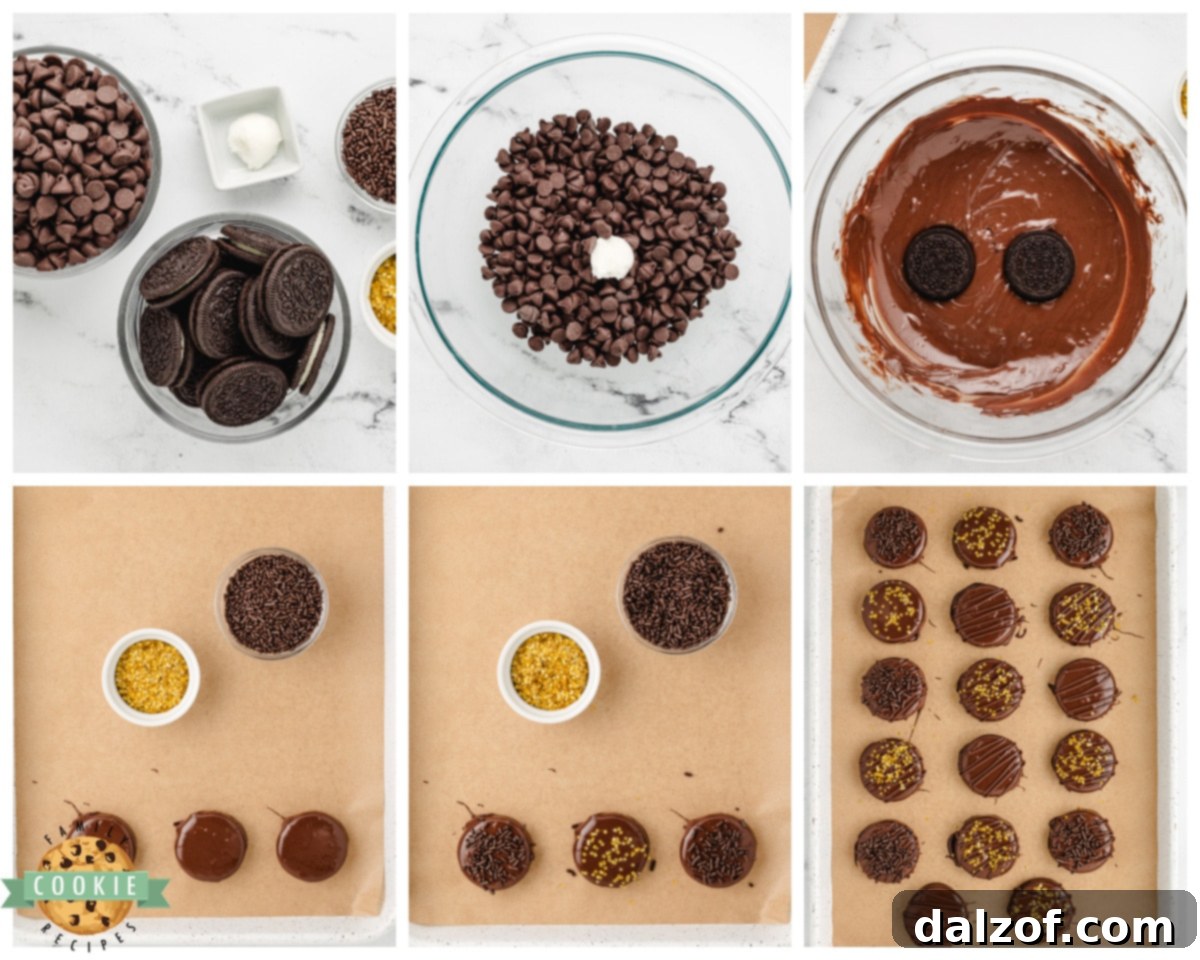
- Dip the Oreos: Carefully dip each Oreo cookie into the melted chocolate. You can use a fork, a slotted spoon, or even a specialized candy dipping tool (like a Wilton dipping tool) to fully submerge the cookie. Ensure the entire surface of the Oreo is generously coated.
- Remove Excess Chocolate: Gently tap the fork or dipping tool against the side of the bowl to allow any excess chocolate to drip off. This helps create a smooth, even coating and prevents pooling around the base of the cookie when it sets.
- Place on Prepared Sheet: Carefully transfer the chocolate-dipped Oreo onto the lined baking sheet.
- Decorate (Optional): If you plan to add sprinkles or other toppings, do so immediately while the chocolate is still wet. This ensures the decorations adhere properly. For an extra touch, melt an additional 2 tablespoons of chocolate chips in a small plastic baggie, snip a tiny corner, and drizzle decorative patterns over the dipped cookies.
- Allow to Set: Once all the Oreos are dipped and decorated, let them cool on the countertop at room temperature until the chocolate has completely set and hardened. Depending on the temperature and humidity of your kitchen, this can take anywhere from 30 minutes to a couple of hours. For quicker setting, you can place the baking sheet in the refrigerator for about 15-20 minutes, but be mindful not to leave them in too long as this can sometimes cause the chocolate to “sweat.”
Once set, your beautiful homemade chocolate dipped Oreos are ready to be enjoyed or packaged for gifting!

Chocolate Dipped Oreo Cookies
Print Recipe
Pin Recipe
Rate This Recipe
Course: Cookies, Dessert
Cuisine: American
Keyword: Chocolate Dipped Oreos, Chocolate Covered Oreos, Oreo Cookies
Prep Time: 20 minutes
Total Time: 20 minutes
Servings: 20 Oreos
Calories: 162 kcal
Author: Jessica & Nellie
Ingredients
- 20 Oreo cookies
- 2 cups semi-sweet chocolate chips
- 1 tsp shortening (e.g., vegetable shortening)
- Sprinkles (optional, for decoration)
Instructions
- Line a baking sheet with parchment paper or wax paper and set it aside.
- In a microwave-safe bowl, combine the chocolate chips and shortening. Heat the mixture in the microwave for 30 seconds at a time. After each interval, stir the chocolate thoroughly. Continue heating and stirring until the mixture is smooth and fully melted, typically taking 2-3 minutes total.
- Dip each Oreo into the melted chocolate, using a fork or a candy dipping tool to fully coat the cookie. Gently tap off any excess chocolate against the side of the bowl and place the dipped Oreo onto the prepared baking sheet.
- If desired, immediately add sprinkles or other decorations to the top of the chocolate-dipped Oreo while the chocolate is still wet. For an extra decorative touch, melt an additional 2 tablespoons of chocolate chips in a small baggie, snip a tiny corner, and drizzle patterns on the dipped cookies.
- Once all of the Oreos are dipped and decorated, allow the cookies to cool completely on the countertop at room temperature until the chocolate has fully set and hardened.
- Enjoy your freshly made chocolate dipped Oreos!
Notes
Store leftover chocolate dipped Oreos in an airtight container at room temperature for up to one week. This helps prevent them from becoming stale or losing their delicious crunch.
Freeze for Longer Storage: If you need to prepare your chocolate dipped Oreos further in advance, they can be frozen. Once they are completely cooled and the chocolate has set, arrange them in a single layer on a baking sheet and freeze for about an hour. After they are frozen solid, transfer them to an airtight container or a freezer-safe bag. They will keep well in the freezer for up to one month. Thaw in the refrigerator before serving for best results.
Nutrition (per serving)
Calories: 162 kcal | Carbohydrates: 18g | Protein: 2g | Fat: 9g | Saturated Fat: 5g | Polyunsaturated Fat: 1g | Monounsaturated Fat: 3g | Trans Fat: 0.1g | Cholesterol: 1mg | Sodium: 48mg | Potassium: 130mg | Fiber: 2g | Sugar: 11g | Vitamin A: 9IU | Calcium: 14mg | Iron: 3mg
Tried this recipe?
Mention @familycookierecipes or tag #familycookierecipes!
Tips for Making Perfect Chocolate Dipped Oreos
Achieving perfectly coated, shiny, and delicious chocolate dipped Oreos is easy with a few expert tips. From melting your chocolate flawlessly to creative decorating, these pointers will help you master the art of this simple dessert.
Melting & Tempering Chocolate for a Flawless Finish
The key to beautiful chocolate dipped Oreos lies in properly melting and, if desired, tempering your chocolate. Tempering helps the chocolate set with a crisp snap, a beautiful shine, and prevents bloom (white streaks or spots).
- Choose Quality Chocolate: Always start with high-quality chocolate chips, bars, or candy melts. Better chocolate equals better flavor and a smoother melt.
- Use a Double Boiler or Microwave Carefully:
- Double Boiler Method: Place your chocolate and shortening in a heatproof bowl set over a saucepan of simmering water (ensure the bowl doesn’t touch the water). Stir gently and frequently until the chocolate is smooth and fully melted. This method offers excellent control and prevents burning.
- Microwave Method: As outlined in the recipe, heat chocolate and shortening in 30-second intervals, stirring thoroughly after each. This prevents overheating and ensures even melting.
- Add Shortening for Smoothness: A teaspoon of shortening (like Crisco) or a touch of coconut oil can significantly improve the consistency of your melted chocolate, making it thinner and easier to dip, and contributing to a glossy finish.
- Consider Tempering for Professional Results (Optional but Recommended): Tempering chocolate involves heating and cooling it to specific temperatures to stabilize the cocoa butter crystals. This results in a crisp, shiny, and snap-able chocolate coating that resists melting at room temperature.
- Dark Chocolate: Melt to 115-120°F (46-49°C), then cool to 88-90°F (31-32°C).
- Milk Chocolate: Melt to 110-115°F (43-46°C), then cool to 86-88°F (30-31°C).
- White Chocolate: Melt to 105-110°F (40-43°C), then cool to 82-84°F (28-29°C).
Use a candy thermometer for accuracy. If you don’t want to fully temper, simply ensuring the chocolate isn’t too hot (around 90°F / 32°C) when dipping will help with setting and shine.
- Maintain Chocolate Temperature: If your chocolate starts to thicken or harden while dipping, gently reheat it over low heat or in short microwave bursts (5-10 seconds) until it regains its desired consistency.
Creative Decorating Ideas
Once your Oreos are dipped, the fun of decorating begins! Here are some ideas to make your chocolate covered Oreos visually stunning and uniquely delicious:
- Classic Sprinkles: The simplest and most popular choice. Use rainbow sprinkles for a festive look, or theme colors for holidays (e.g., red and green for Christmas, pastels for Easter). Add them immediately after dipping while the chocolate is still wet.
- Contrasting Drizzles: After the main chocolate coating has set, melt a different color or type of chocolate (e.g., white chocolate drizzle on dark chocolate Oreos) and use a fork or a piping bag with a tiny snip to create decorative zigzags or patterns.
- Crushed Toppings: Sprinkle crushed nuts (pecans, almonds, pistachios), shredded coconut, crushed candy canes (peppermint Oreos!), crushed pretzels (for a sweet and salty crunch), or even other crushed cookies.
- Edible Glitter or Lustre Dust: For a touch of elegance, lightly brush or sprinkle edible glitter or lustre dust on partially set or fully set chocolate. Gold or silver dust can make them look incredibly sophisticated.
- Swirled Patterns: Dip the Oreo in one color of chocolate, then immediately drizzle a contrasting color over it and use a toothpick to gently swirl the two chocolates together before it sets.
- Half-Dipped: For a simpler yet still elegant look, dip only half of the Oreo in chocolate, leaving the other half exposed. This offers a nice contrast.
- Thematic Designs: Use small cookie cutters (miniature stars, hearts) or stencils to create shapes on the wet chocolate using sprinkles or finely chopped nuts.
Remember to let the chocolate harden completely before serving, packaging, or stacking your beautifully decorated chocolate dipped Oreos. Enjoy the process of creating these delightful treats!

Variations of Chocolate Dipped Oreos: Endless Possibilities
One of the most exciting aspects of making chocolate dipped Oreos is their incredible versatility. You can endlessly customize them to suit any taste, theme, or occasion by experimenting with different Oreo flavors and types of chocolate. This adaptability makes them a fantastic choice for both everyday treats and special events.
Change ’em up with Different Flavors of Oreos
While the classic original Oreo cookie provides a timeless base for chocolate dipping, exploring other Oreo flavors can introduce exciting new dimensions to your treats. Each flavor brings its own unique character, allowing for truly creative combinations with various chocolate coatings.
Some popular Oreo flavors that pair exceptionally well with chocolate include:
- Golden Oreos: These vanilla-flavored cookies offer a delightful contrast to chocolate, especially dark or milk chocolate, creating a “cookies and cream” like experience with a twist.
- Mint Oreos: Dipping mint Oreos in dark chocolate creates a sophisticated and refreshing flavor profile, reminiscent of classic mint chocolate desserts.
- Peanut Butter Oreos: The nutty, creamy filling of peanut butter Oreos is a natural match for milk or dark chocolate, appealing to fans of the classic peanut butter and chocolate pairing.
- Red Velvet Oreos: These colorful cookies, often with a cream cheese flavored filling, can be beautifully coated in white chocolate for a vibrant, elegant treat.
- Birthday Cake Oreos: With their celebratory sprinkles in the cream, dipping Birthday Cake Oreos in white chocolate or milk chocolate creates an even more festive and fun dessert.
- Seasonal & Limited Edition Oreos: Keep an eye out for seasonal or limited-edition Oreo flavors! Pumpkin Spice Oreos in white chocolate for fall, or Peppermint Bark Oreos dipped in dark chocolate for winter, can create highly thematic and sought-after treats.
Experimenting with these different Oreo varieties is a fantastic way to keep your chocolate dipped Oreos fresh and exciting, always offering something new for your guests or family.
Different Types of Chocolate for Dipping
Beyond the Oreo itself, the type of chocolate you choose for dipping plays a crucial role in the final taste and appearance of your chocolate covered Oreos. Each variety offers a distinct flavor profile and visual appeal, allowing for a wide range of creative outcomes.
Consider these popular types of chocolate for dipping your Oreos:
- Dark Chocolate: For those who appreciate a richer, less sweet experience, dark chocolate (50-70% cocoa) provides a deep, intense flavor that beautifully balances the sweetness of the Oreo cookie. It offers a sophisticated touch.
- Milk Chocolate: A classic crowd-pleaser, milk chocolate is creamy, sweet, and comforting. It’s a perfect choice for a traditional chocolate dipped Oreo, appealing to most palates.
- White Chocolate: Offering a sweet, milky, and vanilla-like flavor, white chocolate provides a lovely contrast, both in taste and color, especially when paired with original or dark-flavored Oreos. It also serves as an excellent base for adding food coloring to create vibrant custom colors.
- Candy Melts: Available in a rainbow of colors and various flavors (like vanilla, chocolate, or even strawberry), candy melts are an excellent option for highly customized, thematic treats. They are easy to melt and set quickly, often without needing tempering, making them ideal for beginners or intricate designs.
- Flavored Chocolate: Some brands offer chocolate chips or bars with pre-infused flavors, such as raspberry, orange, or even chili. These can add an unexpected and delightful twist to your chocolate dipped Oreos.
By experimenting with different types of chocolate, you can craft chocolate dipped Oreos that are not only delicious but also visually stunning, perfectly tailored for any event or personal craving. The possibilities are truly endless, limited only by your imagination!
Can You Make Chocolate Dipped Oreos Ahead of Time?
Planning for a party, preparing gifts, or simply wanting to get a head start on your sweet cravings? You’ll be glad to know that chocolate dipped Oreos are an excellent treat to make in advance. Their robust structure and chocolate coating make them quite forgiving, allowing you to prepare them days or even weeks before they’re needed. This saves valuable time and reduces stress when you’re hosting or busy.
Store in an Airtight Container
Once your chocolate dipped Oreos have fully cooled and the chocolate has completely set, proper storage is key to maintaining their freshness and crunch. Place them in a single layer in an airtight container. If you need to stack them, separate layers with parchment paper to prevent sticking and preserve decorations. Store the container at room temperature, away from direct sunlight and heat. When stored correctly, homemade chocolate dipped Oreos can maintain their quality for up to one week, though they are often best enjoyed within the first few days.
Freeze for Longer Storage
For extended storage, freezing is an excellent option, allowing you to enjoy your chocolate covered Oreos for much longer. This is particularly useful if you’re making a large batch or preparing for an event far in advance.
- Initial Freeze: Ensure the chocolate on your dipped Oreos is completely hardened and dry. Place them in a single layer on a baking sheet lined with parchment paper. Freeze them for approximately one hour, or until they are solid. This prevents them from sticking together when transferred to a larger container.
- Transfer to Airtight Container: Once frozen, carefully transfer the individual chocolate dipped Oreos into an airtight freezer-safe container or a heavy-duty freezer bag. Again, if stacking, place parchment paper between layers.
- Label and Store: Label the container with the date. Chocolate dipped Oreos can be safely stored in the freezer for up to one month without significant loss of quality. Beyond that, while still safe to eat, their texture and flavor might start to diminish slightly.
- Thawing: When you’re ready to enjoy them, remove the desired number of frozen Oreos from the freezer and let them thaw in the refrigerator for a few hours. Alternatively, you can let them come to room temperature on the countertop, which usually takes about 30-60 minutes. Thawing slowly helps prevent condensation from forming on the chocolate, which can make it sticky or “sweat.”
Avoid Refrigeration (for extended periods)
While a brief stint in the refrigerator (15-20 minutes) can help accelerate the setting of the chocolate, it’s generally best to avoid long-term refrigeration for chocolate dipped Oreos. The moisture in the fridge can cause the chocolate to “sweat” (develop condensation), which can lead to a dull, sticky coating and potentially soften the Oreo cookie itself. For best results, stick to room temperature or freezing for storage.
By following these simple storage guidelines, you can confidently prepare your chocolate dipped Oreos ahead of time, ensuring they remain fresh, crisp, and delicious whenever you’re ready to enjoy them.

Frequently Asked Questions About Chocolate Dipped Oreos
Here are answers to some of the most common questions people have when making and storing chocolate dipped Oreos.
How long do chocolate dipped Oreos stay fresh?
When stored properly in an airtight container at room temperature, chocolate dipped Oreos can remain fresh for up to two weeks. However, for the best taste and texture, it is recommended to consume them within the first week.
Can you freeze chocolate dipped Oreos?
Yes, absolutely! Chocolate dipped Oreos freeze beautifully. Once the chocolate coating is completely set, place them in a single layer on a baking sheet and freeze for about an hour. Then, transfer them to an airtight freezer-safe container or bag, separating layers with parchment paper. They can be stored in the freezer for up to three months. To enjoy, simply thaw them at room temperature for a few hours or in the refrigerator overnight.
What types of chocolate work best for dipping?
You have many options! Semi-sweet chocolate chips are a popular and balanced choice. Milk chocolate offers a sweeter, creamier coating, while dark chocolate provides a richer, more intense flavor. White chocolate and colorful candy melts are excellent for creative and thematic decorations. For the best results, use high-quality chocolate that melts smoothly.
What’s the best way to get a smooth, shiny chocolate coating?
Using a small amount of shortening (about 1 teaspoon per 2 cups of chocolate chips) helps the chocolate melt smoothly and gives it a nice sheen. Melting the chocolate slowly and gently, either in a microwave in 30-second intervals (stirring well each time) or over a double boiler, prevents it from burning or seizing. For a truly professional, shiny finish and a crisp snap, consider tempering your chocolate, though it’s not strictly necessary for delicious homemade treats.
Can I use different Oreo flavors?
Yes, and it’s highly encouraged! Experimenting with various Oreo flavors like Golden Oreos, Mint Oreos, Peanut Butter Oreos, or seasonal editions can create unique and exciting taste combinations. This is a fantastic way to customize your chocolate dipped Oreos.
How can I prevent the chocolate from seizing (becoming thick and grainy)?
Seizing usually occurs when chocolate comes into contact with even a tiny amount of water or is overheated. To prevent this, ensure all your bowls and utensils are completely dry. If using a double boiler, make sure the water is simmering gently and does not touch the bottom of the chocolate bowl. If using a microwave, heat in short bursts and stir frequently to avoid overheating.

More Cookies Made with OREOs:
- EASY HOMEMADE OREO COOKIES
- OREO STUFFED BROWNIE COOKIES
- OREO PEANUT BUTTER COOKIES
- BACON WRAPPED OREOS
- FROSTED OREO PIZZA
- OREO STUFFED COOKIES
Give Them a Try!
Chocolate dipped Oreos are truly a delicious, easy-to-make treat that offers universal appeal. Whether you’re a devoted chocolate aficionado, an ardent Oreo enthusiast, or simply searching for a quick yet decadent dessert, these treats are guaranteed to satisfy your sweet tooth and impress your guests. Their simplicity makes them accessible to home bakers of all skill levels, while their inherent customizability ensures they can be tailored to any taste or occasion.
One of the most appealing aspects of chocolate covered Oreos is their remarkable versatility. You have complete freedom to choose any type of chocolate, from the rich intensity of dark chocolate to the creamy sweetness of milk chocolate, or even the subtle vanilla notes of white chocolate. This choice alone dramatically alters the character of the finished treat. Beyond the chocolate, the possibilities for toppings are endless. Imagine vibrant sprinkles for a festive pop, crunchy crushed nuts for added texture, a delicate sprinkle of sea salt to enhance the chocolate’s depth, or playful candy pieces for an extra layer of sweetness and visual interest.
The process of making chocolate dipped Oreos is incredibly straightforward. All you truly need are a package of your favorite Oreo cookies, some quality melting chocolate, and a few basic kitchen tools like a microwave-safe bowl and parchment paper. You can also get creative with the dipping process itself, experimenting with techniques like drizzling contrasting chocolate designs or swirling colors for an artistic touch, making each cookie a unique masterpiece. This hands-on activity is not only enjoyable but also yields a homemade dessert that feels special and personalized.
Ultimately, chocolate dipped Oreos are more than just a snack; they’re a fun, delicious, and adaptable confection perfect for sharing. Whether you’re preparing them for a bustling party, crafting them as heartfelt homemade gifts, celebrating a special occasion, or simply whipping up a quick snack for yourself, they are sure to be a resounding success. So, why wait? Gather your ingredients, unleash your creativity, and embark on the delightful journey of making your own irresistible chocolate dipped Oreos. Give them a try and discover firsthand just how tasty and rewarding they can be!