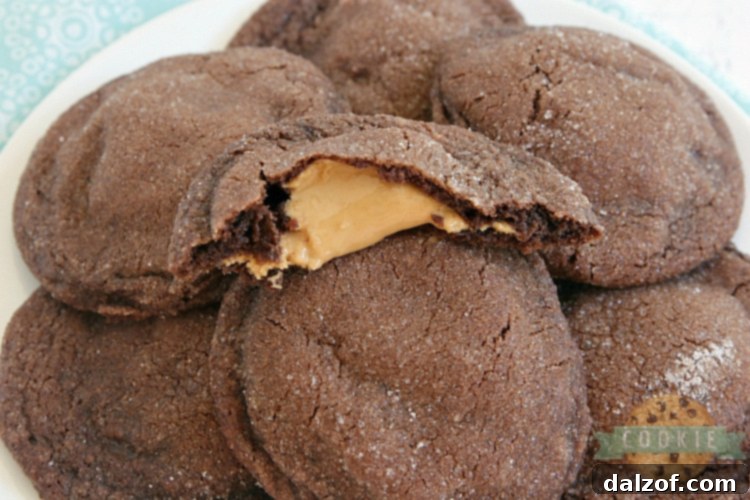
Welcome to a truly irresistible treat that combines two of the world’s most beloved flavors: chocolate and peanut butter. These aren’t just any cookies; these are Buckeye Cookies – a delightful fusion of a soft, rich chocolate cookie shell enveloping a lusciously gooey, creamy peanut butter center. Inspired by the classic Buckeye Balls, these cookies bring that iconic flavor combination into an easy-to-make, supremely satisfying cookie form. Get ready to experience a unique dessert that’s not only simple to prepare but also promises an explosion of flavor with every single bite.
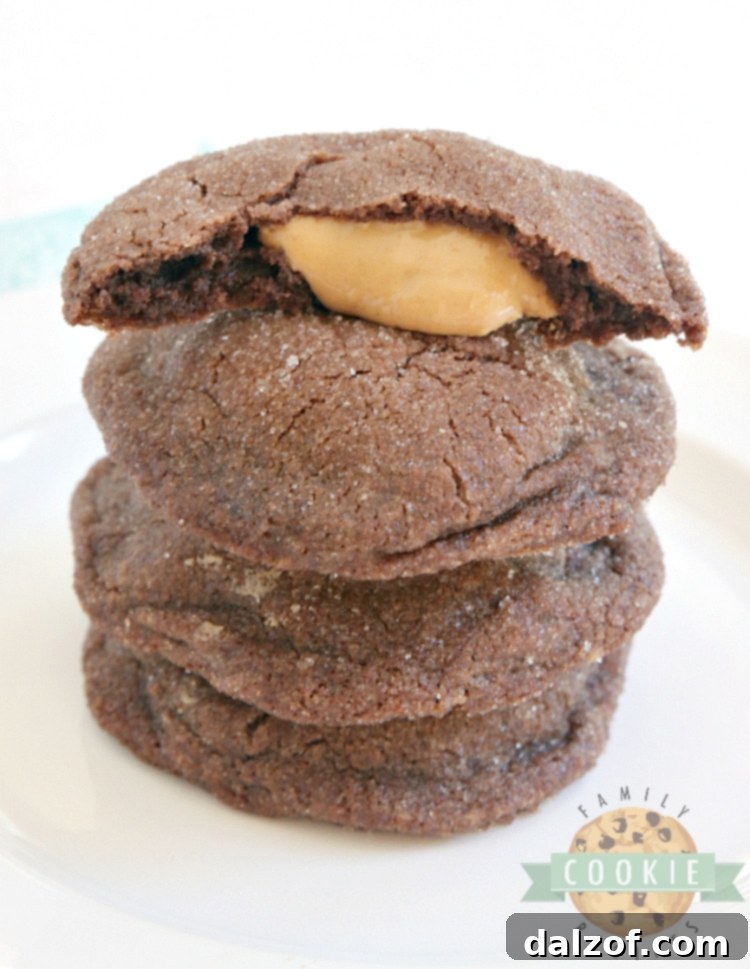
For those unfamiliar, Buckeye Balls are a traditional confection named after the buckeye nut, famously featuring a peanut butter fudge ball partially dipped in chocolate. This cookie recipe captures that same essence, allowing you to enjoy the beloved peanut butter and chocolate pairing in a warm, freshly baked cookie. Imagine biting into a tender chocolate cookie, only to discover a warm, melt-in-your-mouth peanut butter filling. It’s an experience that’s truly out of this world, and surprisingly, incredibly easy to achieve. If you’ve never had such a delightful surprise in the middle of a cookie, prepare to be amazed – it’s a revelation!
Why Buckeye Cookies Are an Absolute Must-Try
Buckeye Cookies offer a unique twist on traditional cookie recipes, standing out with their distinct flavor and texture profile. Here’s why this recipe deserves a spot in your baking rotation:
- Unforgettable Flavor Combination: The classic pairing of rich chocolate and creamy peanut butter is a match made in heaven. These cookies perfectly balance the sweetness of chocolate with the savory notes of peanut butter, creating a harmonious and utterly addictive taste.
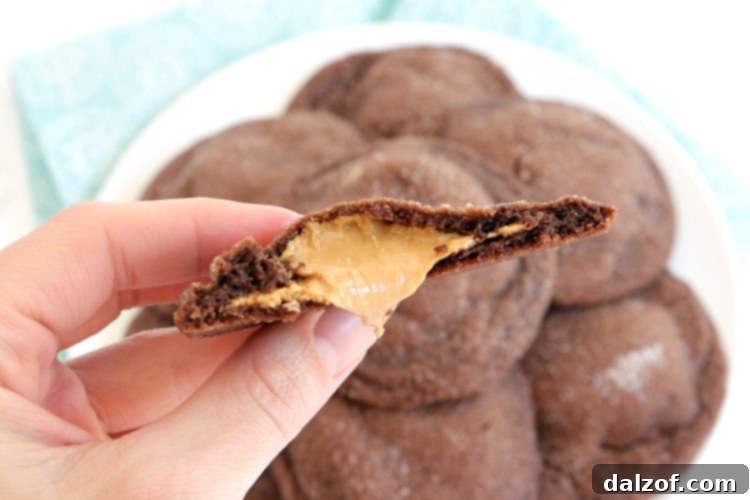
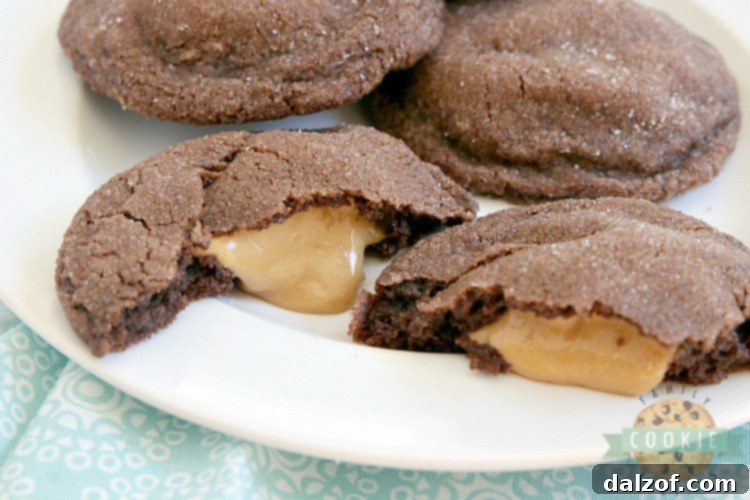
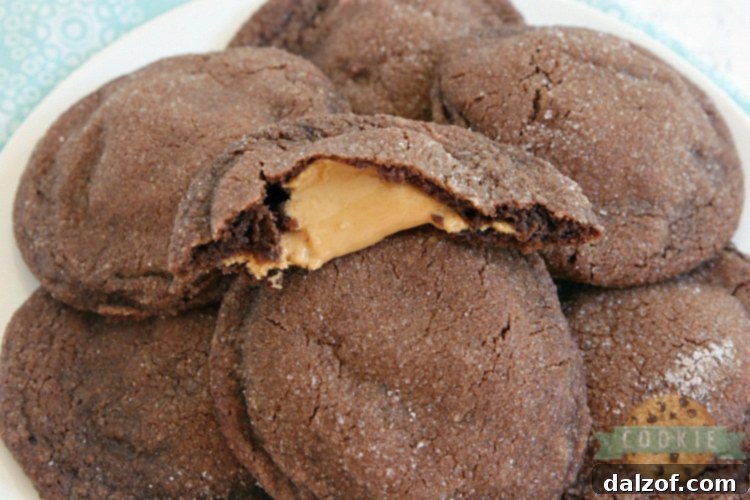
- Irresistible Texture: You get the best of both worlds – a soft, chewy chocolate cookie exterior and a wonderfully gooey peanut butter filling that remains soft even after cooling. This contrast in textures adds to the cookies’ appeal, making each bite a delightful experience.
- Surprisingly Simple to Make: Despite their impressive appearance and gourmet taste, Buckeye Cookies are incredibly easy to prepare. With straightforward steps and common pantry ingredients, even novice bakers can achieve spectacular results.
- A Crowd-Pleasing Treat: Whether you’re baking for a family gathering, a party, or simply a cozy night in, these cookies are guaranteed to be a hit. Their unique design and familiar flavors appeal to almost everyone, making them perfect for any occasion.
- Versatile and Fun: The process of encasing the peanut butter filling in the chocolate dough is a fun and interactive baking step. It’s a great recipe to involve kids in the kitchen, turning baking into a memorable activity.
Ingredients for Your Buckeye Cookie Masterpiece
Crafting these delectable Buckeye Cookies requires two main components: the luscious peanut butter filling and the rich chocolate cookie dough. Gather these simple ingredients, and you’ll be well on your way to baking bliss.
Peanut Butter Filling
- 1 1/4 cups creamy peanut butter: Opt for a smooth, creamy peanut butter for the best gooey texture. Avoid natural peanut butter that separates, as it can be too oily for the filling.
- 1/3 cup powdered sugar: This provides the necessary sweetness and helps bind the peanut butter, making it firm enough to handle but still deliciously soft.
Chocolate Cookie
- 3/4 cup butter, softened to room temperature: The butter’s temperature is crucial for the dough’s consistency. It should be soft enough to cream easily but not melted.
- 1/2 cup granulated sugar: Adds sweetness and contributes to the cookie’s texture.
- More granulated sugar for dipping: This creates a beautiful, sparkling coating and prevents sticking.
- 3/4 cup brown sugar: Packed brown sugar adds moisture and a rich, caramel-like flavor, contributing to the cookies’ chewiness.
- 1 egg: Acts as a binder, providing structure and moisture to the dough.
- 1 tsp vanilla extract: Enhances the overall flavor profile, adding a warm, aromatic note.
- 1 1/4 cups all-purpose flour: The foundational ingredient for the cookie structure.
- 3/4 cup unsweetened cocoa powder: Gives the cookies their deep chocolate flavor and color. Ensure it’s unsweetened for optimal taste balance.
- 3/4 tsp baking soda: The leavening agent that helps the cookies rise and spread slightly, contributing to their soft texture.
- 1/2 tsp salt: Balances the sweetness and enhances all the other flavors.
How to Make Buckeye Cookies: A Step-by-Step Guide
Follow these detailed instructions to create your own batch of these incredible chocolate and peanut butter delights. Precision and a little patience will ensure perfect results.
- Prepare Your Oven: Begin by preheating your oven to 350°F (175°C). This ensures the oven is at the correct temperature when your cookies are ready to bake, leading to consistent results.
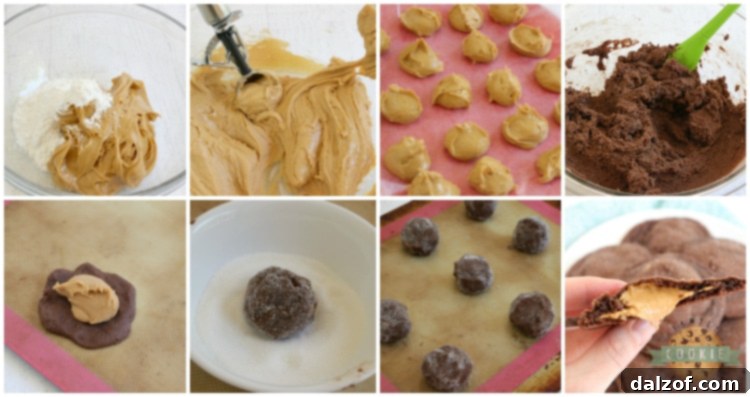
- Craft the Peanut Butter Filling: In a medium bowl, combine the creamy peanut butter and powdered sugar. Stir diligently until the mixture is smooth and well-combined. The consistency should be firm enough to roll into balls. Using a small cookie scoop (or about 1 tablespoon), scoop out portions of the filling onto a plate or baking sheet lined with wax paper or parchment paper. Aim for about 20-22 uniform balls. Place these peanut butter balls in the freezer for approximately 30 minutes. Freezing them makes them much easier to work with when encasing them in the cookie dough, preventing them from melting and becoming messy.
- Whip Up the Chocolate Cookie Dough: While your peanut butter balls are firming up in the freezer, start on the chocolate cookie dough. In a large mixing bowl, cream together the softened butter, granulated sugar, and brown sugar using an electric mixer. Beat for about 2-3 minutes until the mixture is light and fluffy. This creaming process incorporates air, which contributes to a tender cookie.
- Add Wet Ingredients: Next, beat in the egg and vanilla extract. Continue mixing for another 1-2 minutes until thoroughly combined and smooth.
- Incorporate Dry Ingredients: In a separate bowl, whisk together the flour, unsweetened cocoa powder, baking soda, and salt. Gradually add these dry ingredients to the wet mixture, mixing on low speed until just combined. Be careful not to overmix the dough; overmixing can lead to tough cookies. Stop once no streaks of flour are visible.
- Assemble Your Buckeye Cookies: Now for the fun part! Take a heaping tablespoonful of the chocolate cookie dough (a medium cookie scoop or an overfilled small scoop works well). Flatten this portion of dough between your palms to form a thin, pancake-like disc. Retrieve a frozen peanut butter ball from the freezer and place it directly in the center of the flattened chocolate dough. Carefully fold the edges of the chocolate cookie dough up and around the peanut butter ball, completely encasing it. Pinch the seams to seal it securely. If the cookie doesn’t look perfectly round, gently roll it between your palms to form a smooth ball. Pro Tip: To keep the process clean and efficient, it’s best to work quickly. Keep at least half of your peanut butter balls in the freezer at all times, only taking them out as you need them. If the peanut butter starts to thaw too much, it becomes significantly stickier and harder to work with, potentially making assembly messy.
- Sugar Coating (Optional but Recommended): Pour some granulated sugar into a shallow bowl. Gently roll each assembled cookie ball in the sugar until it’s coated on all sides. This sugar coating not only adds a beautiful sparkle and a delightful textural crunch but also helps prevent the cookies from sticking to the baking sheet.
- Bake to Perfection: Arrange the sugar-coated cookie balls on a prepared cookie sheet, ensuring they are spaced at least 2 inches apart. You can use well-greased cookie sheets, parchment paper, or silicone baking mats. Silicone baking mats are highly recommended as they prevent sticking entirely and promote even baking.
- Baking Time: Bake for approximately 10-12 minutes. For truly soft and chewy cookies, aim for the lower end of the baking time. The cookies might appear slightly underbaked in the center when you remove them, but they will continue to set on the hot baking sheet. If you prefer a slightly firmer cookie, you can extend the baking time by an additional minute or two. For chocolate cookies, it can be tricky to tell if they are done, but look for the edges to be slightly set and a bit darker.
- Cooling Process: Allow the cookies to cool on the baking sheets for about 10-15 minutes before carefully transferring them to a wire rack to cool completely. While these cookies are absolutely divine warm, the peanut butter filling retains its delightful gooeyness even after they’ve cooled entirely, and for several days after baking!
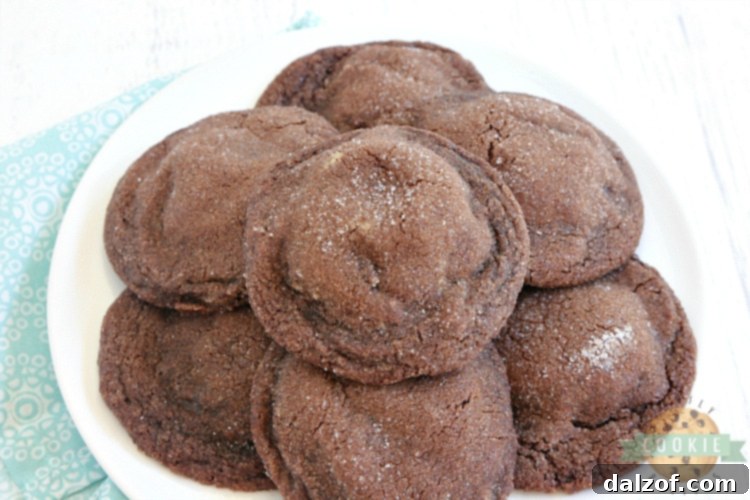

Buckeye Cookies
Buckeye Cookies are soft and chewy chocolate cookies with a gooey peanut butter filling in the middle. This chocolate and peanut butter cookie recipe is unique, but so easy to make!
Course: Cookies
Cuisine: American
Keyword: buckeye cookies, chocolate peanut butter cookies
Prep Time: 30 minutes
Cook Time: 12 minutes
Servings: 20 cookies
Author: Jessica & Nellie
Ingredients
Peanut Butter Filling
- 1 1/4 cups creamy peanut butter
- 1/3 cup powdered sugar
Chocolate Cookie
- 3/4 cup butter, softened to room temperature
- 1/2 cup sugar, plus more for dipping
- 3/4 cup brown sugar
- 1 egg
- 1 tsp vanilla extract
- 1 1/4 cups flour
- 3/4 cup unsweetened cocoa powder
- 3/4 tsp baking soda
- 1/2 tsp salt
Instructions
- Preheat the oven to 350°F (175°C).
- Make the peanut butter filling: Stir together the creamy peanut butter and powdered sugar until smooth and well-combined. Use a small cookie scoop to portion the filling onto a plate or cookie sheet lined with wax paper. You should be able to make about 20-22 balls. Place them in the freezer for about 30 minutes to firm up.
- Prepare the chocolate cookie dough: While the peanut butter balls are freezing, cream the softened butter and both sugars (granulated and brown) together with an electric mixer for about 2-3 minutes until light and fluffy. Add the egg and vanilla extract, mixing for another 1-2 minutes until smooth.
- Combine dry ingredients: In a separate bowl, whisk together the flour, cocoa powder, baking soda, and salt. Gradually add these dry ingredients to the wet mixture, mixing on low speed until just combined. Be careful not to overmix.
- Assemble the cookies: Scoop out a heaping tablespoonful of cookie dough and flatten it into a disc in your hand. Place a frozen peanut butter ball on top of the dough. Carefully fold the edges of the chocolate dough around the peanut butter ball until it’s completely covered. If needed, gently roll it between your palms to form a smooth ball. (Remember to work quickly and keep remaining peanut butter balls in the freezer to prevent thawing).
- Sugar coat: Place some granulated sugar in a shallow bowl and gently roll each cookie ball in the sugar until coated on all sides. This adds texture and prevents sticking.
- Bake: Place the cookie balls at least 2 inches apart on a prepared cookie sheet (greased, parchment-lined, or silicone mat).
- Bake for 10-12 minutes. For softer cookies, stick to the lower end of the baking time. The cookies will continue to set on the baking sheet.
- Cool: Let the cookies cool on the baking sheets for about 10-15 minutes before transferring them to a wire rack to cool completely. The peanut butter filling will remain gooey even after cooling.
Mastering the Art of Perfect Buckeye Cookies: Expert Tips
Achieving consistently perfect cookies is a skill that comes with practice, but these essential tips will help you bake like a pro every time. These pointers are designed to ensure your Buckeye Cookies are not just good, but absolutely phenomenal.
- The Critical Role of Softened Butter: This is arguably the most crucial step. Your butter should be softened to room temperature, which typically means leaving it out on the counter for 1-2 hours. It should be pliable enough to make a slight indentation when pressed, but not oily or melted. Never use melted butter for creaming, as it will drastically alter the cookie’s texture, making them flat and greasy. If you’re short on time, microwave the butter in 5-second bursts, carefully flipping it each time, and pulling it out just before it starts to liquefy. Some bakers find using the defrost setting on their microwave softens butter more evenly without melting it.
- Creaming Butter and Sugars Properly: Don’t rush this step! Creaming the butter and sugars together for a full 2-3 minutes with an electric mixer is vital. This process incorporates air into the mixture, which creates a lighter, fluffier dough and contributes to the cookies’ final texture – ensuring they are soft and chewy rather than dense.
- Preheating Your Oven is Non-Negotiable: Always preheat your oven for at least 15-20 minutes before baking. Placing cookies into a cold or even lukewarm oven can lead to uneven baking and cookies that spread too much or don’t cook through properly. A fully preheated oven ensures the cookies start baking immediately at the correct temperature, locking in their shape and moisture.
- Invest in a Cookie Scoop for Uniformity: For cookies that are consistently sized and perfectly shaped, a cookie scoop is your best friend. Uniformly sized cookies bake more evenly, preventing some from being overdone while others are underbaked. It also makes the assembly process much quicker and cleaner.
- The Magic of Parchment Paper or Silicone Mats: Line your baking sheets with parchment paper or a silicone baking mat. This simple step is a game-changer! It prevents cookies from sticking, ensures easy removal, and promotes even browning on the bottom. Plus, cleanup is a breeze!
- Resist the Urge to Overbake: This is especially true for chocolate cookies, where visual cues can be misleading. When you pull your Buckeye Cookies from the oven, they should still look slightly soft or even a tiny bit underbaked in the center. The edges should be set and perhaps a touch darker, but not crispy. They will continue to cook and set on the hot baking sheet for several minutes after removal, resulting in that coveted soft, gooey interior. Overbaking leads to dry, crumbly cookies.
- Don’t Overmix the Dry Ingredients: Once you add the flour and cocoa powder mixture, mix only until the dry ingredients are just incorporated. Overmixing develops the gluten in the flour, which can lead to tough, dense cookies.
- Chilling the Dough (Optional but Recommended): While this recipe is designed to be quick, a 30-minute chill of the chocolate cookie dough can further prevent spreading and enhance flavor. If you find your dough too sticky or the cookies spreading too much, a short chill can help.
- Proper Cooling: Allow cookies to cool on the baking sheet for the recommended time before transferring to a wire rack. This allows them to firm up slightly, preventing them from breaking when moved.
Creative Variations & Customizations
While the classic Buckeye Cookie is perfect as is, you can always get creative and customize them to your liking. Here are a few ideas to inspire your baking adventures:
- Nutty Additions: For an extra crunch, finely chop some peanuts and mix them into the peanut butter filling. Or, you could sprinkle some chopped nuts (like pecans or walnuts) into the chocolate cookie dough.
- Chocolate Drizzle: After the cookies have cooled, melt a bit of extra chocolate (milk, dark, or white) and drizzle it artistically over the tops for an elegant finish and an extra touch of chocolate.
- Sprinkle Fun: Before baking, press some festive sprinkles onto the sugar-coated cookie balls for a pop of color, especially great for holidays or celebrations.
- Espresso Boost: Add 1/2 teaspoon of espresso powder to the chocolate cookie dough. It won’t make the cookies taste like coffee, but it will deepen and intensify the chocolate flavor beautifully.
- Alternative Fillings: While it wouldn’t be a “Buckeye” cookie, you could experiment with other creamy fillings like Nutella, Biscoff spread, or even a soft caramel center for a different kind of surprise.
Serving Suggestions for Your Buckeye Cookies
These incredible cookies are a treat all on their own, but here are a few ways to enhance the experience:
- Classic Pairing: Serve them warm with a tall glass of cold milk. The combination is timeless and utterly comforting.
- Coffee Break Bliss: Enjoy a Buckeye Cookie alongside your morning coffee or afternoon tea. The rich flavors complement hot beverages perfectly.
- Dessert Platter: Arrange them on a dessert platter with other cookies or small treats for a beautiful and varied spread.
- Ice Cream Topper: Crumble a warm Buckeye Cookie over a scoop of vanilla ice cream for an indulgent and textural dessert.
Frequently Asked Questions About Buckeye Cookies
Have questions about making these delicious cookies? Here are some common queries and their answers to help you bake with confidence.
- Can I use crunchy peanut butter for the filling? While creamy peanut butter is recommended for the signature gooey texture, you can certainly use crunchy peanut butter if you prefer a little added texture in your filling. Just be aware it will change the smoothness.
- How do I store Buckeye Cookies? Store baked Buckeye Cookies in an airtight container at room temperature for up to 3-4 days. They can also be frozen for longer storage; place them in a freezer-safe bag or container for up to 2-3 months. Thaw at room temperature before serving.
- Can I make the dough ahead of time? Yes! You can prepare the chocolate cookie dough and store it in an airtight container in the refrigerator for up to 2-3 days. You can also form the cookie balls (with the peanut butter filling) and freeze them on a baking sheet. Once frozen solid, transfer them to a freezer bag and bake from frozen, adding a couple of extra minutes to the baking time.
- Why are my cookies spreading too much? This can happen for several reasons: your butter might have been too warm/melted, you might have too little flour, your oven temperature might be inconsistent, or your baking sheets might be too warm between batches. Ensure your butter is properly softened (not melted), measure flour accurately, and allow baking sheets to cool between batches. Chilling the dough briefly can also help.
- What if my peanut butter filling is too sticky? If the peanut butter filling becomes too soft and sticky during assembly, pop the plate of balls back into the freezer for another 10-15 minutes. It’s crucial they are firm when you enclose them in the dough.
If You Enjoyed These Buckeye Cookies, Here Are a Few More Peanut Butter Cookie Recipes You’ll Enjoy:
- Best Chocolate Chip Peanut Butter Cookies
- Peanut Butter Oatmeal Chocolate Chip Cookies
- Peanut Butter Chip Chocolate Cookies
- Easy Peanut Butter Cookies
- Fudge Peanut Butter Cookie Cups
- Reese’s Peanut Butter Cookies
- Best Monster Cookies
- Peanut Butter No Bake Cookies


Buckeye Cookies are the epitome of comfort food – soft, chewy chocolate cookies embracing a truly gooey peanut butter filling. This chocolate and peanut butter cookie recipe isn’t just unique; it’s a testament to how easy it can be to create something truly special in your kitchen.

Moving across the country, especially in the heat of summer, is always an adventure. A few weeks ago, we relocated from the mild climate of Washington to the vibrant, triple-digit warmth of Southern Utah. It’s been quite an adjustment, feeling like we’re either melting or frying under the constant sun! But everyone here assures us that if we just hang on for a couple of months, the weather transforms into something truly amazing. Until then, our days are filled with as much pool time as possible – it’s really the only way to beat this intense heat! Our little one, initially a bit hesitant, is quickly becoming quite the little fish, embracing the water and the new adventures that come with it.