
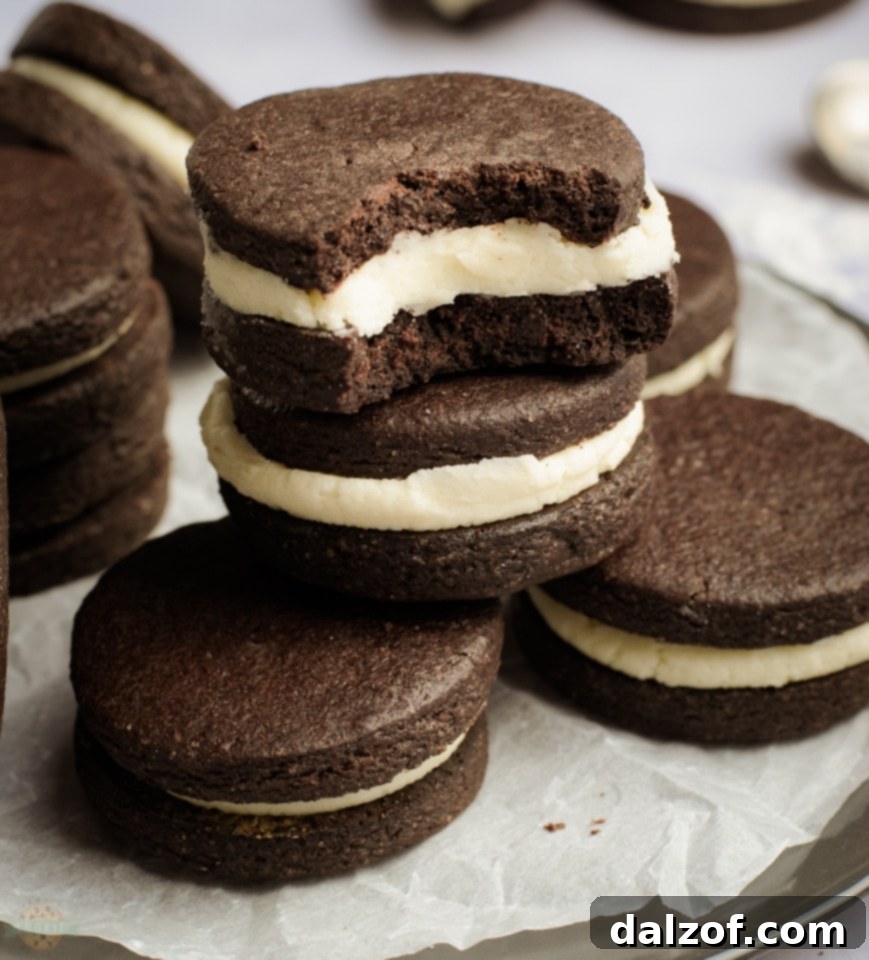
Homemade Oreo Cookies offer a delightful twist on a classic treat, inviting you to recreate the magic of those iconic chocolate sandwich cookies right in your own kitchen. This isn’t just a recipe; it’s an experience that promises richer chocolate wafers and a buttery, luscious vanilla cream filling that often surpasses the store-bought version. If you adore Oreos, prepare to fall in love all over again, because our Homemade Oreos are designed to deliver an unparalleled taste and texture.
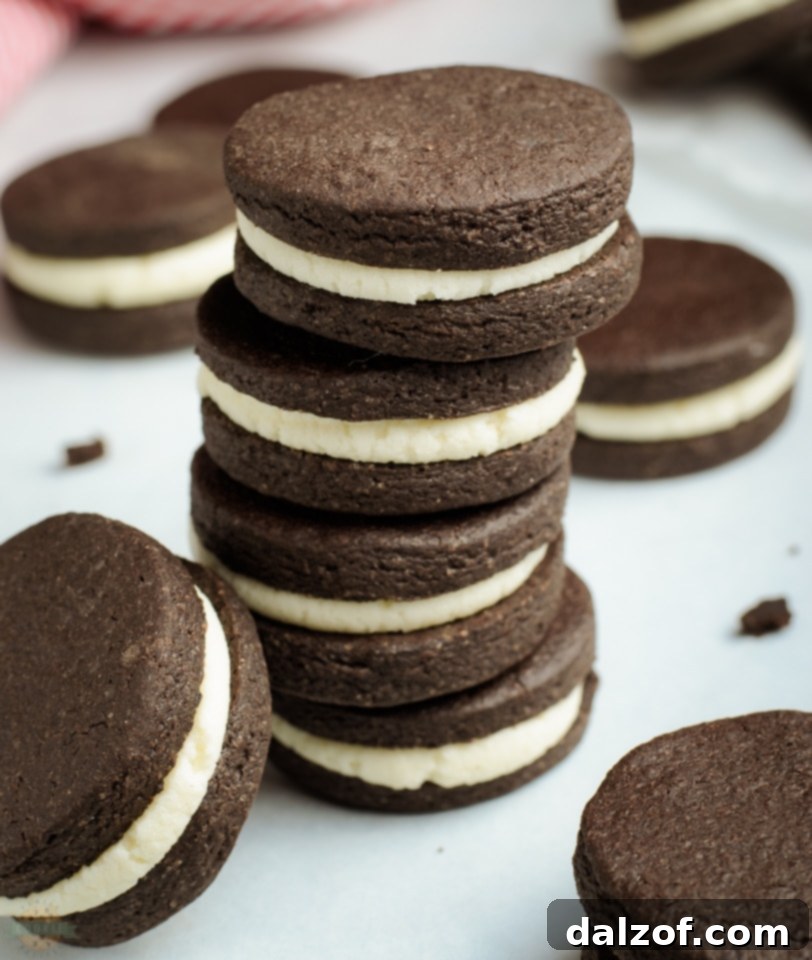
For generations, the beloved Oreo has held a special place in our hearts. Those distinctive dark chocolate cookies with their bright, sweet cream filling are an undisputed favorite. But what if you could elevate that experience, crafting your own version that’s fresher, more flavorful, and completely customizable? This homemade Oreo cookie recipe empowers you to do just that. It’s surprisingly easy, incredibly fun, and yields a truly delicious result. With each bite of these crispy chocolate sandwiches, filled with a smooth, vanilla-infused frosting, you’ll discover an incredible journey of flavor and texture that makes every moment a treat.
Imagine enjoying freshly baked, warm homemade Oreos within an hour of starting. These cookies don’t demand an extensive list of exotic ingredients or complex techniques. Instead, with a perfectly balanced homemade Oreo cream and perfectly crisp chocolate cookies, these treats are simply amazing. Once you experience the superior taste and quality of homemade, you might just find yourself reaching for your apron more often than that blue package, eager to whip up another batch of these irresistible goodies. It’s not just about baking; it’s about creating memories and savoring pure, unadulterated joy with every delicious bite.
 What Exactly Are Homemade Oreos?
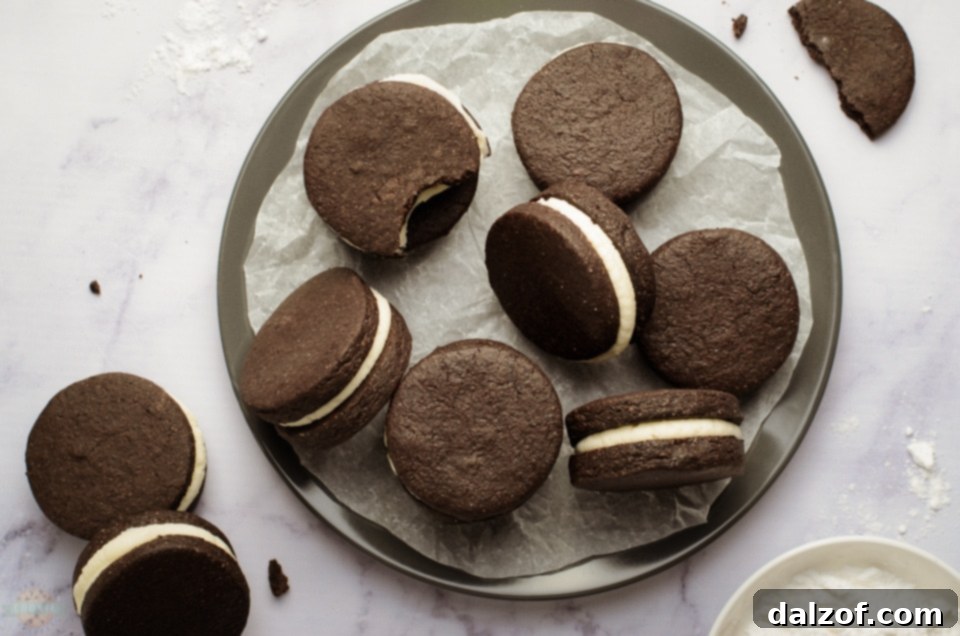 What Exactly Are Homemade Oreos?
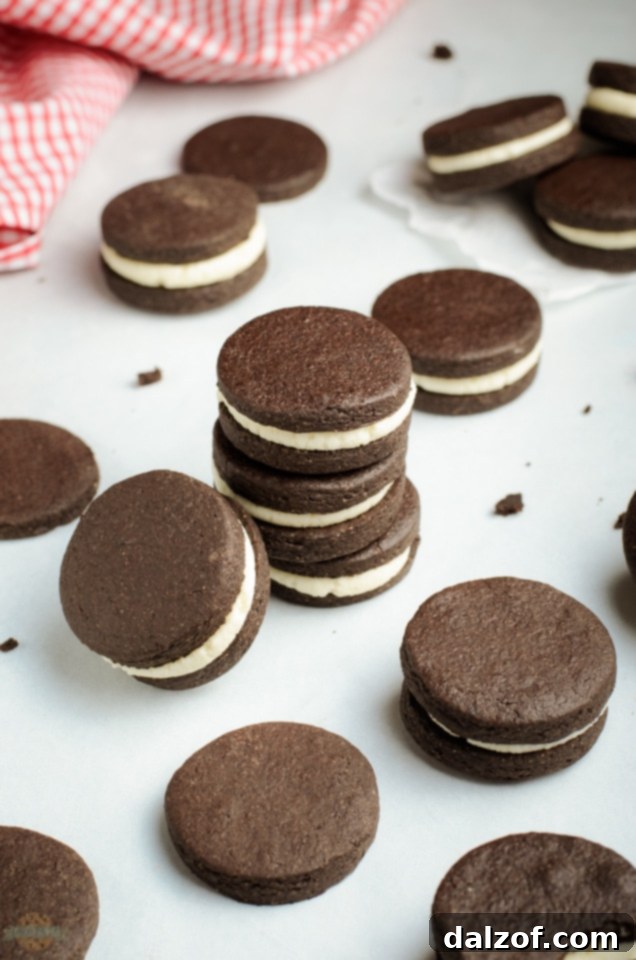
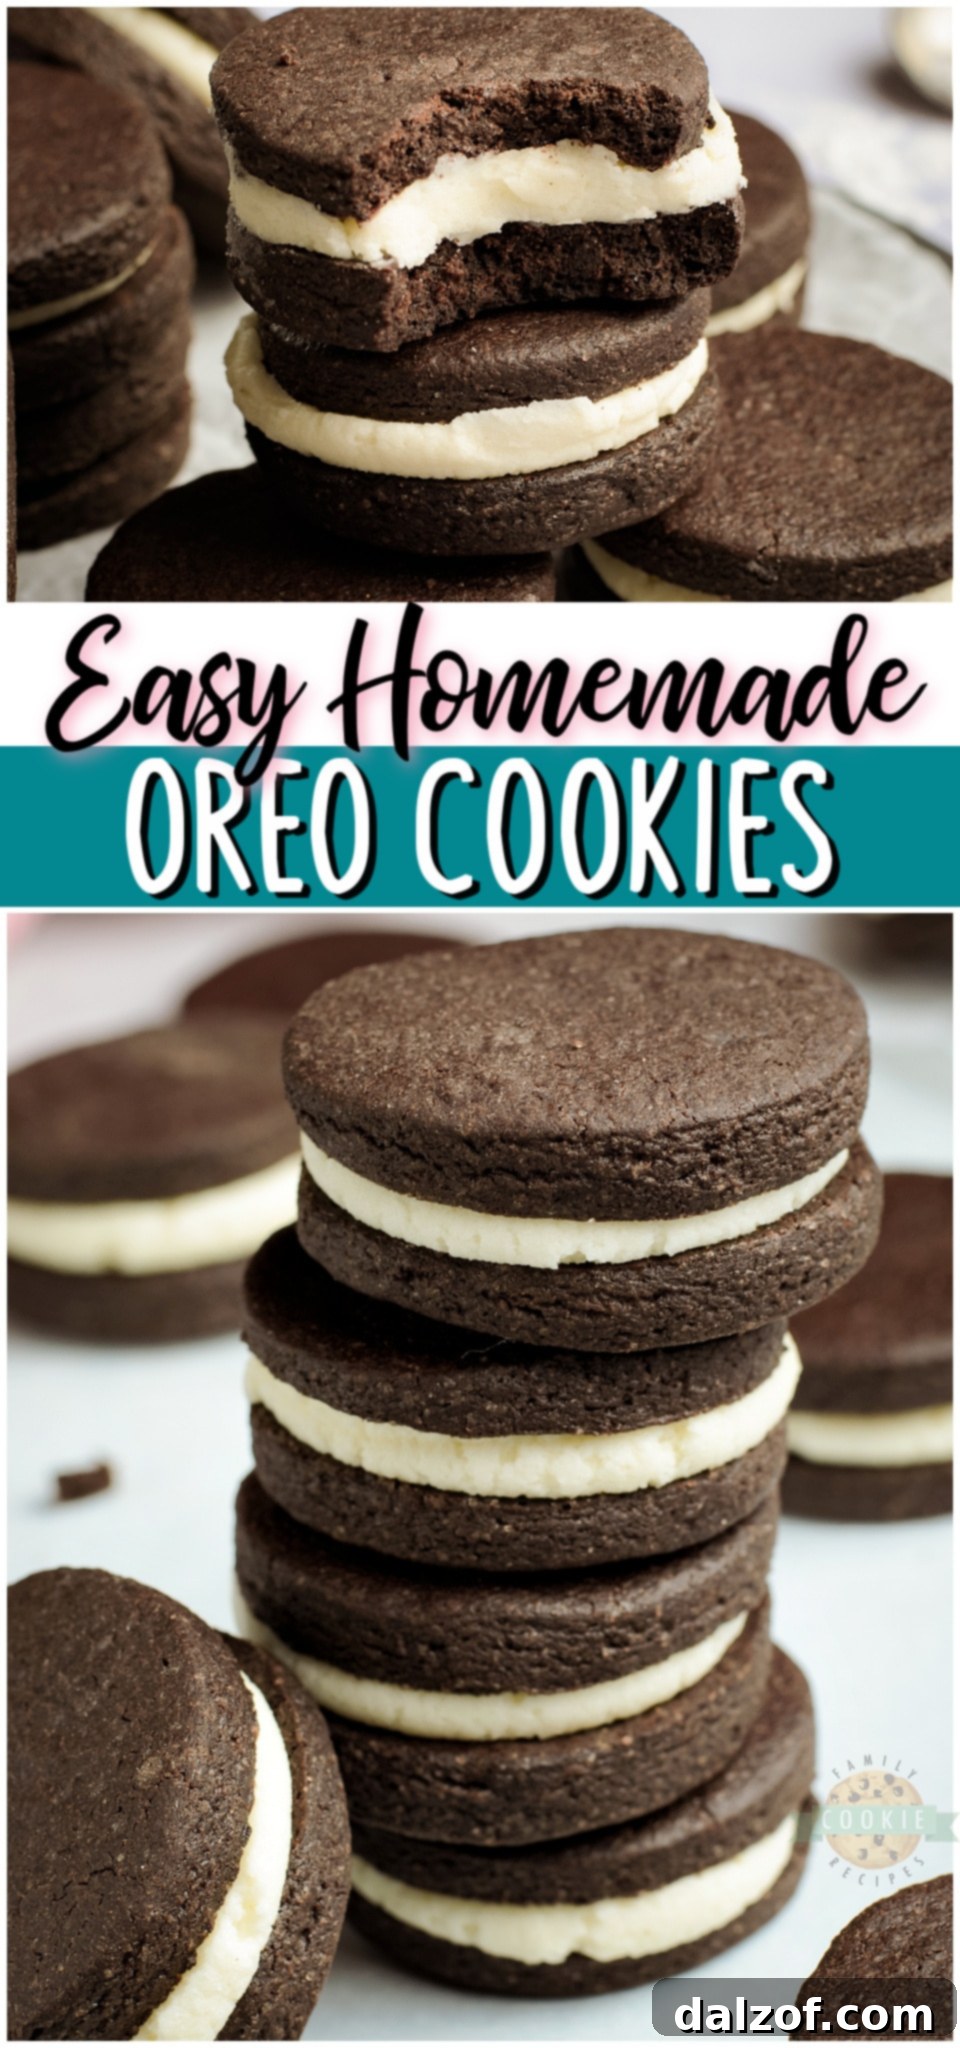
While some might compare them to whoopie pies due to their sandwich structure, homemade Oreos are meticulously crafted to emulate and enhance the iconic texture and flavor of an actual Oreo. These are not soft, cake-like treats, but rather crispy chocolate sandwich cookies encasing a rich, velvety vanilla-flavored cream filling. The magic lies in the contrast: the firm, slightly bitter cocoa wafers perfectly complementing the sweet, smooth interior. This recipe brings together a simple cookie dough and a luscious filling to create the ultimate cookies and cream experience, a treat you’ll undoubtedly enjoy baking and savoring for years to come. Our version aims for that distinct crunch and deep chocolate flavor, paired with a cream filling that’s truly decadent.
Why Embrace the Homemade Oreo Experience?
Beyond the simple satisfaction of baking, making your own Oreos offers several compelling advantages:
- Unrivaled Freshness: Nothing beats the taste of a cookie fresh from the oven, especially when it’s still slightly warm and the filling is perfectly smooth.
- Superior Flavor Profile: By choosing high-quality ingredients, you can achieve a deeper chocolate flavor in the wafers and a richer, more authentic vanilla taste in the cream.
- Ingredient Control: Avoid artificial flavors, preservatives, and high-fructose corn syrup often found in commercial cookies. You know exactly what goes into your treats.
- Customization Options: Feel free to experiment! Adjust the sweetness, add a hint of mint to the cream, or even dye the filling for special occasions.
- A Fun Family Activity: Baking Oreos from scratch is a fantastic way to spend quality time with loved ones, teaching kids about baking while creating delicious memories.
- The Joy of Accomplishment: There’s immense satisfaction in presenting a plate of these perfectly crafted cookies, knowing you made them yourself.
Essential Ingredients for Your Perfect Homemade Oreo Cookies
Crafting the perfect homemade Oreo starts with understanding the role of each ingredient. Quality matters, and the right components ensure that classic taste and delightful texture. Here’s what you’ll need for both the signature dark chocolate wafers and the dreamy vanilla cream filling:
For the Rich Chocolate Wafers, You Will Need:
- All-Purpose Flour: We need 1 ¾ cups of all-purpose flour to form the structural base of our crispy cookie dough. Proper measurement is key; spoon and level your flour for accuracy to avoid dense cookies.
- Unsalted Butter: ½ cup (one stick) of softened unsalted butter is crucial for a tender crumb and a richer flavor in the cookies. Ensure it’s truly softened, not melted, for optimal creaming with sugar.
- Granulated Sugar: 1 cup of granulated sugar contributes to the cookies’ sweetness and plays a vital role in achieving that desirable crisp texture as they bake. It also aids in the creaming process.
- Cocoa Powder: Using ½ cup of good quality cocoa powder is essential for achieving the iconic dark color and intense chocolate flavor that defines an Oreo wafer. For the truest Oreo experience, Dutch-processed cocoa powder is recommended as it provides a darker color and less acidic taste compared to natural cocoa.
- Egg: Just 1 large egg, at room temperature, acts as a binding agent, bringing the dough together and adding richness. To quickly bring an egg to room temperature, place it in a bowl of warm (not hot) water for a few minutes.
- Salt: A ½ teaspoon of salt is more than just a seasoning; it’s a flavor enhancer. It balances the sweetness of the sugar and deepens the chocolate notes, making all the other flavors shine and taste even better.
- Vanilla Extract: 1 teaspoon of vanilla extract complements the chocolate, adding depth and complexity to the cookies. High-quality vanilla can make a noticeable difference in the overall flavor.
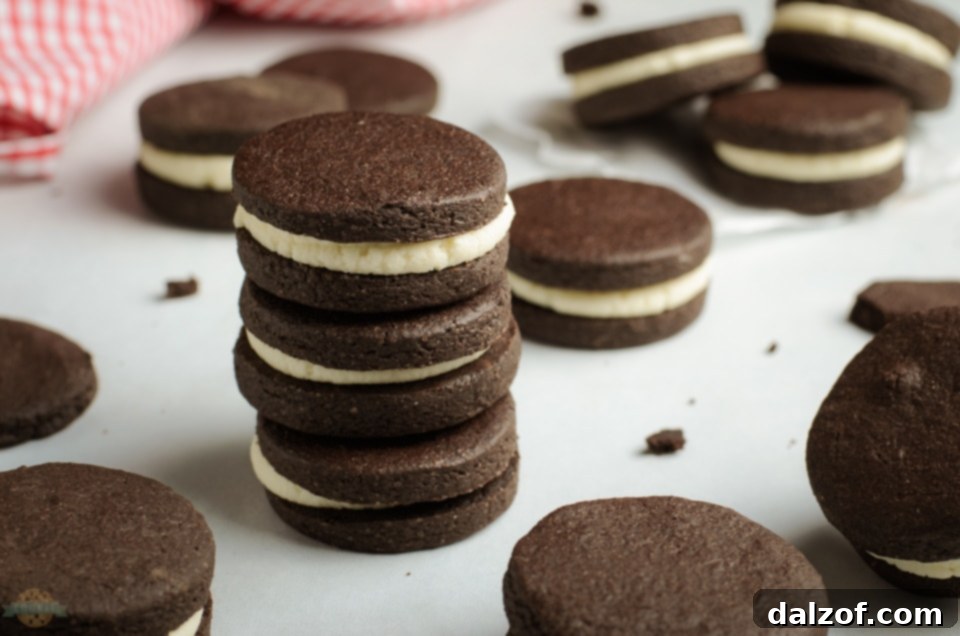 Cocoa Powder: Using ½ cup of good quality cocoa powder is essential for achieving the iconic dark color and intense chocolate flavor that defines an Oreo wafer. For the truest Oreo experience, Dutch-processed cocoa powder is recommended as it provides a darker color and less acidic taste compared to natural cocoa.
For the Dreamy Vanilla Cream Filling, You Will Need:
- Unsalted Butter: We need ¼ cup of unsalted butter, also at room temperature, to create a smooth, creamy texture and a rich, indulgent flavor for our filling.
- Powdered Sugar: 1 ½ cups of powdered sugar (confectioners’ sugar) is the base for our frosting, providing sweetness and that characteristic smooth, melt-in-your-mouth texture without grittiness.
- Vanilla Extract: ½ teaspoon of vanilla extract infuses our filling with a delightful flavor. Using a higher quality vanilla can significantly enhance the final taste, making the cream truly irresistible.
How to Make Homemade Oreos: Step-by-Step Instructions
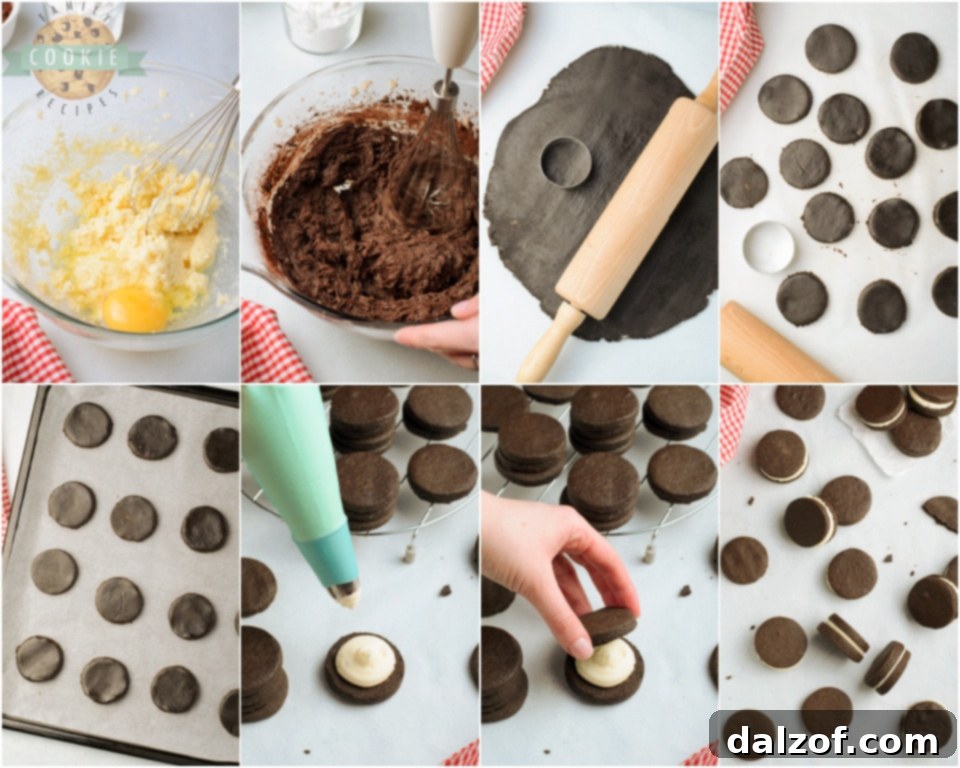 How to Make Homemade Oreos: Step-by-Step Instructions
Follow these detailed steps to create your own batch of irresistible homemade Oreo cookies. Precision and patience are your best friends here!
- Preheat Your Oven: Begin by preheating your oven to 375°F (190°C). Line a baking sheet with parchment paper to prevent sticking and ensure even baking.
- Cream Butter and Sugar: In a large mixing bowl, using an electric mixer, beat together the softened unsalted butter and granulated sugar until the mixture is light, fluffy, and pale in color. This process incorporates air, which contributes to the cookies’ texture.
- Incorporate Wet Ingredients: Mix in the salt, room temperature egg, and vanilla extract until well combined. Scrape down the sides of the bowl to ensure everything is evenly incorporated.
- Add Cocoa Powder: Sift the cocoa powder into the wet mixture. Mix on low speed until just combined, being careful not to overmix, as this can make the cookies tough. The dough will be dark and rich.
- Gradually Add Flour: Add the all-purpose flour a little at a time, mixing on low speed until just combined. The dough should come together but still be slightly crumbly.
- Gentle Kneading: Gather the dough from the bowl and gently knead it on a clean surface for about 10 seconds. This helps to bring the dough together without developing too much gluten, which could make the cookies hard.
- Chill the Dough (Optional but Recommended): For best results and to prevent spreading, wrap the dough in plastic wrap and chill in the refrigerator for at least 30 minutes. This step helps firm up the butter and makes the dough easier to handle.
- Roll and Cut Cookies: On a lightly floured surface or between two sheets of parchment paper, roll your dough out evenly until it’s approximately ¼ inch thick. Use a 2-inch round cookie cutter to cut out your shapes. Carefully transfer the cut cookies to the prepared baking sheet, leaving a little space between each.
- Bake to Perfection: Bake your cookies in the preheated oven for 9-12 minutes. Keep a close eye on them; it’s crucial not to overcook, as this will make them hard and diminish their rich flavor. The cookies should look set.
- Cool the Cookies: Allow the baked cookies to rest on the baking sheet for 5 minutes after removing them from the oven. This helps them firm up before transferring them to a wire rack to finish cooling completely. They need to be fully cool before frosting.
- Prepare the Frosting: While the cookies are cooling, prepare your filling. In a medium bowl, beat the ¼ cup of room temperature butter until it’s creamy and smooth. Gradually add the powdered sugar, mixing on low speed, then incorporate the ½ teaspoon of vanilla extract. Beat until the frosting is light, fluffy, and well distributed.
- Assemble Your Oreos: Once the cookies are completely cooled, you’re ready to assemble! Using a piping bag fitted with a round tip (or simply a small spoon), frost the bottoms of half of your chocolate cookies with a generous dollop of vanilla cream. Then, gently place another cookie on top, pressing down slightly to create a perfect Oreo sandwich.
- Enjoy Your Creation: Take a moment to admire your homemade masterpieces, then enjoy them with a glass of milk, coffee, or simply on their own. The satisfaction of a homemade treat is truly unmatched!
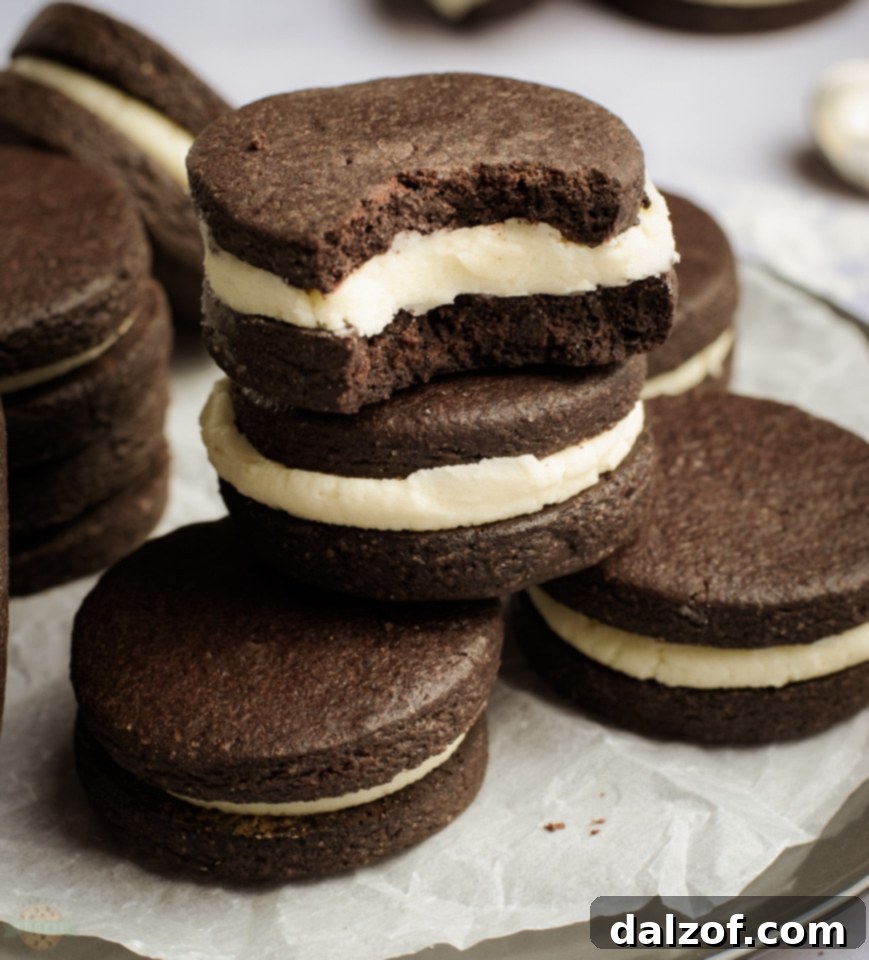
Homemade Oreos
★★★★★
Print
Pin
Rate
Ingredients
Cookies
- 1 3/4 cup all-purpose flour
- 1/2 cup unsalted butter softened
- 1 cup granulated sugar
- 1/2 cup cocoa powder
- 1 egg room temperature
- 1/2 teaspoon salt
- 1 teaspoon vanilla extract
Filling
- 1/4 cup unsalted butter room temperature
- 1 1/2 cup powdered sugar
- 1/2 teaspoon vanilla extract
Instructions
-
Preheat oven to 375°F. Line a baking sheet with parchment paper.
-
In a large bowl, beat the butter and sugar until light and fluffy. Mix in salt, egg, and vanilla.
-
Add the cocoa powder, mix to combine.
-
Add the flour, a little at a time. Gather the dough, and knead it gently for 10 seconds.
-
Roll the dough to a thickness of 1/4-inch. Use a 2-inch diameter round cutter to cut shapes, then place on the prepared baking sheets.
-
Bake the cookies for about 9-12 minutes. Do not overcook. Let cookies rest on the baking sheet for 5 minutes and then transfer to a wire rack to cool completely.
-
To make the frosting, mix the butter until creamy and smooth. Mix in powdered sugar and vanilla.
-
Using a piping bag or a spoon, frost the bottoms of half the cookies, then sandwich with another cookie.
Nutrition
Pro Tips for Baking the Best Homemade Oreos
To ensure your homemade Oreos are nothing short of spectacular, keep these expert tips in mind:
- Don’t Skip the Chill: Chilling the cookie dough is crucial. It prevents the cookies from spreading too much in the oven, helping them maintain their perfect round shape and crisp texture. A minimum of 30 minutes is recommended, but an hour is even better.
- Use Dutch-Processed Cocoa: For that authentic dark Oreo color and a smoother, less bitter chocolate flavor, opt for Dutch-processed cocoa powder. It makes a significant difference in both appearance and taste.
- Avoid Overmixing the Dough: Once you add the flour, mix only until just combined. Overmixing develops the gluten in the flour, which can lead to tough, chewy cookies instead of the desired crispness.
- Roll Dough to Even Thickness: Consistency is key for even baking. Use a rolling pin with guides or simply be mindful to roll your dough to a uniform ¼-inch thickness. This ensures all cookies bake at the same rate.
- Room Temperature Ingredients are a Must: For both the cookies and the filling, ensure your butter and egg are at room temperature. This allows them to emulsify properly, creating a smooth, cohesive dough and a creamy, lump-free filling.
- Quality Vanilla Makes a Difference: While any vanilla extract will work, a good quality vanilla can truly elevate the flavor of your cream filling. Pure vanilla extract offers a much richer and more complex aroma than imitation vanilla.
- Don’t Overbake: Oreo wafers are known for their crispness, not softness. Bake just until the edges are set and the centers still look slightly soft. They will firm up considerably as they cool.
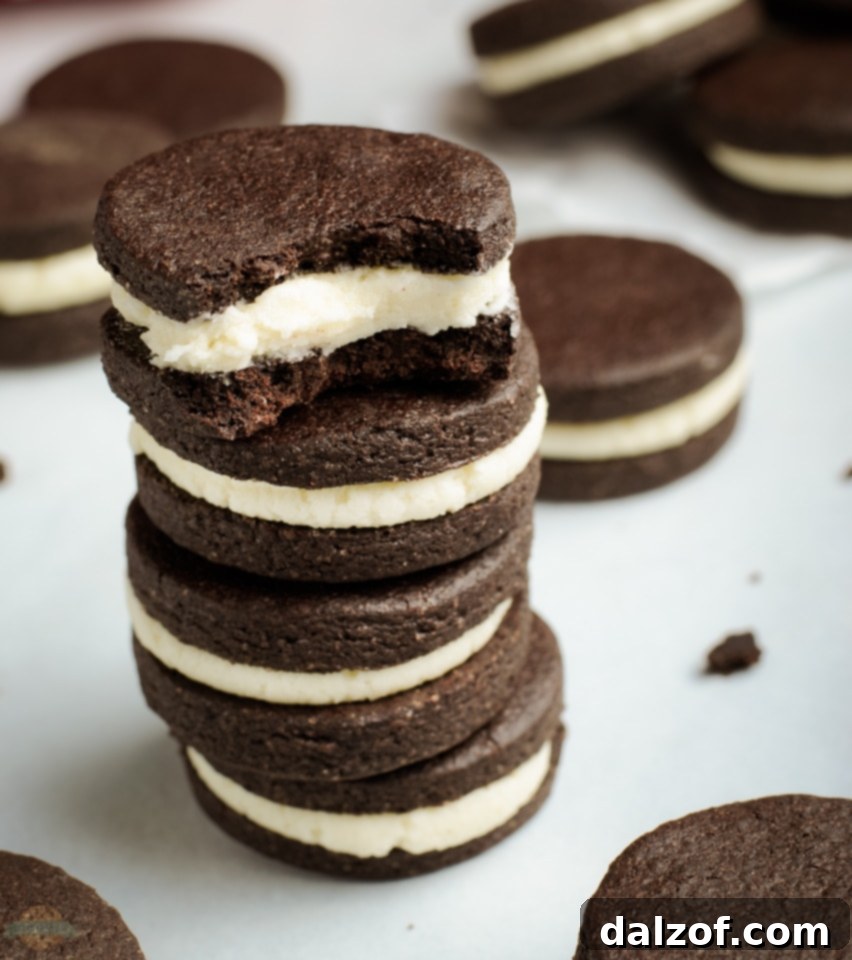
Serving and Storing Your Homemade Oreo Delights
Once you’ve assembled your homemade Oreos, the next step is to enjoy them! These cookies are delightful on their own, but here are some suggestions:
- Classic Pairing: Serve them with a tall glass of cold milk for the ultimate nostalgic experience. The contrast between the rich cookie and cool milk is simply perfect.
- Coffee or Tea Companion: They make a sophisticated partner for your morning coffee or afternoon tea.
- Dessert Component: Crumble them over ice cream, use them as a crust for cheesecakes, or incorporate them into milkshakes for an extra layer of flavor and texture.
How to Store Homemade Oreos
To maintain their freshness and ensure the filling remains luscious, proper storage is essential. Keep your homemade Oreo cookies well covered or stored in an airtight container. Place them in the refrigerator, and they will remain fresh and delicious for up to a week. The cool temperature helps maintain the firmness of both the chocolate wafers and the buttery vanilla cream filling, preventing them from becoming soft or soggy.
How Long Are Homemade Oreos Good For?
The longevity of your homemade Oreos depends on how you store them:
- In the Refrigerator: When stored in an airtight container in the fridge, these cookies will stay fresh and delicious for up to a week.
- In the Freezer: For longer storage, homemade Oreos freeze exceptionally well. They can last for up to 2 months in the freezer without losing their quality. To freeze them, arrange the assembled cookies in a single layer on a baking sheet and freeze until firm (about 1-2 hours). Once firm, transfer them to an airtight freezer-safe container, layering them with parchment paper between each cookie to prevent sticking. When you’re ready to enjoy them, simply let them thaw at room temperature for a few minutes.
Whether you devour them fresh or save some for later, these homemade Oreos are a treat you’ll be proud to share!
More Irresistible Cookie Recipes to Explore Soon!
 More Irresistible Cookie Recipes to Explore Soon!
If you’ve enjoyed the process of making these delightful homemade Oreos and are eager to expand your baking repertoire, here are some other fantastic cookie recipes from our collection that you’re sure to love:
- Cream Cheese Sugar Cookies
- Cherry Chocolate Chip No Bake Cookies
- Ranger Cookies
- Strawberry Cool Whip Cookies
- Pink Sandwich Cookies
- Iced Pumpkin Cookies
- Applesauce Oatmeal Chocolate Chip Cookies
- Chocolate Peppermint Cookies
- Chocolate Cherry Cookies
- Peppermint Cookie Bars
- Cherry Almond Cookie Bars
- Chocolate Turtle Cookies
- Iced Cinnamon Pumpkin Cookies
- Christmas Cut Out Cookies
- Holiday Spiced Snickerdoodles
These recipes offer a variety of flavors and styles, ensuring there’s always something new and exciting to bake!
Final Thoughts on Crafting Your Own Classic Oreo Cookies
There’s an undeniable magic in creating beloved treats from scratch, and these Homemade Oreo Cookies are a testament to that joy. From the rich, dark chocolate wafers to the creamy, sweet vanilla filling, every component is crafted with care, resulting in a cookie that is often praised for being even better than the original. This recipe not only delivers on taste but also offers a rewarding baking experience that brings warmth and delicious aromas to your home.
So, gather your ingredients, embrace the process, and prepare to delight your taste buds and those of your family and friends. Whether you’re a seasoned baker or just starting your culinary journey, this straightforward guide will help you master the art of the homemade Oreo. Dive in, experiment with flavors, and savor the incredible satisfaction of making your very own batch of these iconic, irresistible chocolate sandwich cookies. Happy baking!