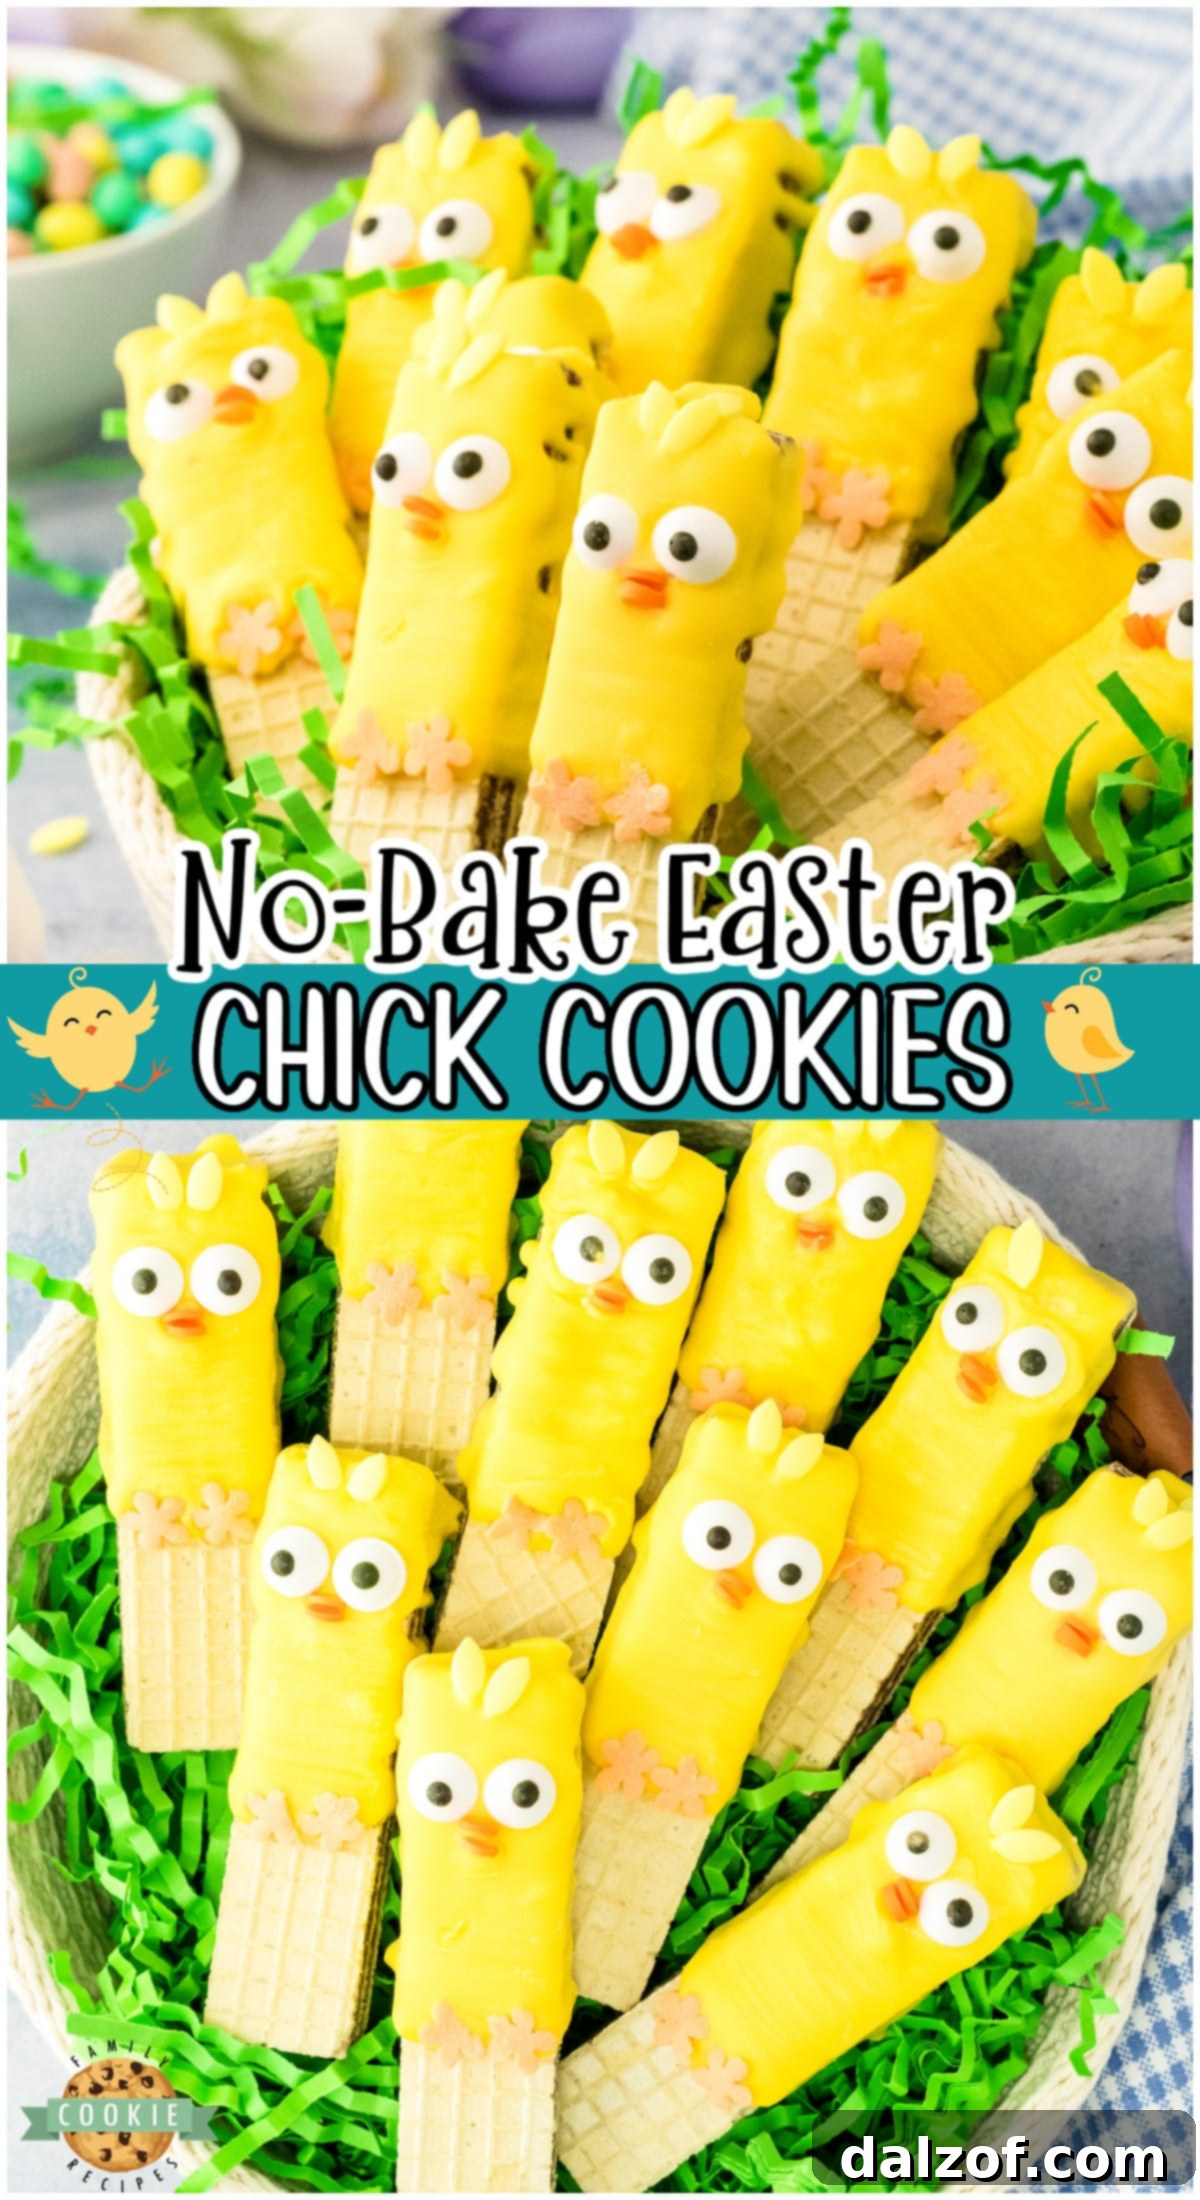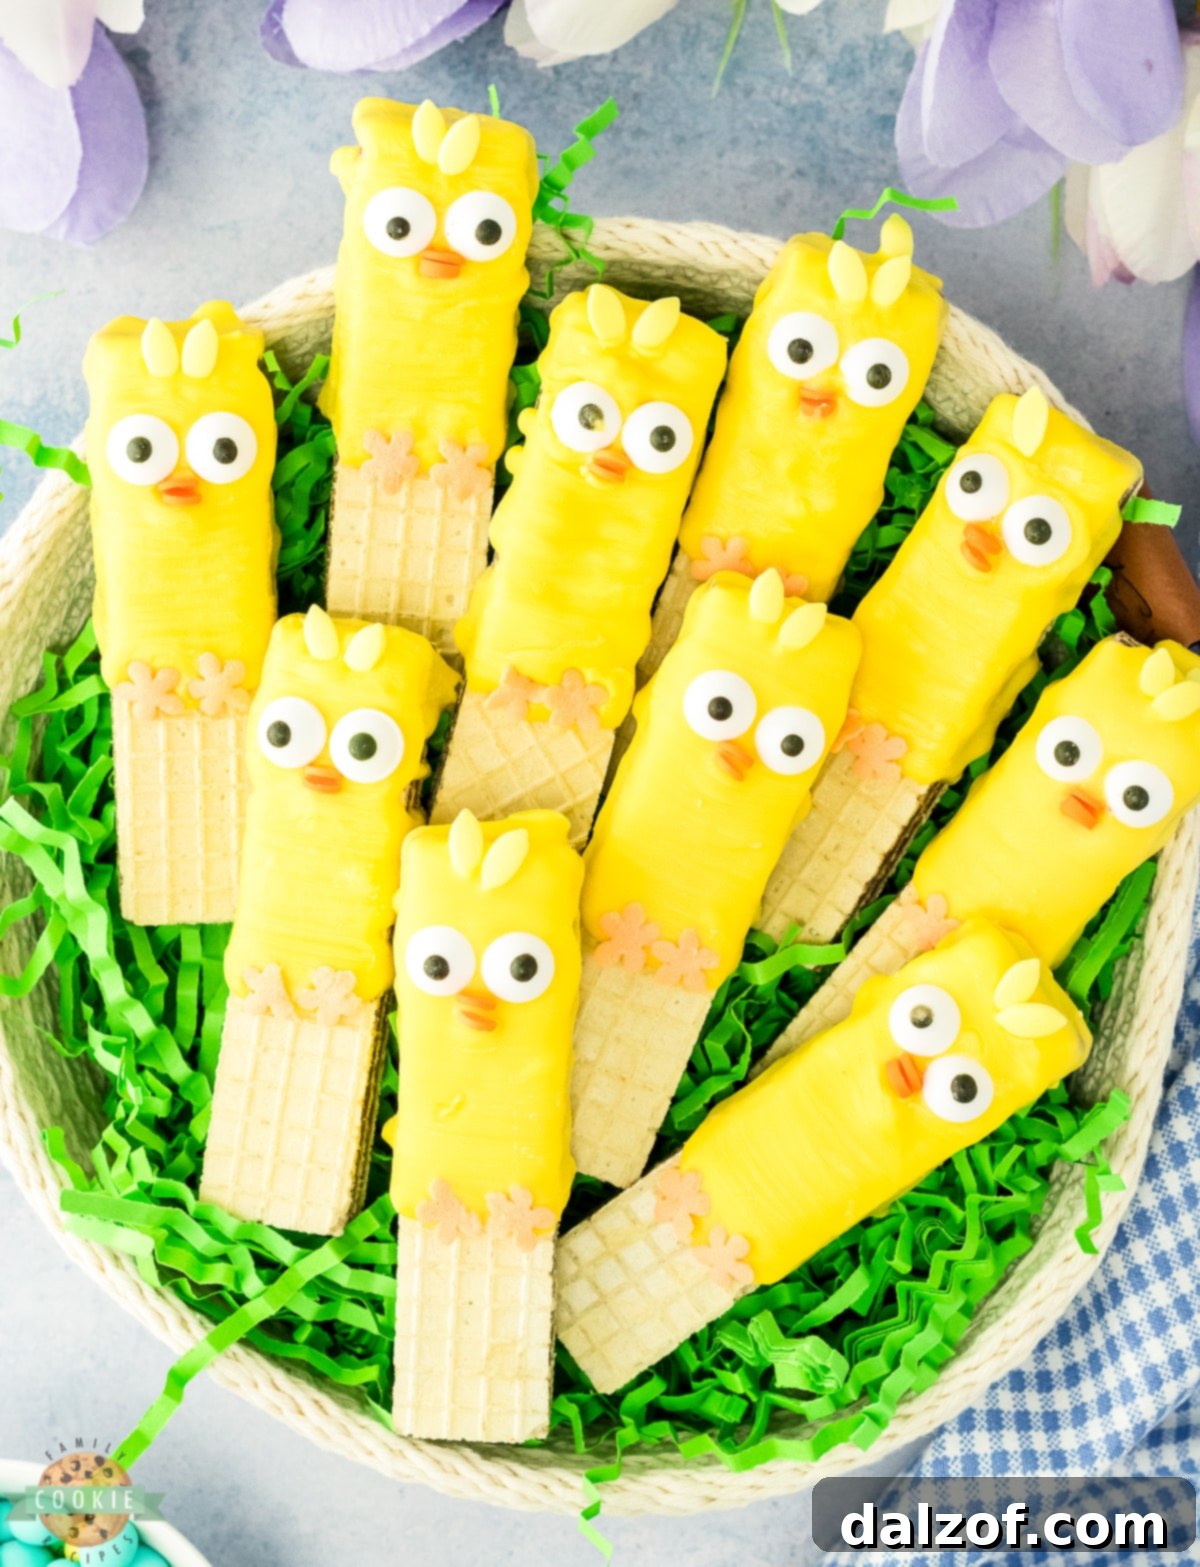
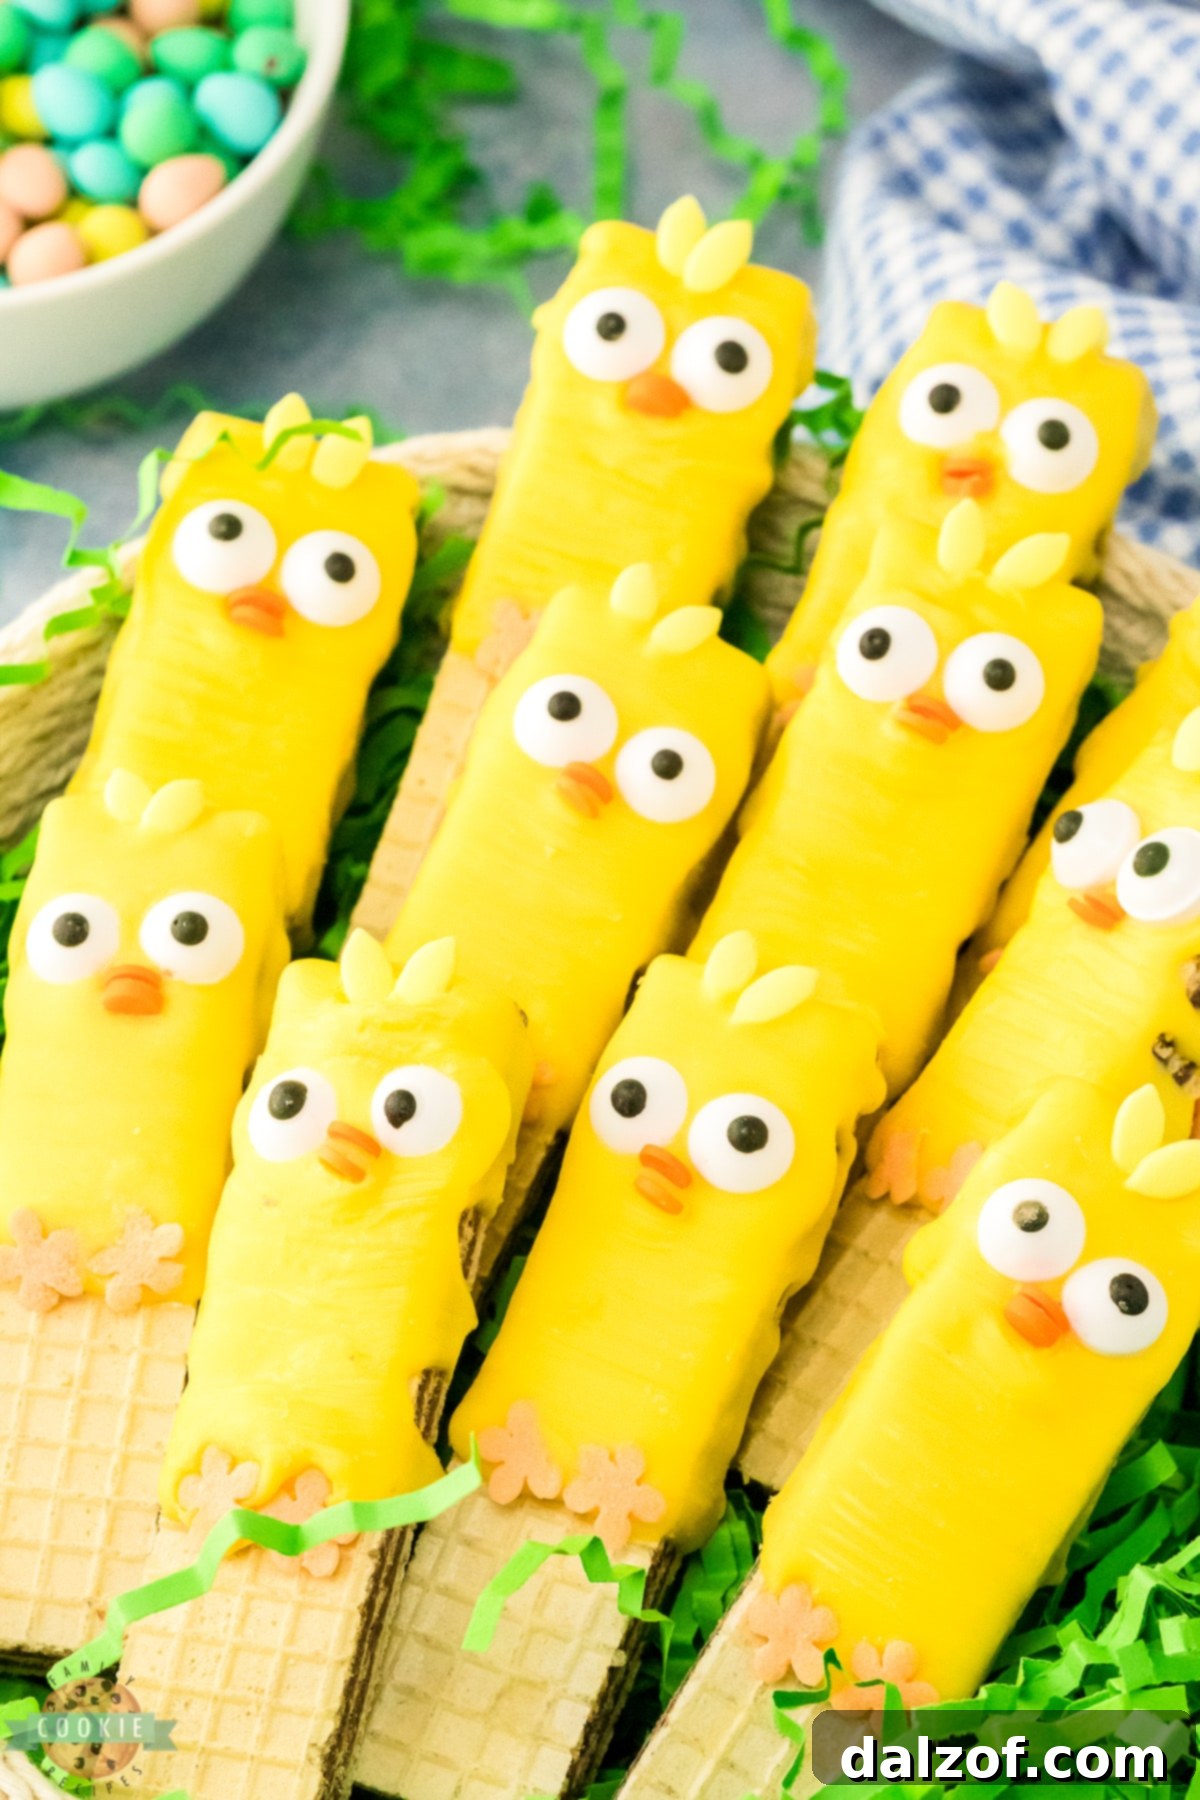
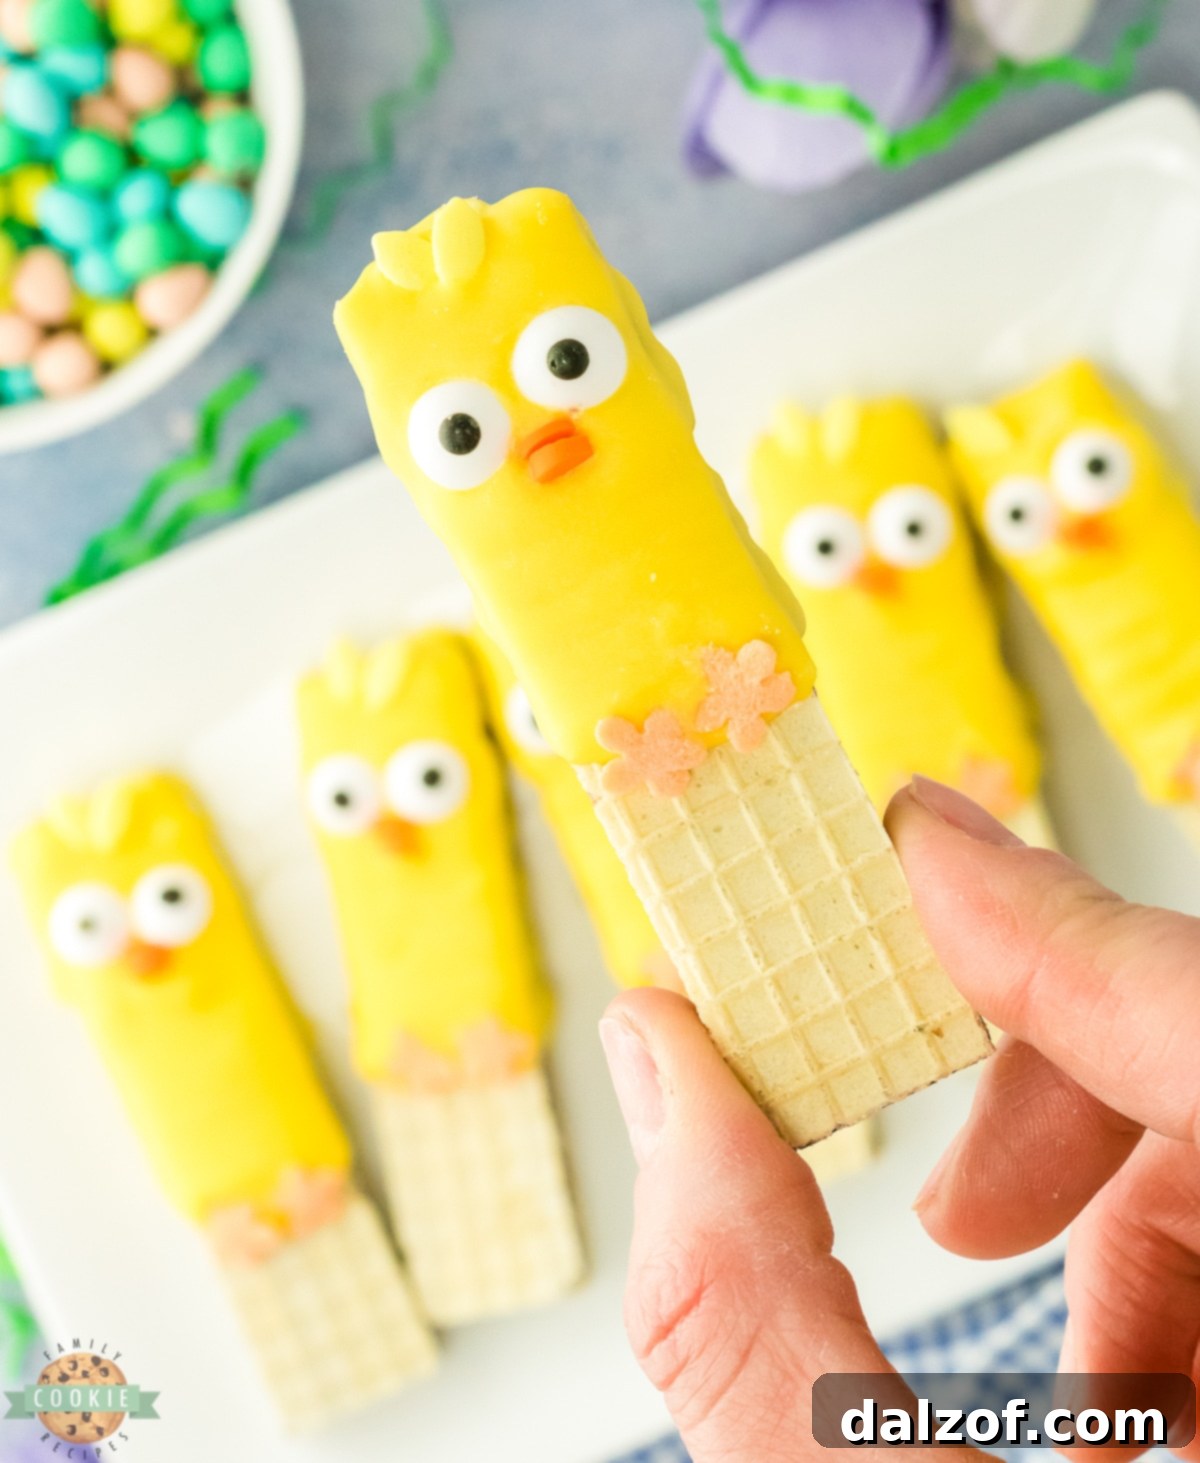
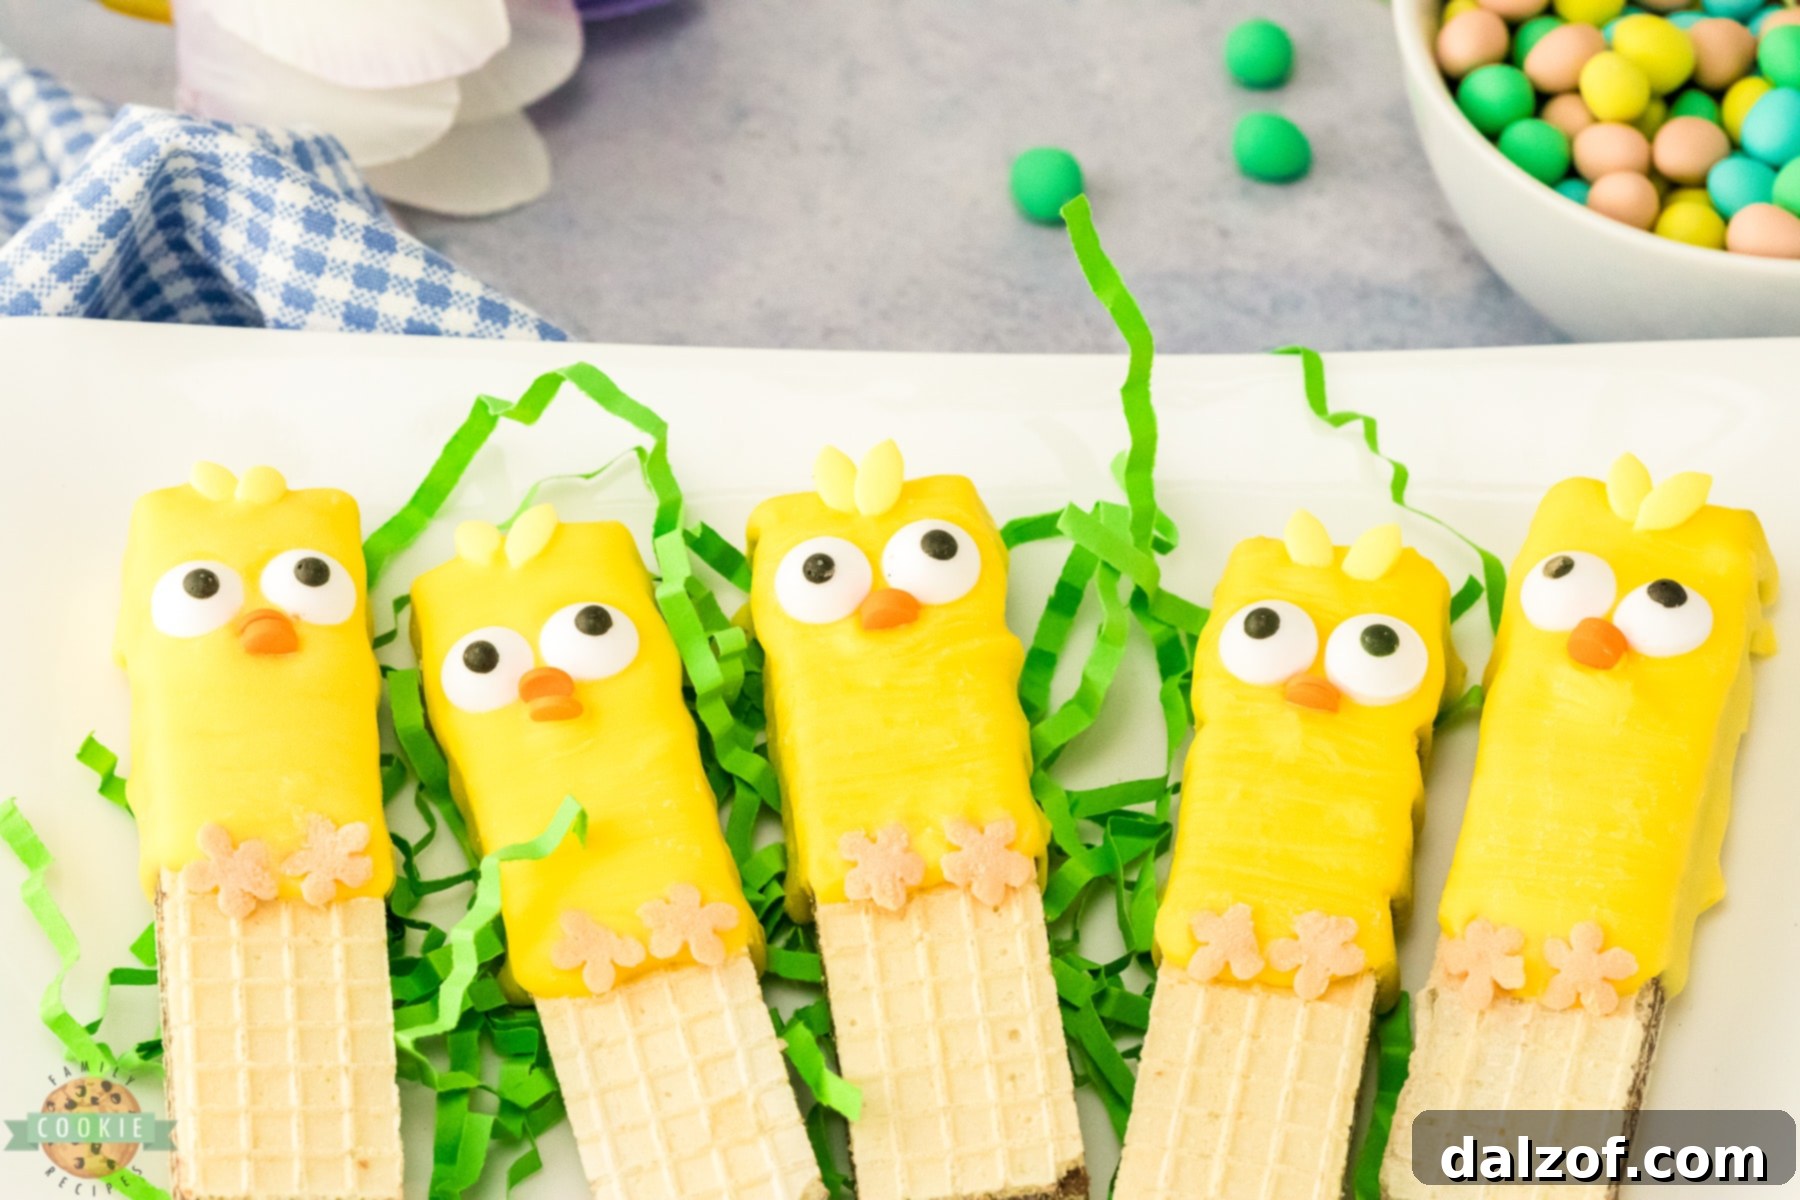
Easy No-Bake Easter Chick Cookies are a delightful and simple way to celebrate the arrival of spring and the joy of Easter. These charming treats are crafted from crisp wafer cookies, dipped in vibrant yellow candy coating, and artfully decorated to resemble adorable baby chicks. Perfect for holiday gatherings, school events, or a fun family activity, this Easter cookie recipe comes together quickly, allowing you to create a festive dessert in under an hour without even turning on your oven. Get ready to impress your friends and family with these irresistibly cute and delicious no-bake Easter treats!
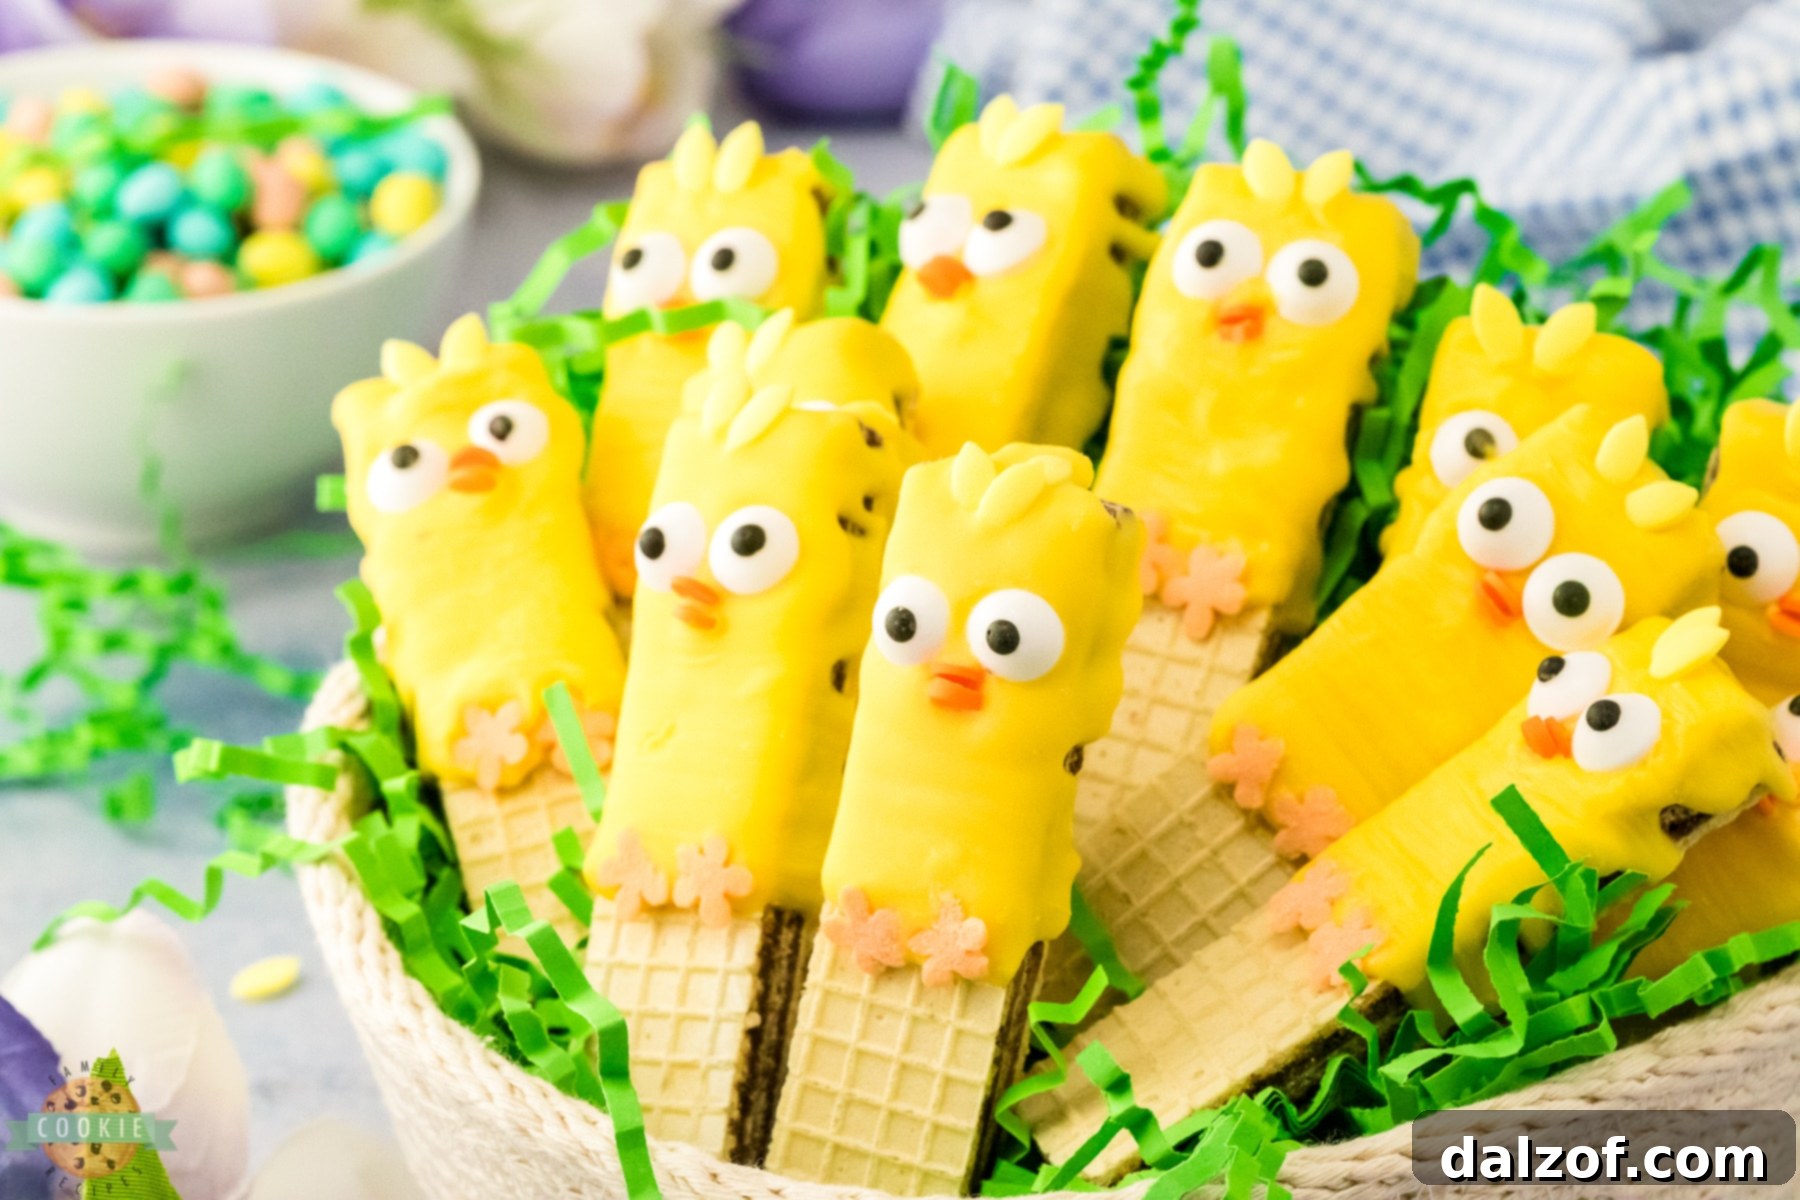
These wonderfully decorated Easter cookies are not just easy to make; they are a truly festive dessert that adds a whimsical touch to any holiday table. As Easter approaches, there’s no better way to get into the holiday spirit than by creating and sharing these adorable Easter chick cookies with your loved ones. Their bright colors and playful design make them a standout treat, guaranteed to bring smiles and compliments. This recipe is designed for maximum fun and minimal fuss, making it accessible for bakers of all skill levels, including enthusiastic little helpers.
Discover the Charm of No-Bake Easter Chick Cookies
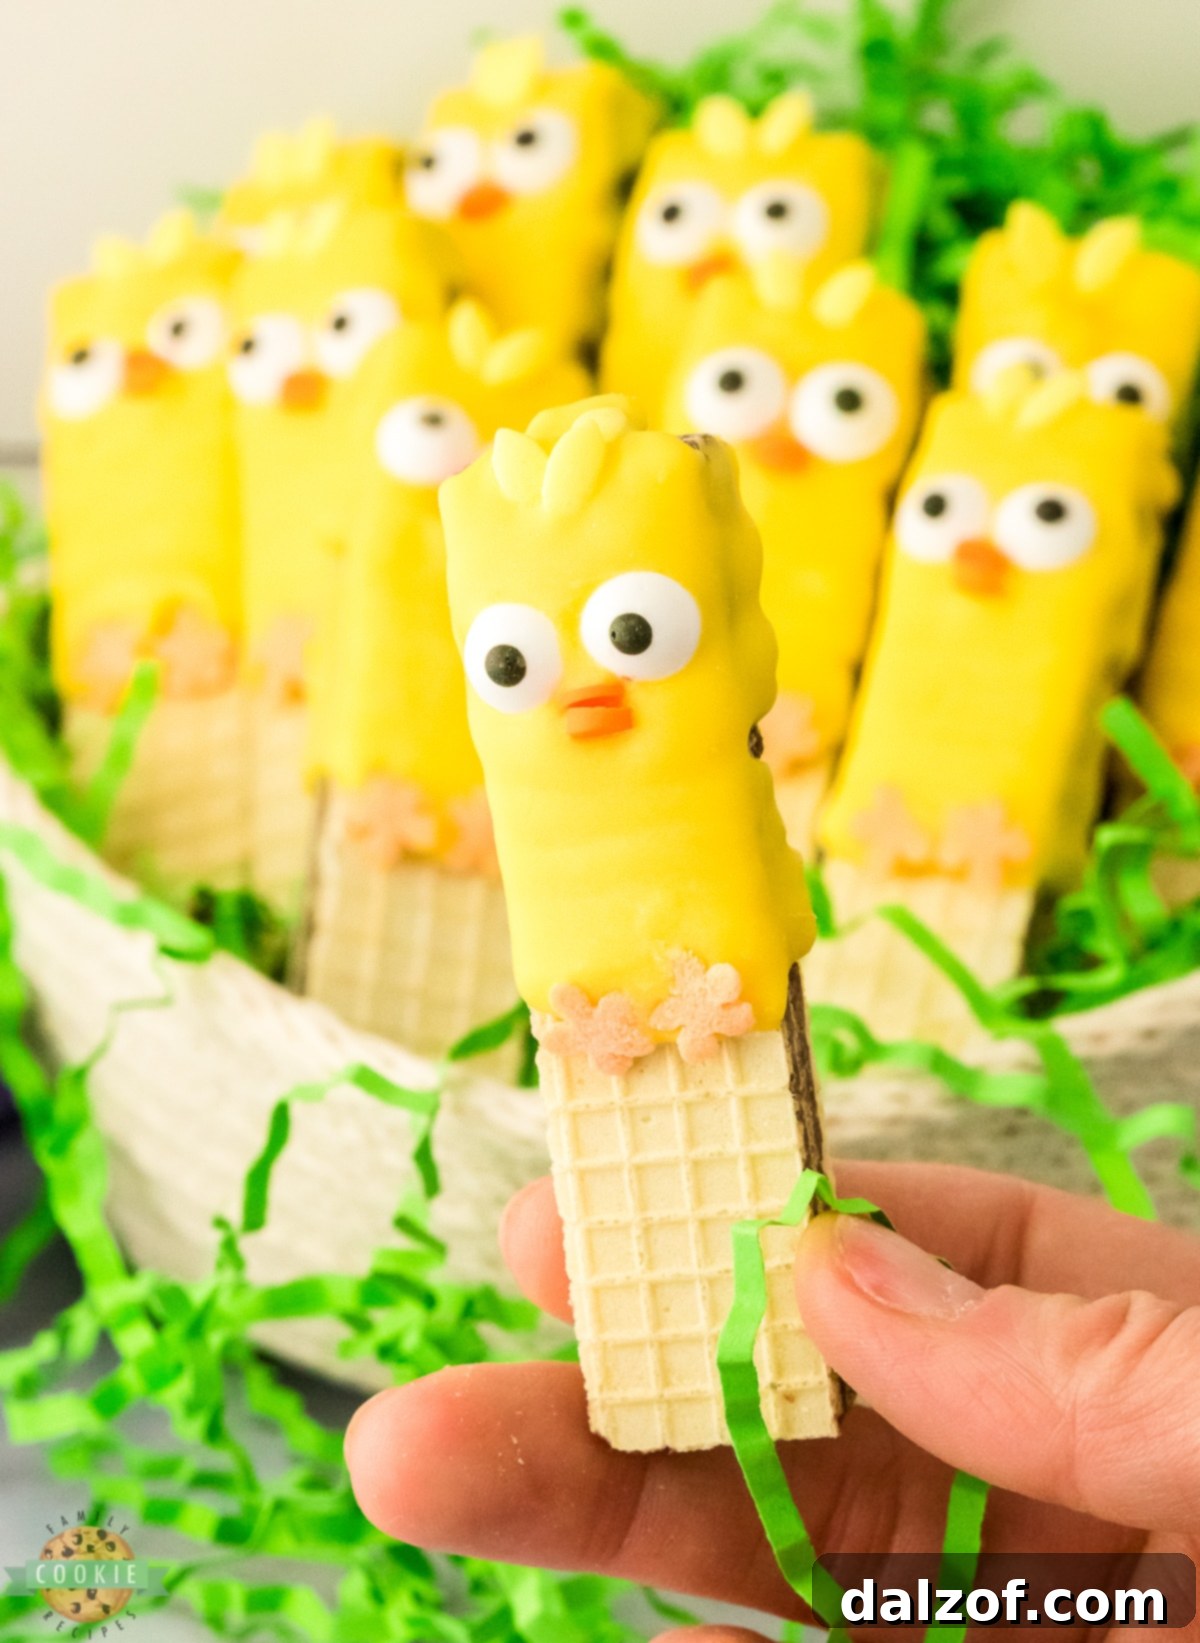
These cute little confections are destined to be an Easter dessert sensation that everyone will adore. Imagine a crunchy, store-bought wafer cookie transformed into a cheerful baby chick, all thanks to a generous dip in smooth yellow candy coating and a few simple decorations. The beauty of this recipe lies in its sheer simplicity: melt the candy coating, dip the wafers, and add sprinkles to bring your chicks to life. It’s an ideal project for getting children involved in the kitchen, fostering creativity, and making cherished holiday memories. I once brought these to a family dinner, and they were an instant hit – devoured with enthusiasm by everyone, from the youngest child to the oldest relative. And honestly, can you blame them? They’re utterly charming, aren’t they? Don’t just take my word for it; give them a try this Easter and experience the amazing delight they bring!
Why You’ll Adore These Festive Easter Treats
Prepare to fall in love with this recipe for so many reasons. These no-bake chick cookies are more than just a dessert; they’re an experience waiting to happen. Here’s why they’ll become your new favorite Easter tradition:
- Absolutely No Baking Required! This is truly the star feature of our recipe. We bypass the oven entirely by using pre-made wafer cookies as the foundation. This ingenious shortcut saves you valuable time and effort, eliminating the need for measuring flour, preheating, or watching the clock. From this convenient base, you simply decorate and transform them into an adorable and utterly delicious Easter dessert. It’s perfect for busy schedules or when you simply want a hassle-free holiday treat.
- Simple, Accessible Ingredients. To craft these wonderfully fun and festive Easter cookies, you’ll only need a handful of basic, readily available ingredients. This translates into a quick and inexpensive trip to the grocery store, making this recipe budget-friendly and stress-free. You likely have many of the decoration components in your pantry already, and the main components are easy to find.
- Festive, Visually Appealing, and Incredibly Fun. These delightful little treats are an exceptional way to celebrate the vibrant Easter holiday. They don’t just taste amazing; their primary appeal lies in the joy of creating them and their striking visual impact. They are a fantastic addition to any holiday dessert table, instantly elevating the festive atmosphere. Gather your family, involve everyone in the decorating process, and enjoy precious time together as you bring these charming chick cookies to life. It’s an activity that creates lasting memories alongside delicious results.
- Kid-Friendly & Engaging. The simple dipping and decorating steps make this recipe perfect for involving children. They can express their creativity by placing eyes, beaks, and “hair,” making each chick cookie unique. It’s a wonderful way to teach basic kitchen skills and encourage participation in holiday preparations.
- Quick & Efficient. With a total time of just 30 minutes (20 minutes prep, 10 minutes setting), these cookies are ideal when you need a festive dessert in a pinch. No long chilling times or elaborate baking steps mean you can whip up a batch on short notice.
Essential Equipment for Crafting Your Chick Cookies
Having the right tools can make the process of creating these delightful chick cookies even smoother and more enjoyable. While many items are standard kitchen staples, a few specialized pieces can significantly enhance your decorating precision and overall experience:
- Microwave-Safe Mixing Bowl: You’ll need a small, sturdy bowl that can safely be used in the microwave to melt your candy coating. Glass or ceramic bowls work best for even heating.
- Piping Bag (or Ziploc Bag): While not strictly essential, a piping bag is highly recommended. It allows for a more controlled and consistent application of the melted candy coating onto your wafer cookies, minimizing mess and reducing waste. If you don’t have a piping bag, a sturdy freezer-grade Ziploc bag with a small corner snipped off will work as an excellent substitute.
- Cooling Rack: This is a crucial piece of equipment for this recipe. A cooling rack elevates the cookies, allowing any excess melted candy coating to drip off cleanly, ensuring a smooth and even finish without puddles on your baking sheet.
- Parchment Paper and/or Baking Sheet: To simplify cleanup and protect your kitchen surfaces, place a sheet of parchment paper or wax paper directly underneath your cooling rack. This will efficiently catch any drips of melted candy coating, making disposal effortless.
- Small Tweezers (Optional, but Recommended): For meticulous placement of the tiny candy eyeballs and sprinkles, a clean set of small tweezers can be incredibly helpful. They offer precision, allowing you to carefully position each decorative element to give your chicks their distinct personalities. If you don’t have tweezers, a toothpick or even clean fingers can work, but tweezers definitely make the job easier, especially for smaller hands.
- Rubber Spatula: Useful for stirring the melting wafers and scraping the bowl to ensure no coating goes to waste.
No-Bake Easter Chick Cookie Ingredients: Simple & Sweet
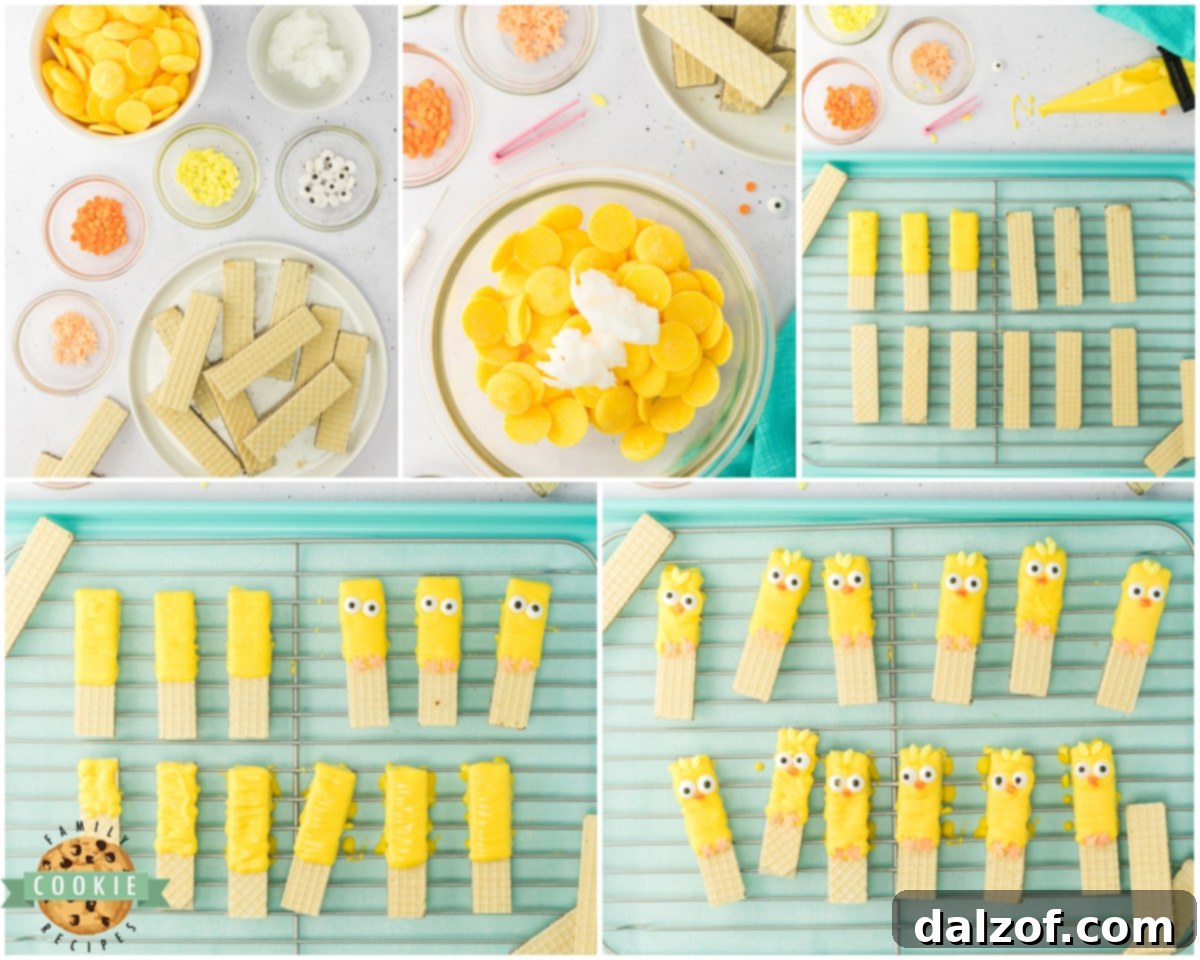
The beauty of these cookies lies in their straightforward ingredient list, mostly consisting of pantry staples and easy-to-find decorative elements. Here’s what you’ll need to create about 30 adorable chick cookies:
- Wafer Cookies: You will need 1 package of your favorite wafer cookies. Any flavor will work as the base, but vanilla or lemon wafers often complement the candy coating beautifully. These provide the perfect crunchy texture and shape for our little chicks.
- Yellow Melting Wafers (Candy Melts): Approximately 1 cup of yellow melting wafers (also known as candy melts or confectionery coating) is needed. These are specially formulated to melt smoothly and set quickly, creating that vibrant yellow chick exterior.
- Coconut Oil: Just 1 tablespoon of coconut oil is added to the melting wafers. This small addition is crucial for thinning out the mixture, ensuring a smooth, dip-able consistency, and preventing the coating from becoming too thick or seizing. It also adds a subtle, delicious flavor.
- Candy Eyeballs: For those expressive chick eyes, you’ll need about 60 small candy eyeballs (two per cookie). These edible decorations are widely available in baking aisles and add an undeniable charm to your finished treats.
- Round Orange Sprinkles: Approximately 60 small, round orange sprinkles will serve as the perfect little beaks for your baby chicks. Their shape and color provide a lovely contrast to the yellow body.
- Orange Flower-Shaped Sprinkles: To create the cute little feet for each chick, gather about 60 orange, flower-shaped sprinkles. These add a whimsical touch and complete the chick’s endearing appearance.
- Yellow Leaf-Shaped Sprinkles: Finally, for a touch of feathery “hair” on top of your chicks’ heads, you’ll need about 60 yellow, leaf-shaped sprinkles. These contribute to the overall fluffy, baby chick aesthetic.
How to Make Easy No-Bake Easter Chick Cookies: Step-by-Step Guide
Creating these adorable Easter chick cookies is a straightforward process, making it enjoyable for all ages. Follow these steps for perfect results:
Prepare the Cookie Coating
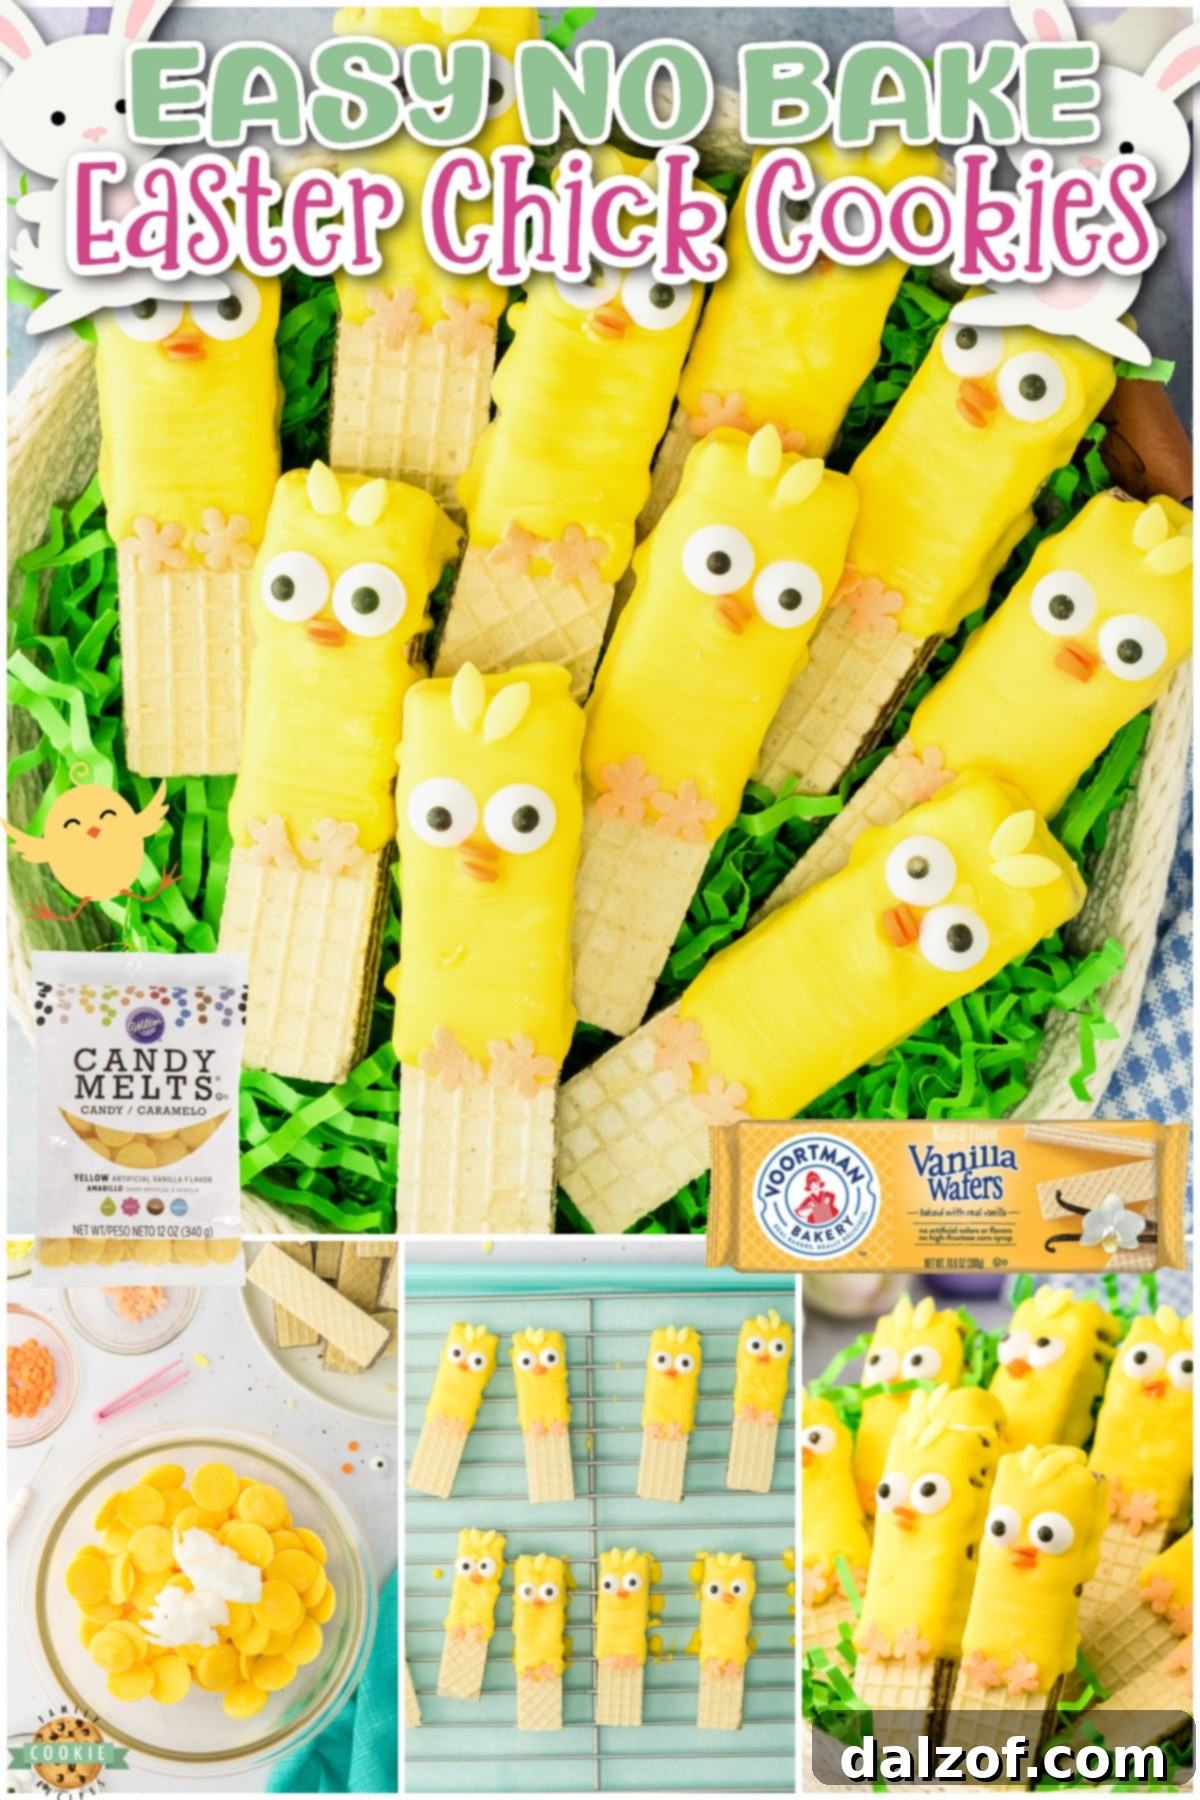
- Melt the Candy Wafers: Begin by placing the yellow melting wafers and coconut oil into a small, microwave-safe bowl. Microwave on 50% power for 1 minute, then remove and stir the mixture thoroughly. Continue microwaving in 30-second intervals at 50% power, stirring well after each interval, until the wafers are completely melted and smooth. This typically takes between 3 to 5 minutes, depending on your microwave’s power. Be careful not to overheat.
- Transfer to a Piping Bag (Optional but Recommended): Once the candy coating is perfectly smooth, carefully pour it into a piping bag. While you can certainly spoon the melted coating directly onto the cookies, using a piping bag provides much greater control. This helps achieve a more consistent coating, reduces mess, and minimizes waste of the precious melting wafers. If you don’t have a piping bag, a heavy-duty Ziploc bag with a small snip off one corner works just as well.
- Set Up for Dipping: Arrange your wafer cookies on a cooling rack. Position a parchment-lined baking sheet directly underneath the cooling rack. This setup is key for catching any drips of excess melted coating, making cleanup a breeze and ensuring your cookies don’t stick to your counter.
- Coat the Wafer Cookies: Starting from the top of each wafer cookie, pour or pipe the melted yellow candy coating over it. Aim to cover approximately two-thirds of the cookie in a gentle back-and-forth motion. Allow the coating to flow naturally down the sides.
- Drip Time: Let the freshly coated cookies sit on the cooling rack for about one minute, allowing any significant excess coating to drip off. This is a critical window; you want the coating to still be wet and pliable for decorating, so work quickly after this brief drip time.
Decorate Your Adorable Chicks
This is where your little wafer cookies truly transform into charming Easter chicks!
- Add Eyes and Feet: While the candy coating is still wet, use your tweezers (or a toothpick for smaller sprinkles) to carefully push two candy eyeballs into the melted chocolate where the chick’s eyes would be. Immediately after, place two flower-shaped orange sprinkles near the bottom of the coated section to resemble the chick’s feet. The wet coating will help them adhere securely.
- Create Hair and Beak: Next, place two yellow leaf-shaped sprinkles just above the eyes, near the top edge of the coated area, to give your chick some playful “hair” or feathery tufts. Then, position two round orange sprinkles directly under the eyes to form the chick’s beak. Again, gentle pressure will help them stick.
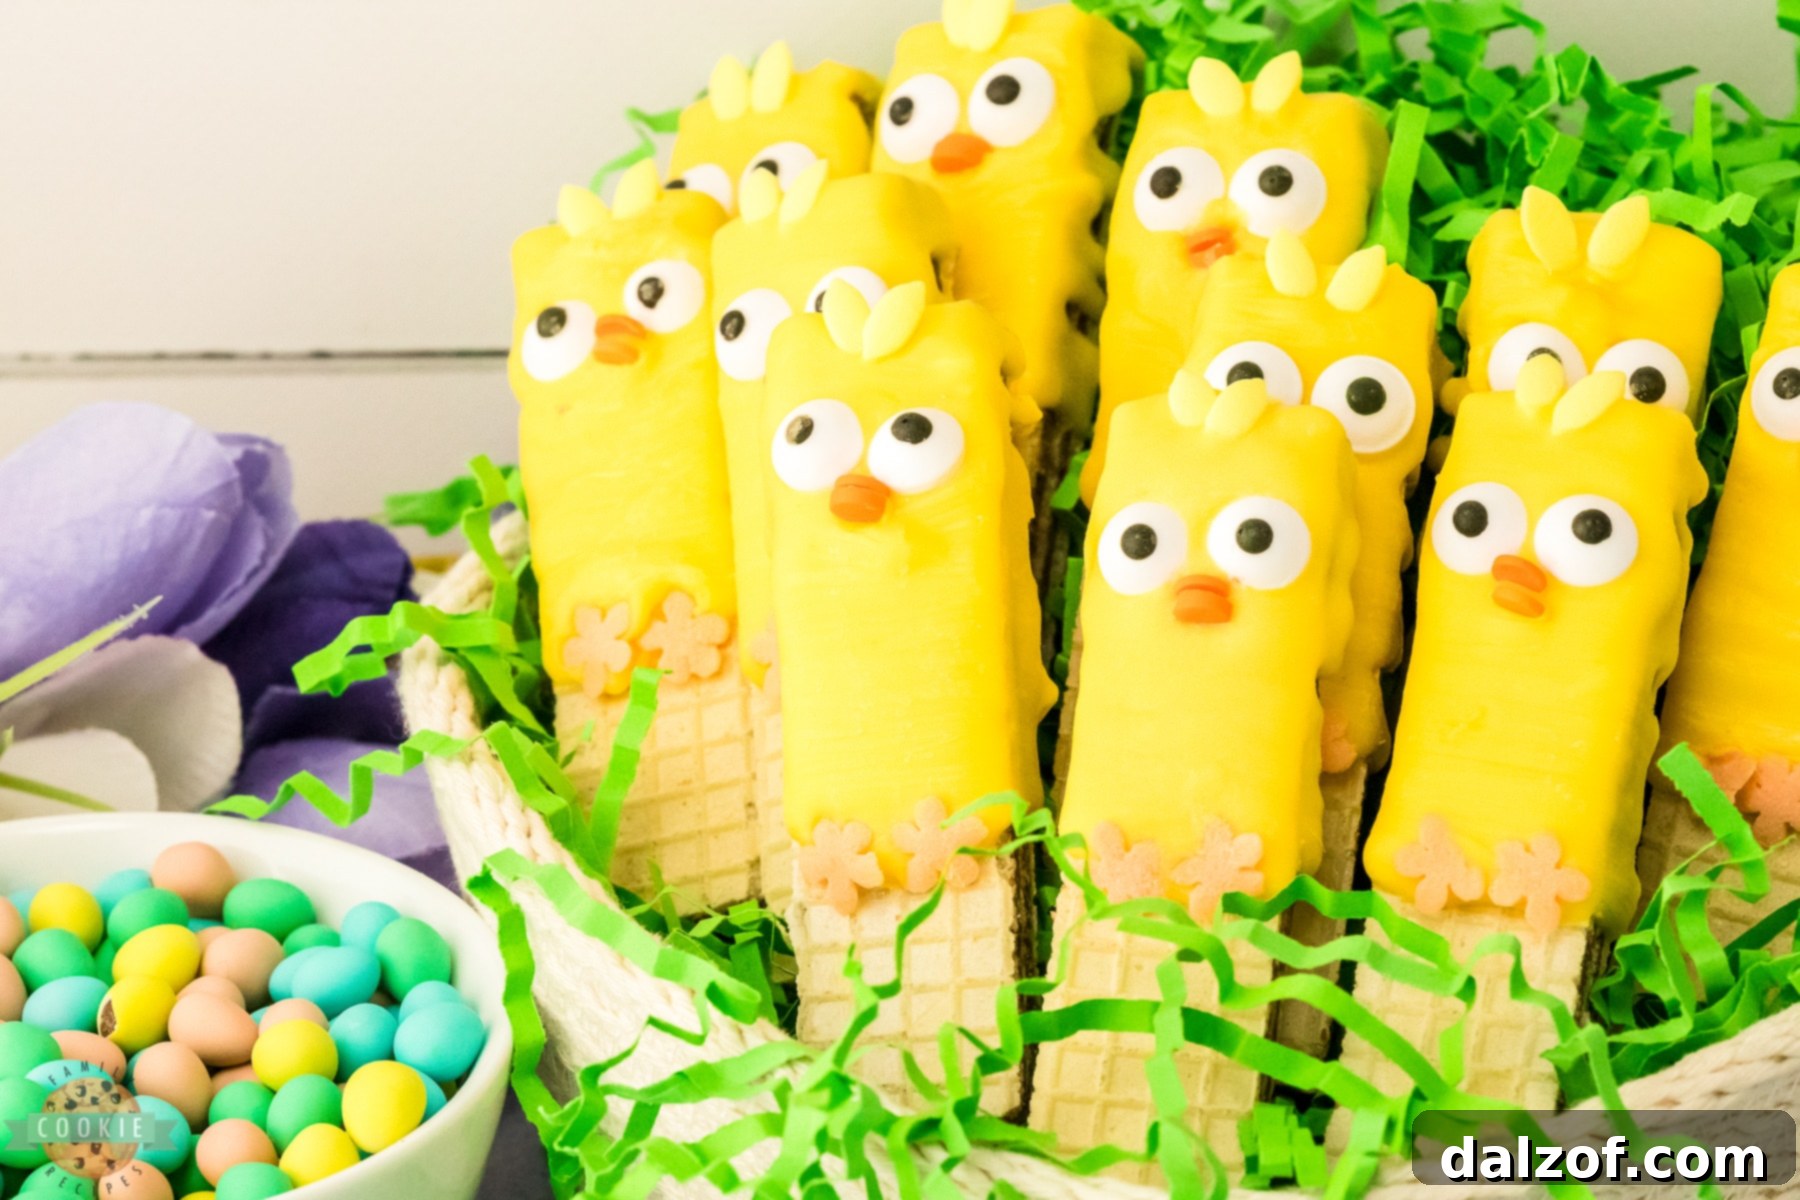
- Allow to Set: Once all your chicks are decorated, let the cookies dry and set completely. This typically takes at least 10 minutes, but can be longer depending on humidity and the thickness of your coating. You can speed up this process by placing them in the refrigerator for a few minutes.
- Serve and Enjoy: Once fully set, your delightful Easy No-Bake Easter Chick Cookies are ready to be served and enjoyed! Watch them disappear quickly!
Expert Tips & Tricks for Creating Amazing Easter Chick Cookies
To ensure your No-Bake Easter Chick Cookies are not only adorable but also perfectly executed, consider these invaluable tips and tricks:
- Coconut Oil Substitution: While coconut oil is recommended for its pleasant flavor and ideal thinning properties, vegetable shortening can be used as a substitute if that’s what you have on hand. Both will effectively thin the melting wafers, but coconut oil often provides a slightly smoother texture and a subtle, appealing taste.
- The Importance of Thinning the Wafers: This step is critical! If you omit the coconut oil or shortening, your melting wafers will be too thick, clumpy, and will set too quickly. This makes dipping difficult and can result in uneven, lumpy coatings that simply won’t look like cute chicks. A properly thinned coating ensures a smooth, glossy finish and gives you enough working time to decorate.
- Get Creative with Sprinkles: Don’t feel limited to the exact sprinkles suggested! This recipe is fantastic for customization. As long as your chosen sprinkles can resemble a beak, feet, or feathers, they’ll work beautifully. Experiment with different colors, shapes, and sizes. Let your imagination soar and have fun creating uniquely personalized chick cookies! Small chocolate chips can even be used for eyes if candy eyeballs aren’t available.
- Piping Bag Efficiency: As mentioned, a piping bag (or a Ziploc bag with a corner cut) is incredibly helpful. It’s faster, provides more precision, and significantly reduces mess and waste compared to spooning the coating. If you’re decorating with kids, a piping bag gives them better control and less frustration.
- Temperature Control is Key: When melting your candy wafers, resist the urge to use high heat. Melting at 50% power in short increments prevents the chocolate from overheating, which can cause it to seize (become thick and unworkable). Stirring frequently helps distribute the heat evenly.
- Work Quickly While Decorating: The candy coating begins to set relatively fast. Have all your sprinkles and candy eyeballs ready and organized before you start dipping. Decorate each cookie immediately after coating it, before the coating hardens.
- Storage Between Batches: If you’re making a large batch and the candy coating in your piping bag starts to thicken, you can gently warm it again in the microwave for a few seconds (without the metal tip if applicable) to restore its smooth consistency.
- Cookie Variety: While vanilla wafers are classic, feel free to try other wafer cookie flavors like chocolate or strawberry for a fun twist! The yellow coating will still make them look like chicks.

Easy No-Bake Easter Chick Cookies
Easy No-Bake Easter Chick Cookies made with wafer cookies dipped in candy coating & decorated to look like darling baby chicks! Simple, quick & fun Easter cookie recipe that’s done in under an hour!
Course: Cookies, Dessert
Cuisine: American
Keyword: Easy No-Bake Easter Chick Cookies, No Bake Easter Cookies
Prep Time: 20 minutes
Setting Time: 10 minutes
Total Time: 30 minutes
Servings: 30 cookies
Calories: 48 kcal per cookie
Author: Jessica & Nellie
Ingredients
- 30 wafer cookies (any flavor)
- 1 cup yellow melting wafers
- 1 TBSP coconut oil
- 60 candy eyeballs
- 60 round orange sprinkles (for the beaks)
- 60 orange flower-shaped sprinkles (for the feet)
- 60 yellow leaf-shaped sprinkles (for the hair)
Instructions
- Cookie Coating: In a small, microwave-safe bowl, combine the yellow melting wafers and coconut oil. Melt for one minute at 50% power. Stir the wafers and coconut oil until combined. Continue microwaving in 30-second increments at 50% power, stirring after each, until the mixture is fully melted and smooth. This process usually takes between 3 and 5 minutes.
- Carefully pour the melted wafers into a piping bag. While not strictly necessary, a piping bag allows for more consistent coating and reduces waste.
- Place the wafer cookies on a cooling rack, ensuring a parchment-lined baking sheet is underneath to catch any drips from the melted wafers.
- Starting at the top of each cookie, pour or pipe the melted wafers onto the cookie in a back-and-forth motion. Aim to cover approximately two-thirds of the cookie.
- Allow the excess melting wafers to drip off for just one minute. It’s important to work quickly here, as you don’t want the coating to set before you add the decorations.
- Decorate: Using tweezers (or a toothpick), gently press two candy eyeballs into the still-wet melted coating. Immediately after, place two flower-shaped orange sprinkles below the eyes to form the chick’s feet.
- Add two yellow leaf-shaped sprinkles above the eyes, near the top of the coated section, to create the chick’s “hair.” Then, position two round orange sprinkles under the eyes to form the beak.
- Allow the decorated cookies to cool and set completely for at least 10 minutes. Once firm, serve your adorable Easter chick cookies and enjoy!
Notes
Easy No-Bake Easter Chick Cookies are a wonderfully fun and delicious way to celebrate the holiday. This Easter cookie recipe is incredibly simple to make, making it perfect for involving the whole family in the decorating fun!
Nutrition
Calories: 48 kcal | Carbohydrates: 6g | Protein: 0.2g | Fat: 2g | Saturated Fat: 2g | Polyunsaturated Fat: 0.4g | Monounsaturated Fat: 0.3g | Trans Fat: 0.02g | Cholesterol: 0.1mg | Sodium: 28mg | Potassium: 5mg | Fiber: 0.1g | Sugar: 4g | Calcium: 0.005mg
Tried this recipe? Share your creations! Mention @familycookierecipes or tag #familycookierecipes on Instagram!
How Long Do Easter Chick Cookies Stay Fresh?
One of the great advantages of these no-bake treats is their decent shelf life, allowing you to prepare them in advance for your Easter celebrations. When stored properly in an airtight container at room temperature, these delightful chick cookies will maintain their freshness, flavor, and texture for up to 5 to 7 days. To prevent the candy coating from sticking together or marring the delicate decorations, it is highly recommended to place a piece of parchment paper or wax paper between each layer of cookies within your storage container. This small step ensures that every chick remains perfectly intact and ready for enjoyment, just as adorable as when you first decorated them. For longer storage, though not ideal for crispy wafers, they can also be refrigerated, which can extend their life slightly.
Understanding and Rescuing Seized Chocolate Coating
Dealing with seized chocolate is a common kitchen challenge, especially when working with candy melts or chocolate coatings. Understanding what it looks like and how to potentially fix it can save your batch of beautiful chick cookies. When chocolate seizes, it transforms from a smooth, luxurious liquid into a thick, lumpy, and often gritty mass. It appears as if the chocolate is refusing to melt, becoming stiff and unworkable. In more severe cases of overheating, seized chocolate might even emit a faint burned smell, although it can seize without this tell-tale scent.
The good news is that seized chocolate can often be salvaged! If you find your candy coating has seized, gently stir in 1 teaspoon of coconut oil or vegetable shortening. The key is to approach this slowly and deliberately. First, pour the shortening or coconut oil directly over the seized chocolate, ensuring it’s mostly covered. Allow it to sit for a few minutes to soften the hardened bits. Then, begin to stir the oil into the seized chocolate very slowly and patiently. Within a minute or two, you should be able to tell if the chocolate is recovering. It might start to loosen up and regain some of its smooth consistency. The success of this rescue mission largely depends on how severely the chocolate has seized; minor seizing is generally easier to correct than a heavily overheated and clumpy batch. Always remember to melt your wafers on low power and stir frequently to prevent seizing in the first place.

Making memories and delicious food often go hand-in-hand. I still fondly remember one of our first family dinners in our new kitchen. My talented sister Raz whipped up a beautiful carrot cake – it was not only visually stunning but also incredibly delicious! These moments of shared joy and culinary delight truly highlight that family time is the absolute best. Just like making these chick cookies, it’s about coming together, creating something special, and enjoying each other’s company.

Need More Festive Easter Treat Recipes? Explore Our Favorites!
If you’re looking to expand your Easter dessert repertoire beyond these adorable chick cookies, we have a variety of other festive and delicious recipes that are perfect for your spring celebrations. From rich brownies to fruity drops, there’s something to satisfy every sweet tooth:
- Cadbury Mini Eggs Brownie Bars: Indulge in fudgy brownies studded with colorful Cadbury Mini Eggs – an irresistible Easter classic.
- Easy Easter Marshmallow Bark: A super simple and visually striking treat made with melted chocolate and pastel marshmallows.
- Homemade Chocolate Marshmallow Eggs: Craft your own gourmet marshmallow eggs, dipped in chocolate for a truly special holiday candy.
- Easy Peanut Butter Easter Eggs: A beloved combination of creamy peanut butter and rich chocolate, shaped like festive Easter eggs.
- Little Lemon Drops: Bright, zesty, and perfectly bite-sized cookies that bring a burst of spring flavor.
- Jumbo Lemon Easter Cookies: Large, soft, and chewy lemon-flavored cookies, perfect for an impressive Easter spread.
- Easy Easter Egg Nests: Adorable edible nests made with crunchy ingredients and topped with candy eggs.
- Easter Rice Krispie Treats: A classic favorite reinvented with colorful sprinkles and festive shapes for Easter.
- Braided Sweet Bread: A beautiful and comforting sweet bread, often adorned with colored eggs, perfect for Easter brunch or dessert.
These Easy No-Bake Easter Chick Cookies are truly a joyful and hassle-free way to celebrate the season. Made with simple packaged wafer cookies, generously dipped in cheerful yellow candy coating, and adorned with playful sprinkles to resemble the most adorable baby chicks, they are an instant hit. This Easter cookie recipe is not only exceptionally easy and fast but also promises a delightful activity that can be completed in under an hour, leaving you with plenty of time to enjoy the holiday festivities!