
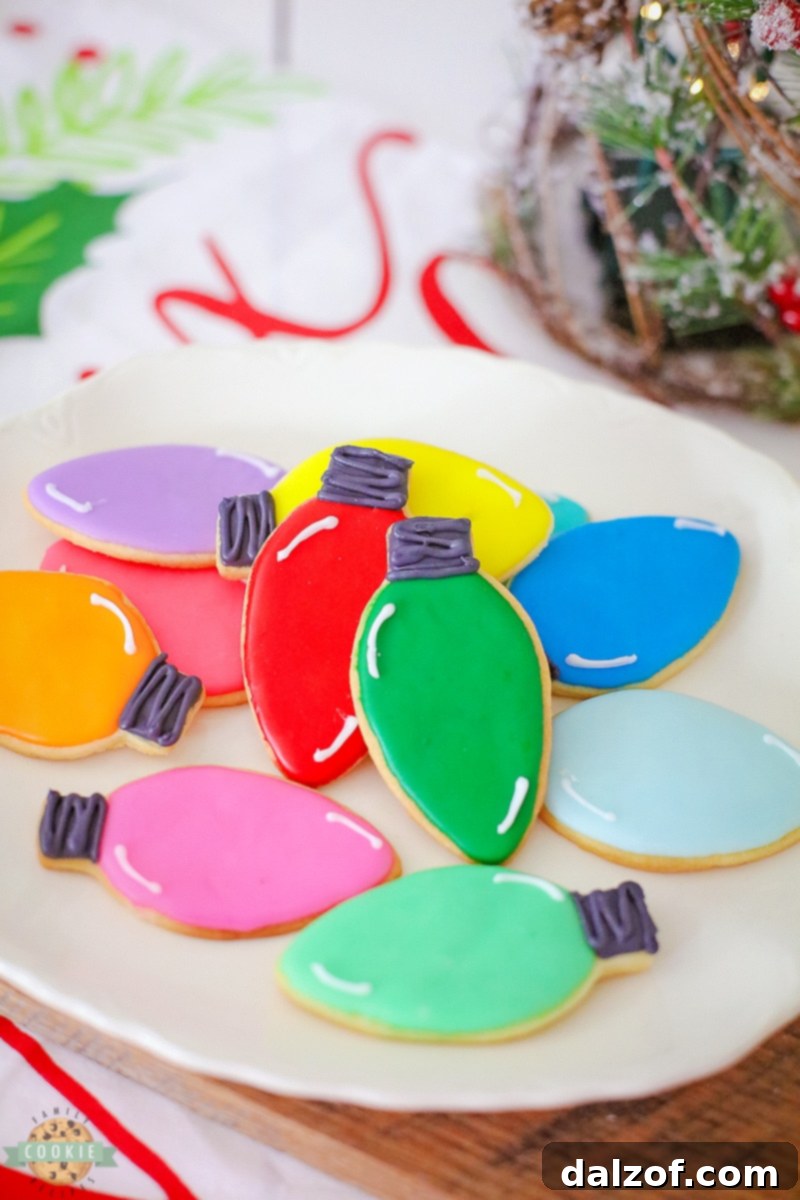
Brighten your holiday season with these enchanting **Christmas light cut-out cookies**! These vibrant and colorful butter cookies are a festive delight, perfect for gracing your holiday dessert trays, cookie exchanges, or simply enjoying with family. Each cookie is meticulously shaped like a twinkling Christmas light, baked to golden perfection, and then artfully frosted to mimic the joyous glow of holiday decorations. Get ready to bake a batch of pure Christmas cheer that will surprise and delight everyone, from the first glance to the last delicious bite.
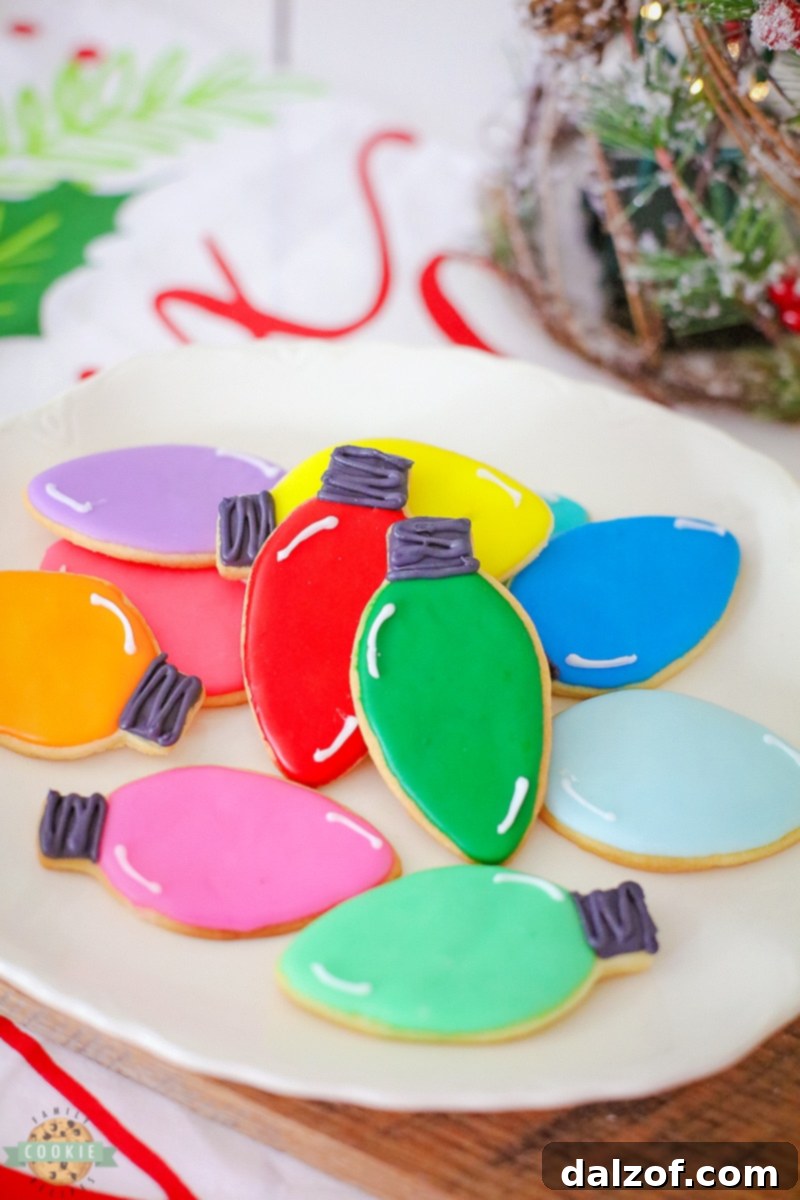
You’ll absolutely adore how straightforward and enjoyable these **Christmas light-shaped cookies** are to create. They offer a unique and unexpected touch to any holiday table, making them an ideal centerpiece for family gatherings and a memorable contribution to cookie swaps. Just as traditional Christmas lights illuminate homes and spread happiness, these delightful cookies are designed to bring immense joy, from their cheerful appearance to their wonderfully sweet taste. This recipe isn’t just about baking; it’s about crafting edible works of art that capture the spirit of the season.
What Are Christmas Light Cut-Out Cookies?
Christmas light cut-out cookies are a delightful holiday treat crafted from a simple, yet incredibly flavorful shortbread cookie dough. The dough is rolled out and shaped using specialized Christmas light-shaped cookie cutters, then baked until beautifully golden. Once cooled, these charming cookie bases are transformed with vibrant colored icing, meticulously applied to resemble sparkling light bulbs. The result is a stunning array of cookies that are almost too pretty to eat, combining classic butter cookie flavor with festive holiday aesthetics. They are an homage to the iconic holiday decorations that bring so much warmth and magic to the winter season.
Why You’ll Love This Festive Cookie Recipe
Beyond their undeniable visual appeal, these **holiday light cookies** offer numerous reasons to become your new favorite Christmas baking tradition:
- **Simple & Fun:** The recipe uses a basic butter cookie dough, making it accessible even for novice bakers. The decorating process is creative and enjoyable for all ages.
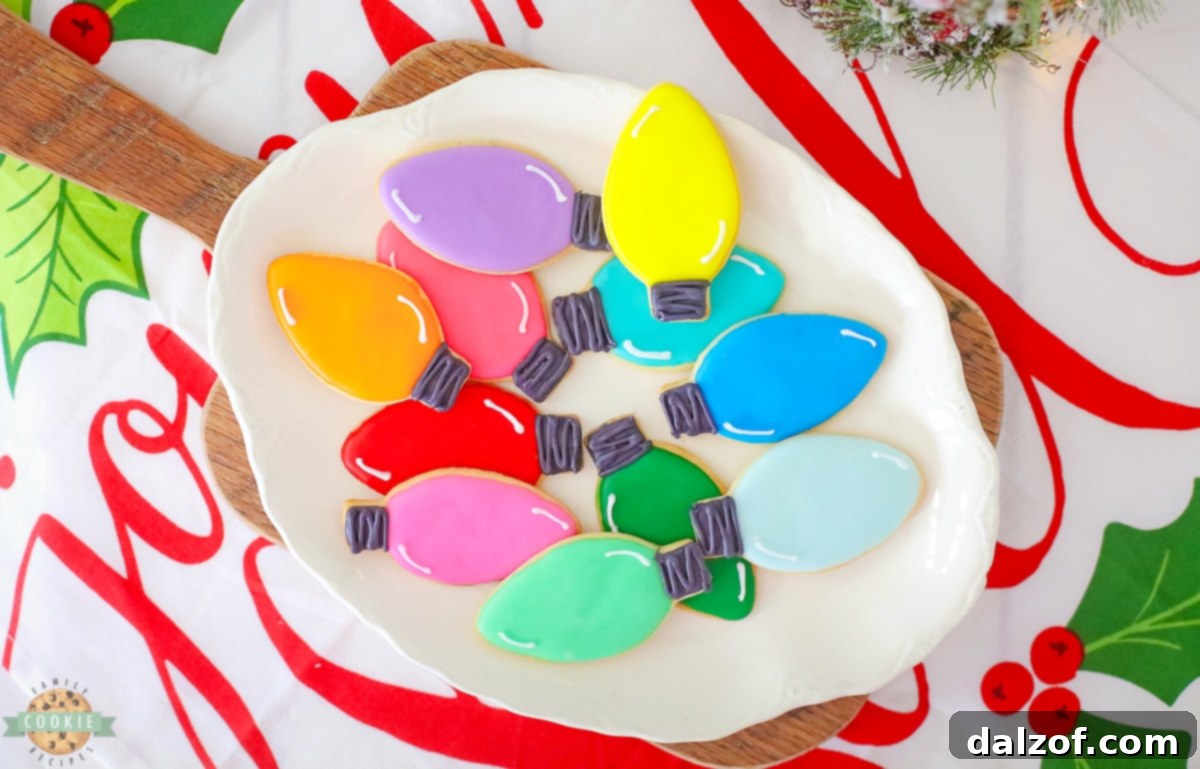
- **Visually Stunning:** The bright, varied colors of the icing truly make these cookies pop, transforming them into edible masterpieces that stand out on any platter.
- **Perfect for Sharing:** They’re an excellent addition to holiday cookie trays, potlucks, and make wonderful homemade gifts for neighbors, teachers, and friends.
- **Kid-Friendly Activity:** Involve your children in the cookie-cutting and decorating process for a memorable holiday baking experience. It’s a fantastic way to create lasting family memories.
- **Delicious Flavor:** The rich, buttery shortbread cookie base pairs perfectly with the sweet royal icing, creating a delightful texture and taste combination.
- **Customizable:** Easily adapt the colors to match your holiday theme or experiment with different flavorings in the cookie dough or icing.
Essential Ingredients for Christmas Light Cookies
Creating these dazzling **decorated Christmas cookies** requires a few fundamental ingredients, split between the rich cookie base and the vibrant royal icing. Using quality ingredients ensures the best flavor and texture for your festive treats.
For the Perfect Butter Cookies:
- Butter: You will need 1 cup of unsalted butter, softened to room temperature. This provides a rich, classic flavor and contributes to the tender crumb of the cookies. Using unsalted butter allows you to control the overall saltiness of the recipe.
- Granulated Sugar: 1 cup of granulated sugar is essential for sweetness and helps achieve that delightful crisp-chewy texture that makes these **Christmas cut-out cookies** so addictive.
- Egg: A single large egg acts as a binder, helping to hold the dough together while adding richness and moisture, ensuring your cookies don’t crumble.
- All-Purpose Flour: You’ll need 2 ½ cups of all-purpose flour. This forms the structural base of the cookie dough, giving it the perfect consistency for rolling and cutting.
- Vanilla Extract: 2 teaspoons of high-quality vanilla extract are crucial for imparting a warm, aromatic flavor that complements the buttery goodness of the cookies. Don’t skimp on good vanilla!
- Cocoa Powder (Optional for Chocolate Version): For a delightful chocolate variation, consider adding ¼ cup of unsweetened cocoa powder to the dough along with the flour. This creates a rich, dark cookie base that’s equally delicious.
For the Sparkling Royal Icing:
- Powdered Sugar: 2 cups of sifted powdered sugar (confectioners’ sugar) forms the smooth, sweet base of your royal icing. Sifting prevents lumps for a perfectly glossy finish.
- Meringue Powder: 3 tablespoons of meringue powder are key to achieving a stable, fast-setting royal icing. It gives the icing its characteristic crisp texture when dry and allows for intricate decorating without smudging.
- Milk: Approximately ¼ cup of milk (whole milk or 2% works best) is used to thin the icing to the ideal consistency for both outlining and flooding. Adjust as needed to reach your desired flow.
- Gel Food Coloring: For truly vibrant and eye-catching results, gel food coloring is highly recommended. You’ll want a spectrum of colors to mimic actual Christmas lights: red, green, aqua, yellow, orange, purple, pink, light blue, and, critically, black for the light bulb bases. Gel colors provide intense hues without significantly altering the icing consistency.
How to Craft Festive Christmas Light Cut-Out Cookies
Making these charming **festive Christmas light cookies** is a rewarding process that brings a touch of magic to your kitchen. Follow these steps carefully for the best results, creating cookies that are as delicious as they are beautiful.
Step 1: Preparing the Cookie Dough
- In a large mixing bowl, using an electric mixer, cream together the softened butter and granulated sugar until the mixture is light, fluffy, and pale in color. This step is crucial for incorporating air and achieving a tender cookie.
- Add the large egg and the vanilla extract to the creamed mixture. Continue to beat until all ingredients are thoroughly combined and smooth.
- Gradually add the all-purpose flour, a little at a time, mixing on low speed after each addition until just combined. Be careful not to overmix the dough, as this can lead to tough cookies. If making chocolate cookies, mix in the cocoa powder along with the flour.
- Once the dough comes together, gently form it into a flattened disk. Wrap it tightly in plastic wrap and refrigerate for at least 30 minutes. Chilling the dough makes it much easier to roll out and prevents the cookies from spreading too much during baking, ensuring your light bulb shapes stay crisp.
Step 2: Cutting and Baking the Cookies
- Preheat your oven to 350°F (175°C). Line a baking sheet with parchment paper to prevent sticking and ensure even baking.
- On a lightly floured surface, roll out the chilled cookie dough to an even thickness of about ¼ inch. This consistent thickness is important for uniform baking.
- Use a Christmas light bulb-shaped cookie cutter to cut out your cookies. Carefully transfer the cut-out shapes to the prepared baking sheet, leaving about an inch of space between each cookie.
- Bake for 15-18 minutes, or until the edges are lightly golden. The exact baking time may vary depending on your oven and the thickness of your cookies.
- Once baked, remove the cookies from the oven and let them cool on the baking sheet for a few minutes before transferring them to a wire rack to cool completely. Ensure they are entirely cool before attempting to ice them.
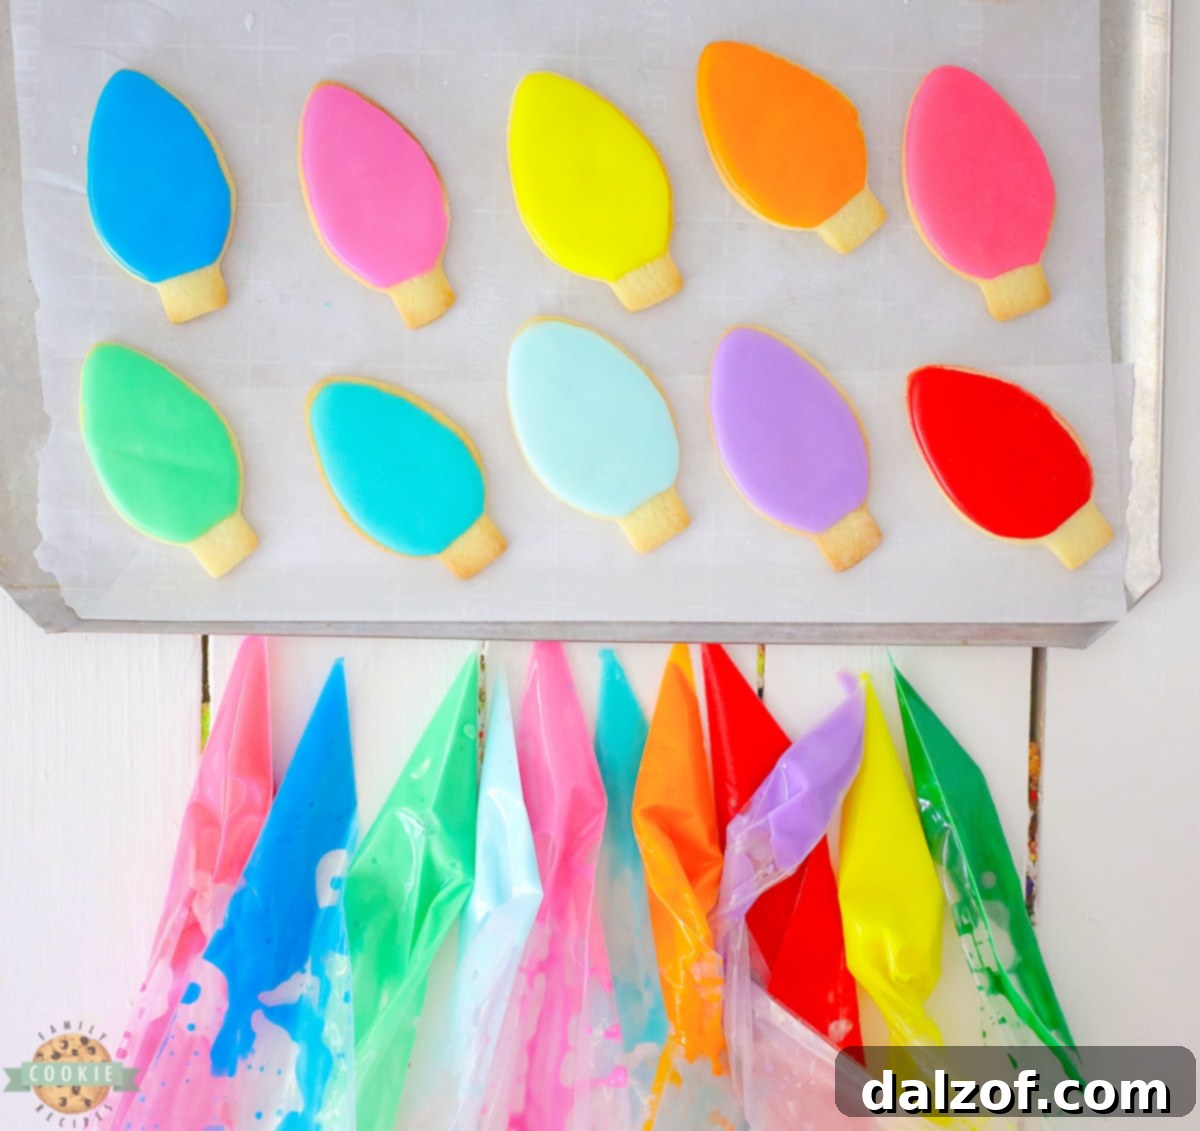
Step 3: Crafting the Vibrant Royal Icing
- In a clean bowl, whisk together the powdered sugar, milk, and meringue powder until the mixture is smooth and free of lumps. The consistency should be thick enough to hold a shape but thin enough to pipe smoothly. If it’s too thick, add a tiny bit more milk; if too thin, add more powdered sugar.
- Prepare 13 piping bags (or use fewer bags and wash them between colors). Divide the prepared white royal icing into 13 small bowls. This allows for individual coloring.
- Add a small amount of gel food coloring to each bowl, mixing until you achieve the desired vibrant hues. Remember to designate one bowl for black icing, which will be used for the base of the light bulbs.
- Carefully fill each piping bag with a different color of frosting and set them aside, ready for decoration.
Step 4: Decorating Your Sparkly Light Bulb Cookies
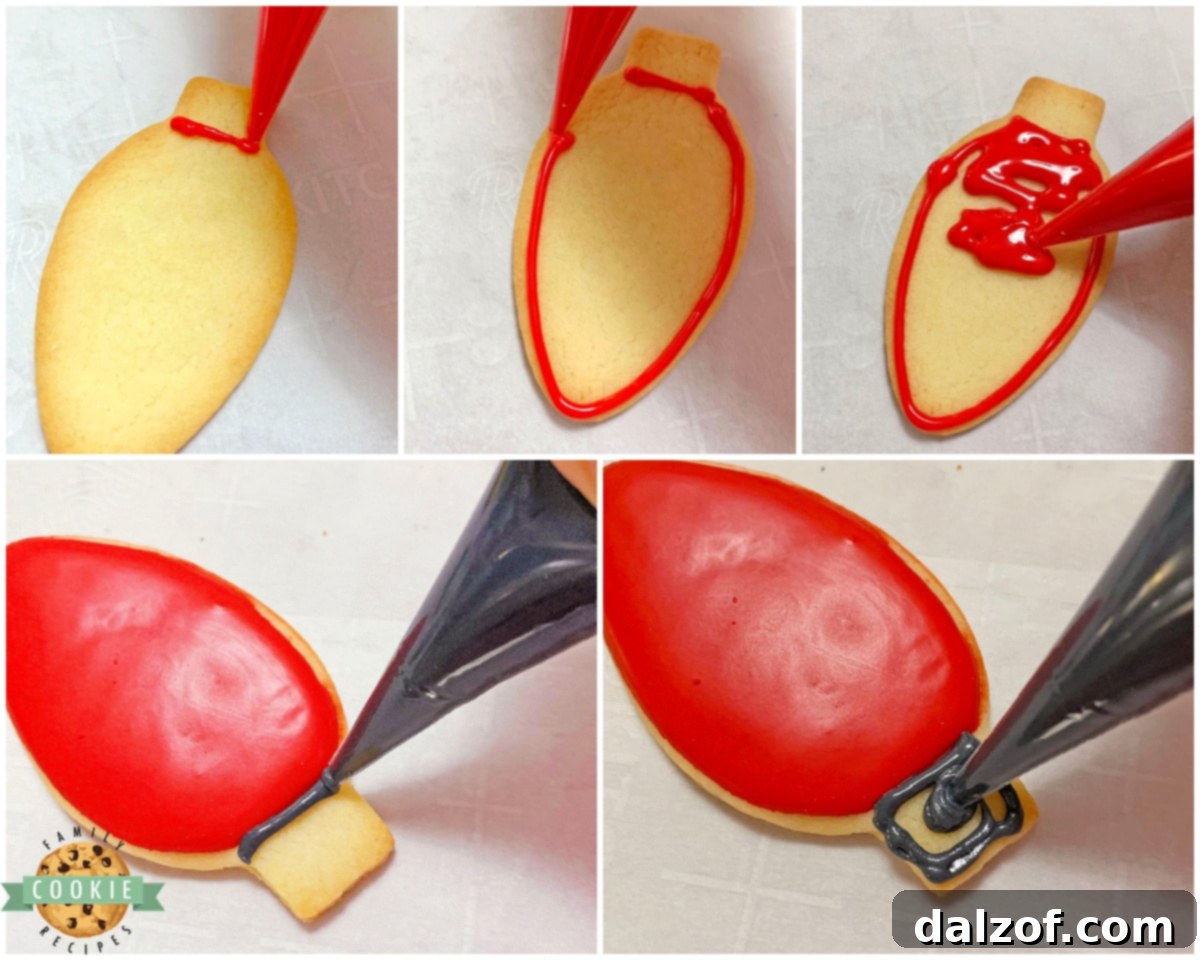
- Take one cooled cookie. Using a piping bag filled with a colored icing (e.g., red, green, yellow), pipe a delicate outline around the main bulb portion of the cookie.
- Immediately after outlining, “flood” the outlined area with the same color of icing. This means filling in the blank space with the solid color. Use a small offset spatula or a clean toothpick to gently spread the icing to the edges. Leave the small, narrower tip of the bulb un-iced at this stage.
- Repeat this process for all cookies, using various colors for a truly festive assortment.
- Once all the colorful bulb portions are iced, take the black icing. Trace an outline around the un-iced tip section of each cookie, and then gently flood this small end section with black icing. This creates the “socket” part of the light bulb.
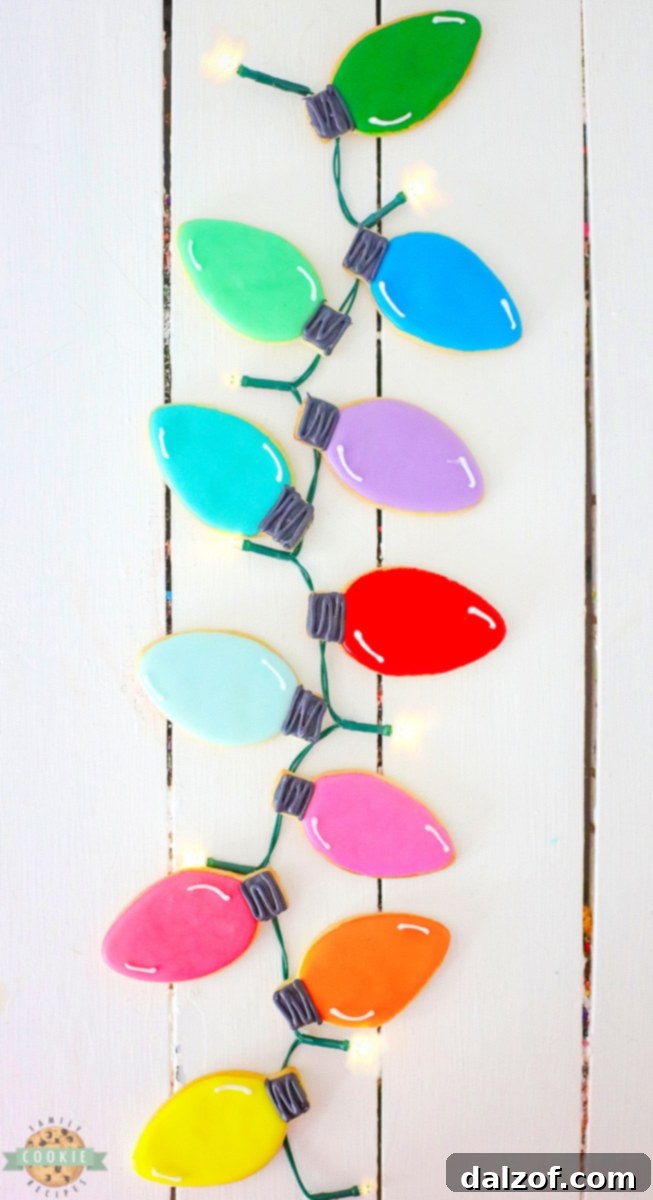
- Allow the black icing to dry and set for at least 15 minutes, or until it forms a light crust. This prevents colors from bleeding into one another.
- Once the black base is slightly set, take the black icing again and pipe three small lines in a zigzag pattern across the solid black part. This detail beautifully mimics the screw-in base of a real light bulb, adding a touch of realism.
- Finally, with a piping bag filled with white icing, create two small lines on each end of the colored bulb part of the cookie. These subtle white lines act as “light reflections,” giving your cookies an even more authentic and shiny light bulb appearance.
- Allow all the decorated cookies to dry completely at room temperature for several hours (or overnight) until the icing is hard to the touch. This prevents smudging and allows for easy stacking and storage. Enjoy your beautiful, edible **Christmas light cookies**!
Tips for Perfect Christmas Light Cookies
- **Chill Your Dough:** Don’t skip the chilling step! Cold dough is easier to handle, less sticky, and helps the cookies maintain their intricate shapes during baking, preventing spreading.
- **Even Thickness:** Roll your dough to an even ¼ inch thickness. This ensures all cookies bake uniformly and have a consistent texture.
- **Quality Vanilla:** Use a good quality vanilla extract. It makes a noticeable difference in the overall flavor profile of your butter cookies.
- **Sift Powdered Sugar:** Always sift your powdered sugar for the icing to prevent lumps, ensuring a smooth, glossy finish.
- **Gel Food Coloring is Best:** Gel food colors are highly concentrated and provide vibrant colors without thinning your icing too much, unlike liquid food colorings.
- **Icing Consistency:** For outlining, your royal icing should be thick enough to hold its shape. For flooding, it should be slightly thinner, flowing smoothly to fill the outlined areas. Test a small amount on parchment paper – it should settle flat within 10-15 seconds.
- **Patience with Drying:** Allow ample time for the icing to dry between steps, especially between flooding and adding details. This prevents colors from mixing and bleeding.
- **Use Parchment Paper:** Always bake on parchment paper. It ensures even baking, easy removal, and prevents sticking.
Frequently Asked Questions About Christmas Light Cookies
How long do iced cookies stay fresh?
These beautifully iced cookies will remain fresh and delicious for up to one week. To maintain their quality, store them in an airtight container at room temperature. It’s generally not recommended to freeze these cookies once they’ve been iced, as the vibrant colors can sometimes bleed or become dull during the thawing process.
Can I make a chocolate version of these cookies?
Absolutely! To transform this recipe into a rich chocolate version, simply add ¼ cup of unsweetened cocoa powder to the cookie dough along with the flour. This will create a darker, deeply flavored cookie that pairs wonderfully with the sweet icing.
Where can I find Christmas light bulb-shaped cookie cutters?
You might be able to find these specialized cookie cutters at larger retailers like Walmart, craft stores such as Michaels, or Joann Fabric and Craft Stores if you prefer to shop in person. For a wider selection and convenience, I highly recommend checking online retailers like Etsy for unique designs or Amazon, which offers a vast array of options.
Enhance Your Holiday Baking with More Christmas Cookie Recipes
If you’re looking to expand your holiday cookie repertoire, explore these other fantastic Christmas recipes that are sure to bring joy to your kitchen and your cookie platters:
- STACKED CHRISTMAS TREE COOKIES
- HOLIDAY SPICED SNICKERDOODLES
- CLASSIC CHRISTMAS CUT OUT COOKIES
- ADORABLE REINDEER CUT OUT COOKIES
- SPICED CHRISTMAS SHORTBREAD COOKIES
- EASY CHRISTMAS SUGAR COOKIE BARS
- SHIMMERING HOLIDAY STAR COOKIES
- FUN CHRISTMAS SPRINKLE COOKIES
- CARAMEL APPLE GINGERBREAD COOKIES
- THE ULTIMATE CHRISTMAS SUGAR COOKIE RECIPE
- COLLECTION OF BEST CHRISTMAS COOKIE RECIPES
- REFRESHING MINT CHRISTMAS COOKIES
- WHIMSICAL GRINCH THUMBPRINT COOKIES
- DELIGHTFUL GINGERBREAD SANDWICH COOKIES
These **Christmas light bulb cookies** are more than just a dessert; they’re a perfect way to infuse your holiday celebrations with brightness, color, and a touch of homemade charm. With this easy-to-follow recipe and simple decorating techniques, these festive cookies are destined to become a cherished and fun tradition in your home for many years to come. Gather your loved ones, bake up a batch, and let these edible lights illuminate your holiday spirit!
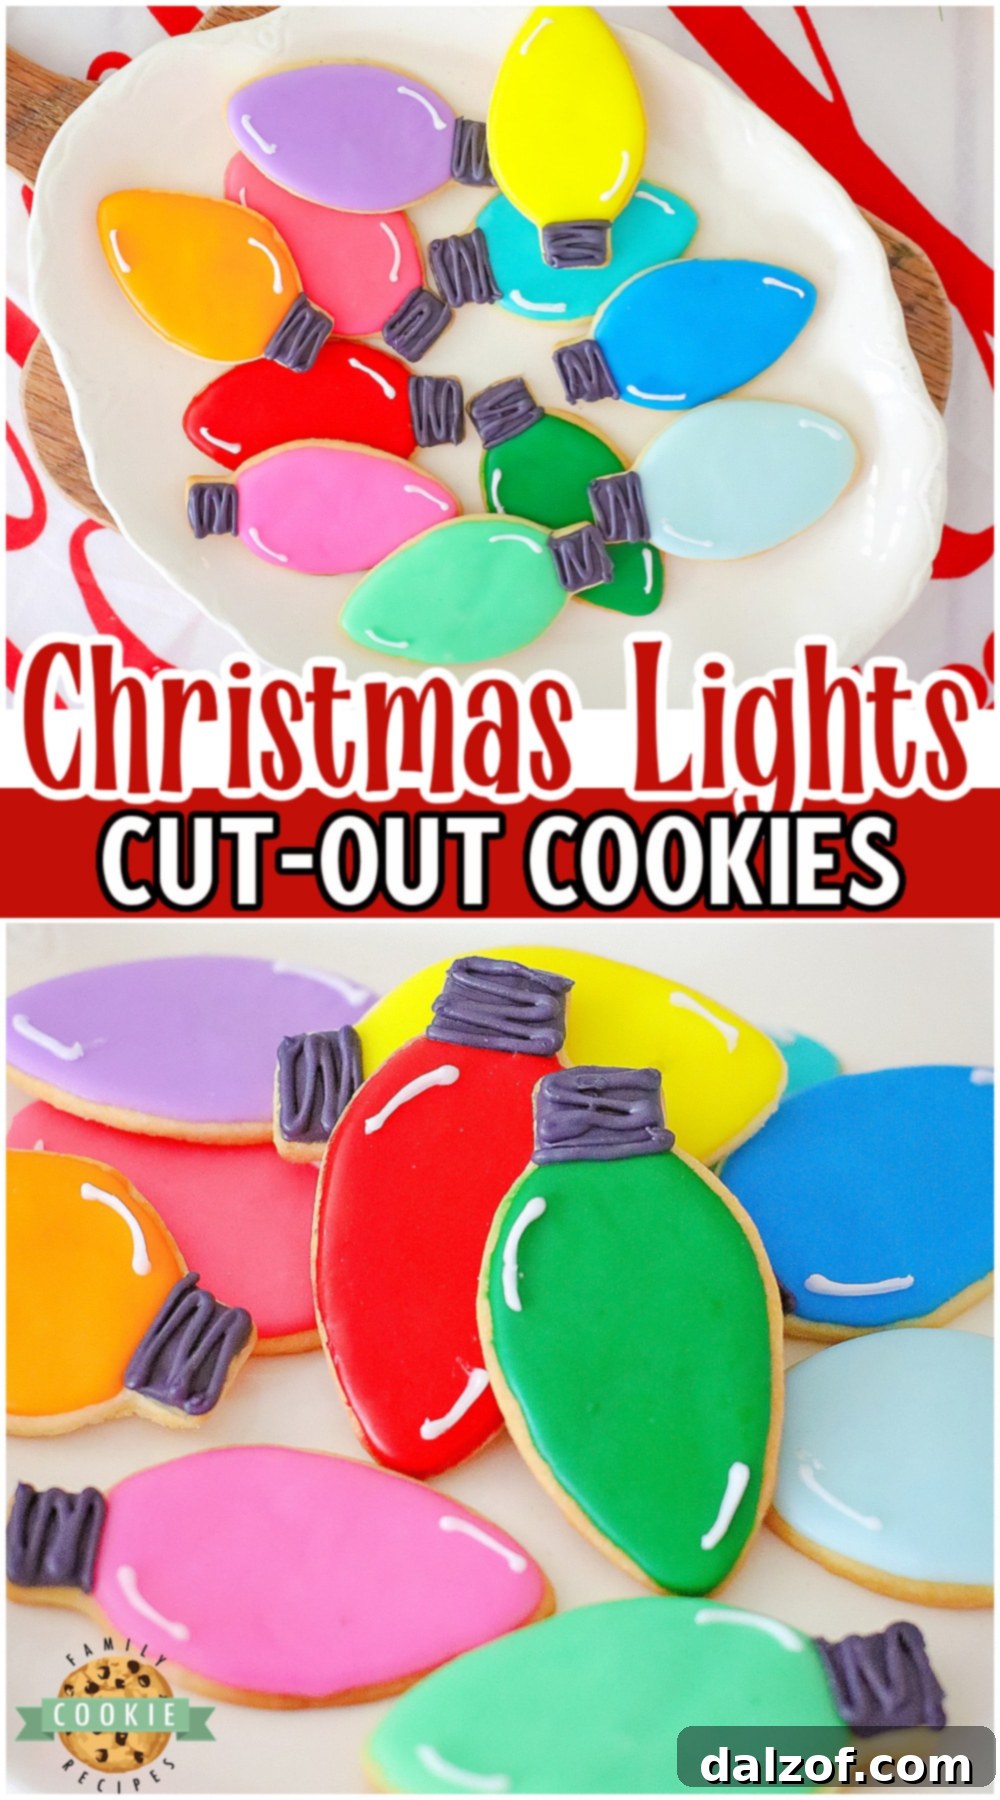
Christmas Lights Cut-Out Cookies
Festive Christmas light cut-out cookies are bright & colorful cookies perfect for Christmas trays! Simple butter cookies cut out, baked & frosted to look just like sparkly holiday lights on the tree!
Print Recipe | Pin Recipe | Rate This Recipe
Ingredients
- 1 cup Butter
- 1 cup Sugar
- 1 Egg
- 2 tsp vanilla extract
- ¼ cup cocoa (optional, for chocolate cookies)
- 2 ½ cups Flour
FOR THE ICING:
- 2 cups Powdered Sugar
- 3 tablespoons Meringue Powder
- ¼ cup Milk
- Gel food coloring (red, green, aqua, yellow, orange, purple, pink, light blue, black)
Instructions
- 1. In a large bowl, mix the Butter and Sugar until creamed, and light and fluffy.
- 2. Add the Egg, Vanilla, and stir until well mixed.
- 3. Add the Flour a little at a time, mixing between additions.
- 4. Roll out the dough on a floured surface, to about a 1/4 inch thick, and using the light bulb cookie cutter, cut out the cookies.
Bake the Cookies
- 5. Place the cut out Cookies on a Parchment lined Cookie sheet, and bake at 350 degrees F for 15-18 minutes. Remove from the oven and cool on a wire rack.
- 6. When the Cookies are cool, prepare the Icing colors to decorate.
- 7. Mix 2 cups of Powdered Sugar and 1/4 cup of Milk, plus 3 Tablespoons of Meringue Powder in a bowl until smooth, and set aside.
Color the Frosting
- 8. Set aside 13 Piping Bags. Divide the frosting into 13 small bowls and color each batch the color of bulb you would like.
- 9. Make sure one bowl is colored black for the tip of each bulb.
- 10. Fill each piping bag with its respective color and set aside.
Frost the Cookies
- 11. Take one cookie and pipe around the edge of the main bulb portion, then flood or fill in this solid colored area. Do not color the narrow tip of the bulb; that area will be piped using black icing.
- 12. After you have iced each bulb with its main color, take the black icing and trace around the edge of the small end section of each cookie, then gently flood that area.
- 13. Let the black icing dry for around 15 minutes. Then, using black icing, make 3 lines in a zigzag pattern over the solid black part to resemble the screw-in base of a light bulb.
- 14. Next, take a piping bag filled with white icing and make 2 small lines on each end of the colored bulb part of the cookie to create a light reflection effect. Allow cookies to fully set before serving. Enjoy!
Nutrition
Carbohydrates: 29g |
Protein: 2g |
Fat: 8g |
Saturated Fat: 5g |
Polyunsaturated Fat: 1g |
Monounsaturated Fat: 2g |
Trans Fat: 1g |
Cholesterol: 27mg |
Sodium: 72mg |
Potassium: 37mg |
Fiber: 1g |
Sugar: 18g |
Vitamin A: 250IU |
Calcium: 9mg |
Iron: 1mg
Tried this recipe? Mention @familycookierecipes or tag #familycookierecipes!