
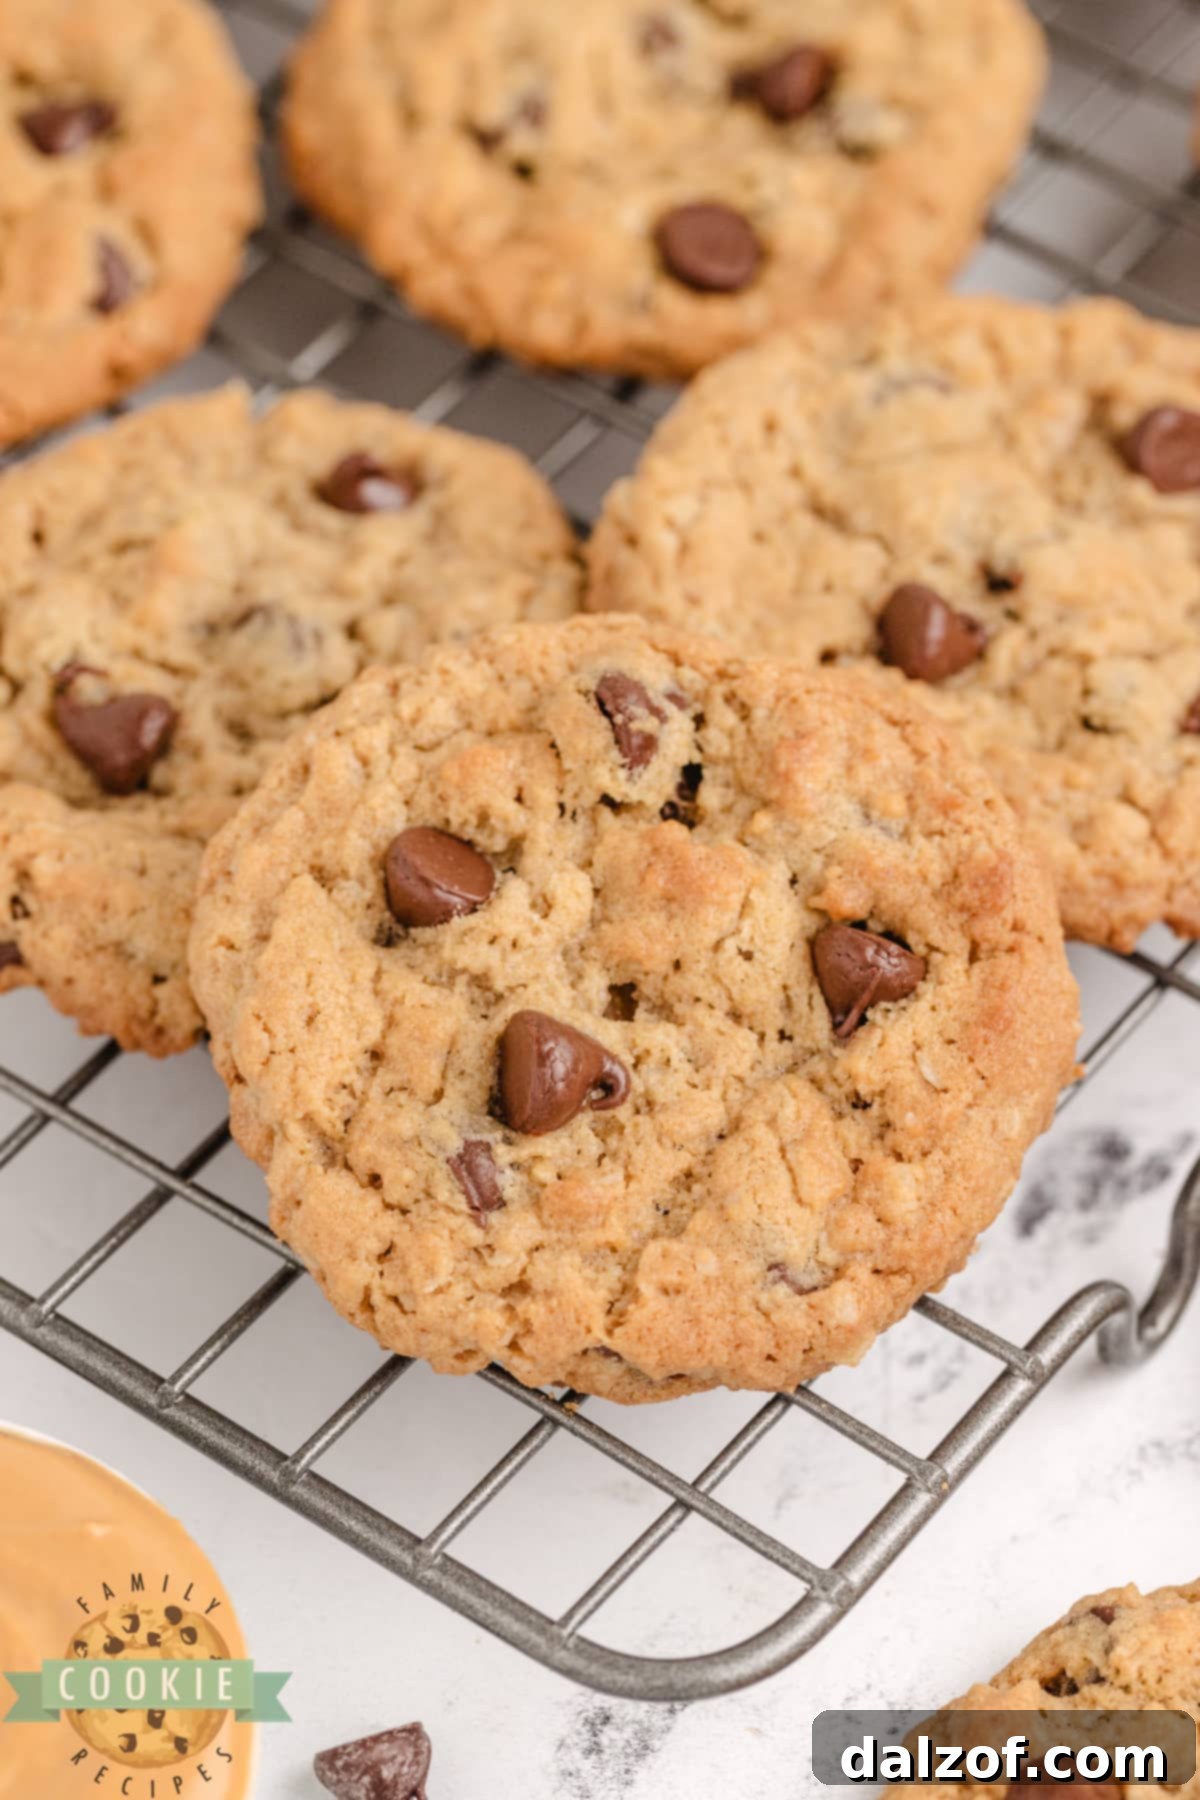
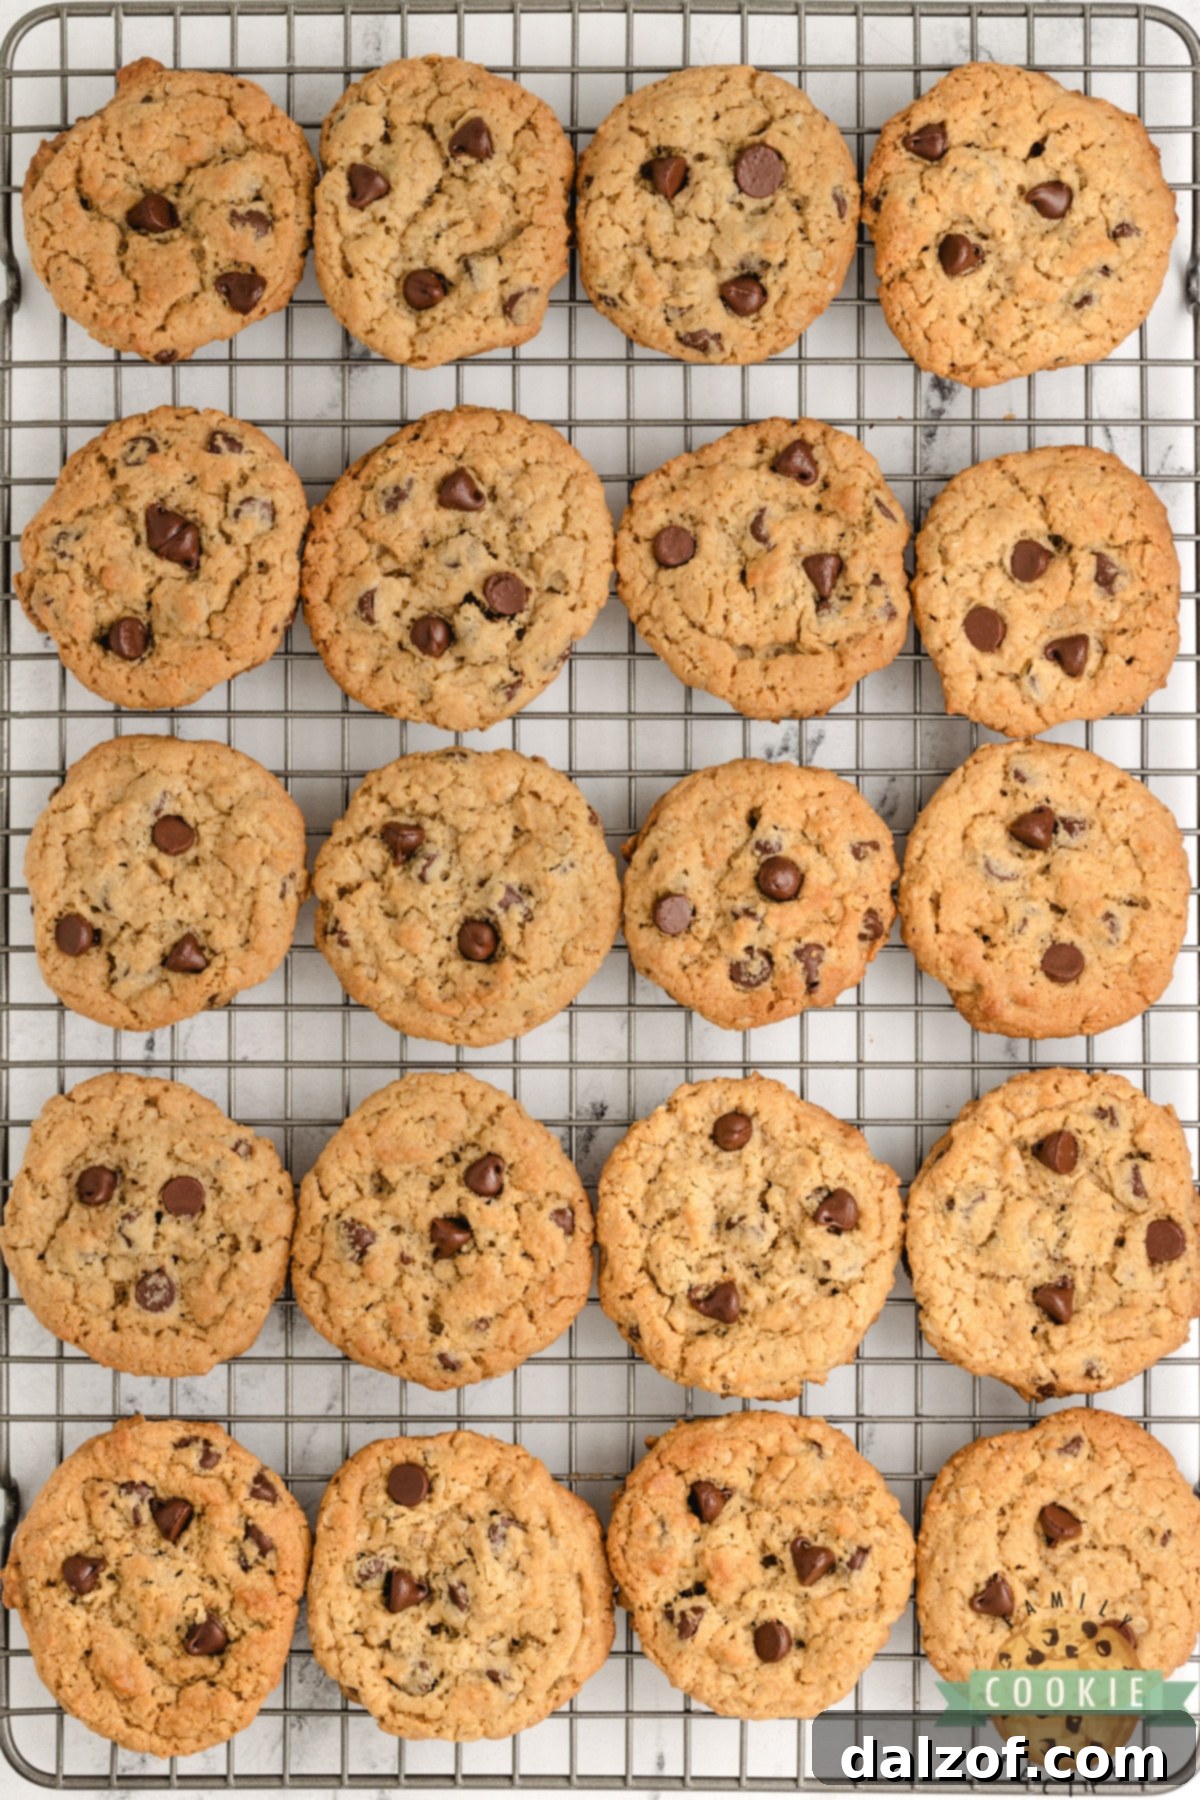
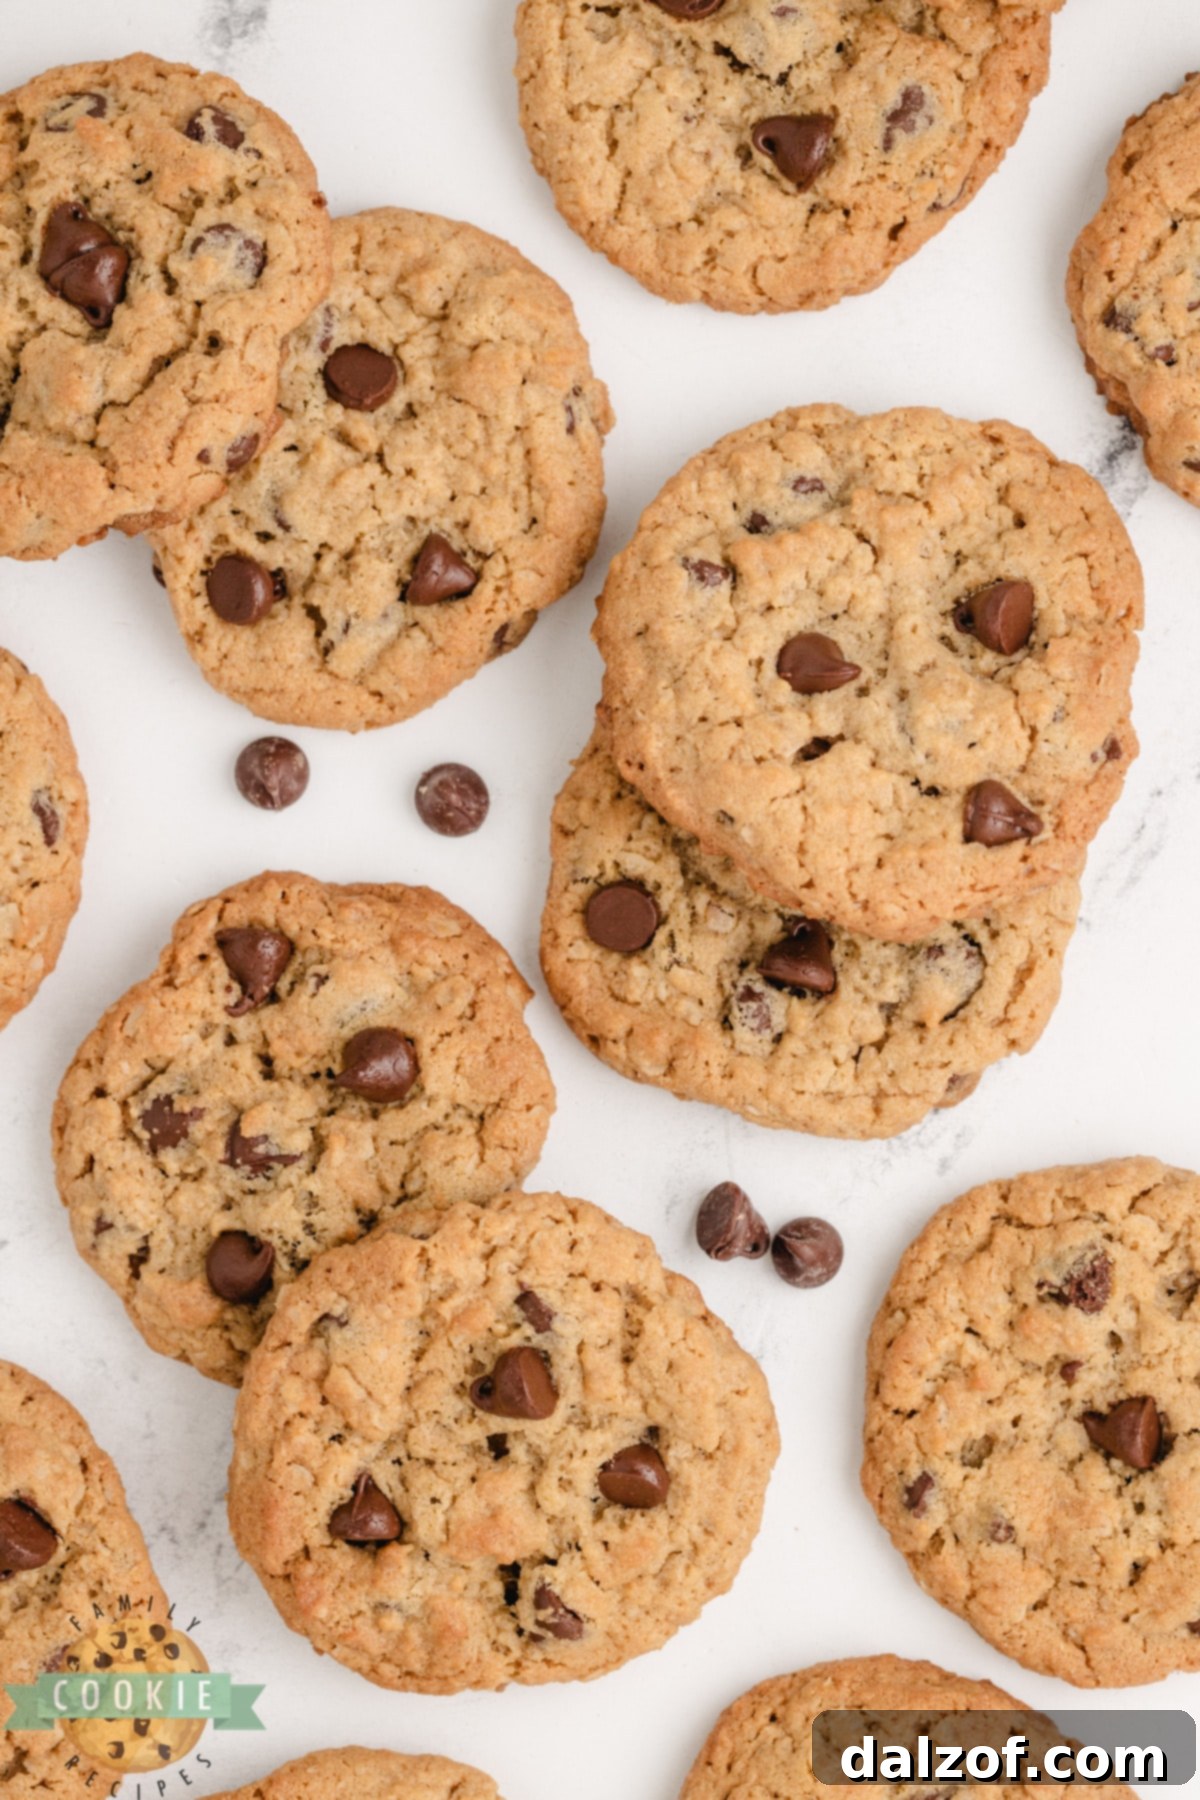
Welcome to the ultimate cookie fusion! Our Peanut Butter Oatmeal Chocolate Chip Cookies bring together three beloved classic flavors into one truly irresistible and comforting treat. Imagine the rich, nutty depth of peanut butter, the hearty chewiness of wholesome oats, and the delightful sweet bursts of chocolate chips, all perfectly combined in a single, perfectly baked cookie. These aren’t just cookies; they’re a symphony of textures and tastes, designed to be wonderfully soft, generously thick, and bursting with flavor in every single bite. They are the ideal choice for those moments when you simply can’t decide between a classic peanut butter cookie, a comforting oatmeal cookie, or a timeless chocolate chip cookie – because with this recipe, you get to savor all three in harmonious perfection. Get ready to bake a batch of happiness that will quickly become a family favorite and a go-to for any occasion, from casual snacking to impressive dessert spreads.
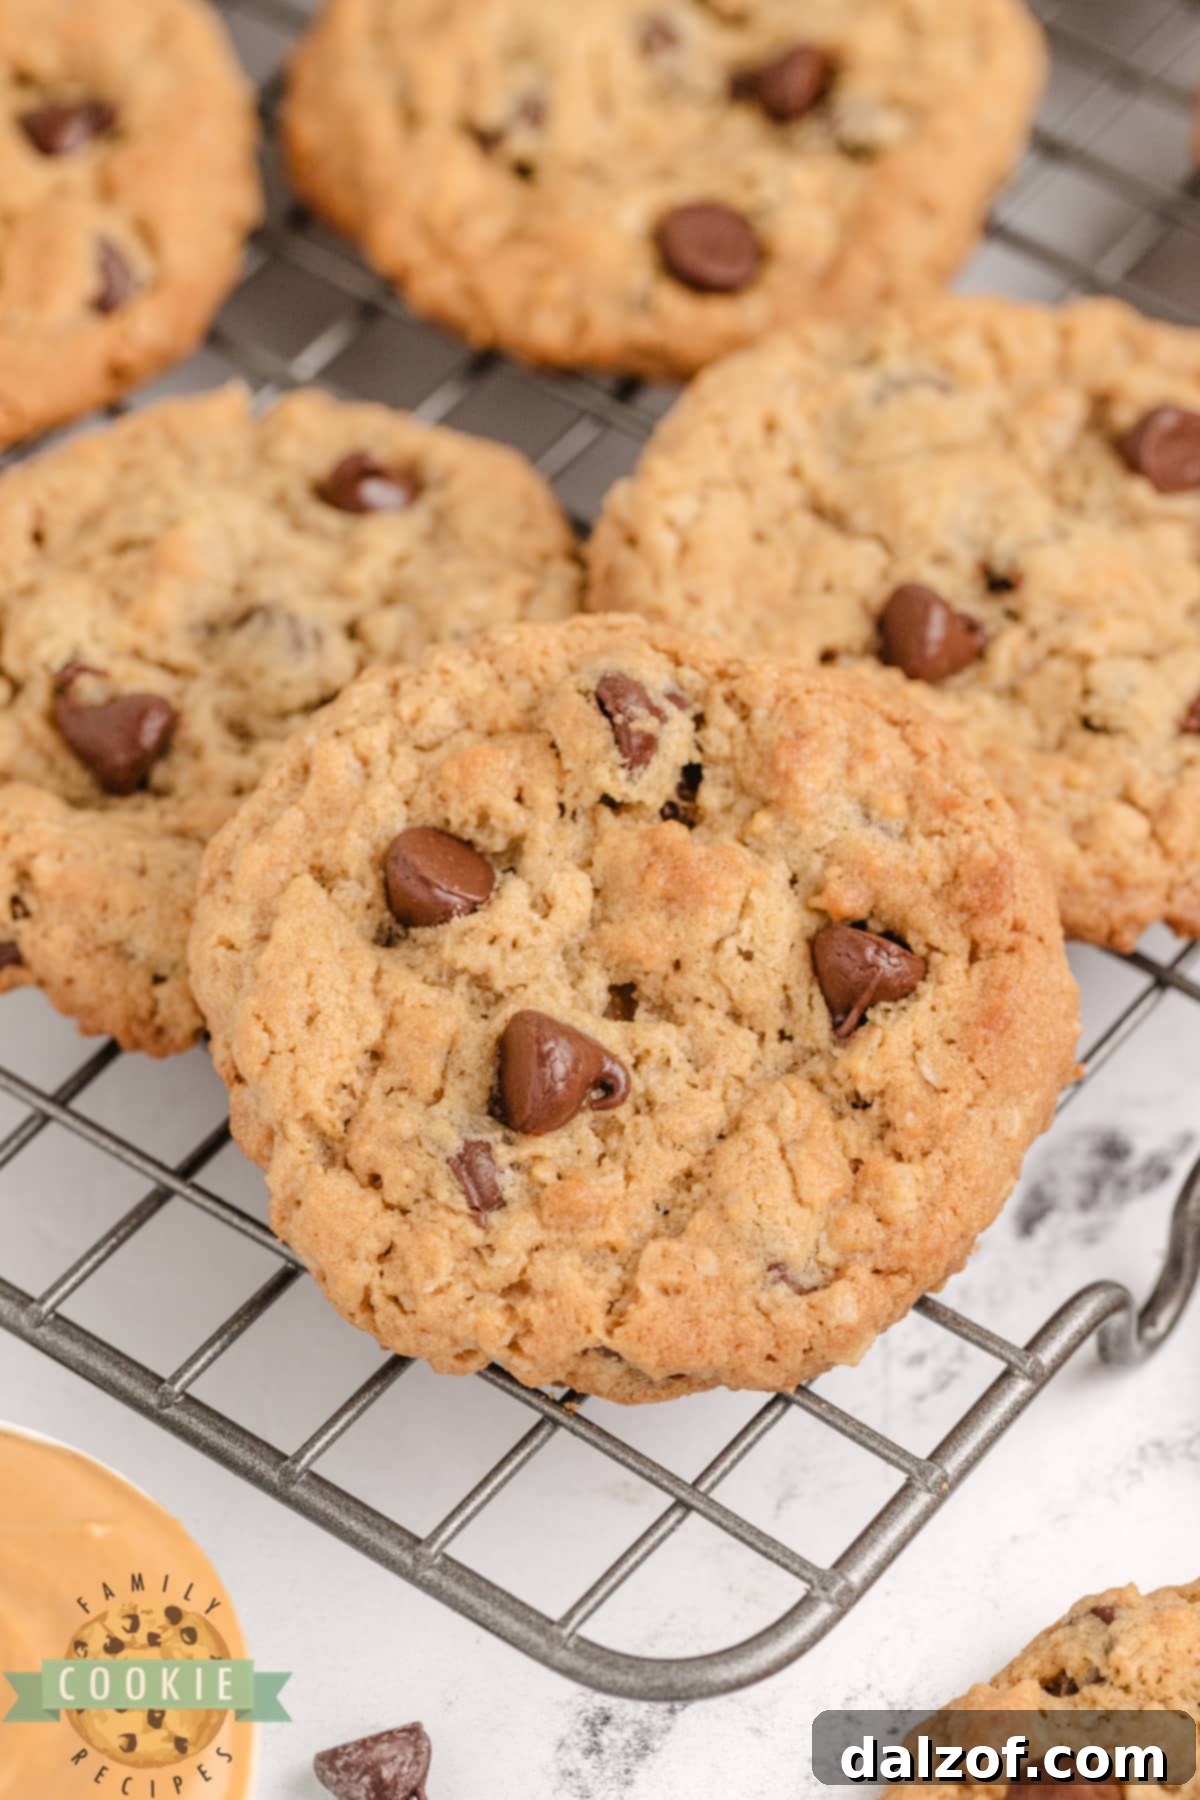
Why You’ll Love These Peanut Butter Oatmeal Chocolate Chip Cookies
These cookies aren’t just another recipe; they’re a solution to your cookie cravings, offering a delightful blend of textures and flavors that truly stand out. Here’s why this particular recipe will quickly become a cherished addition to your baking repertoire, guaranteeing smiles with every batch:
- Three Iconic Flavors in One Perfect Cookie: Why settle for one favorite when you can indulge in three? Every single bite of these cookies delivers the comforting richness of creamy peanut butter, the satisfying, wholesome texture of chewy oats, and the indulgent sweetness of gooey chocolate chips. It’s a harmonious flavor explosion that satisfies every sweet tooth and ensures no one has to pick just one kind of cookie. This ultimate mashup makes them truly unique and universally appealing.
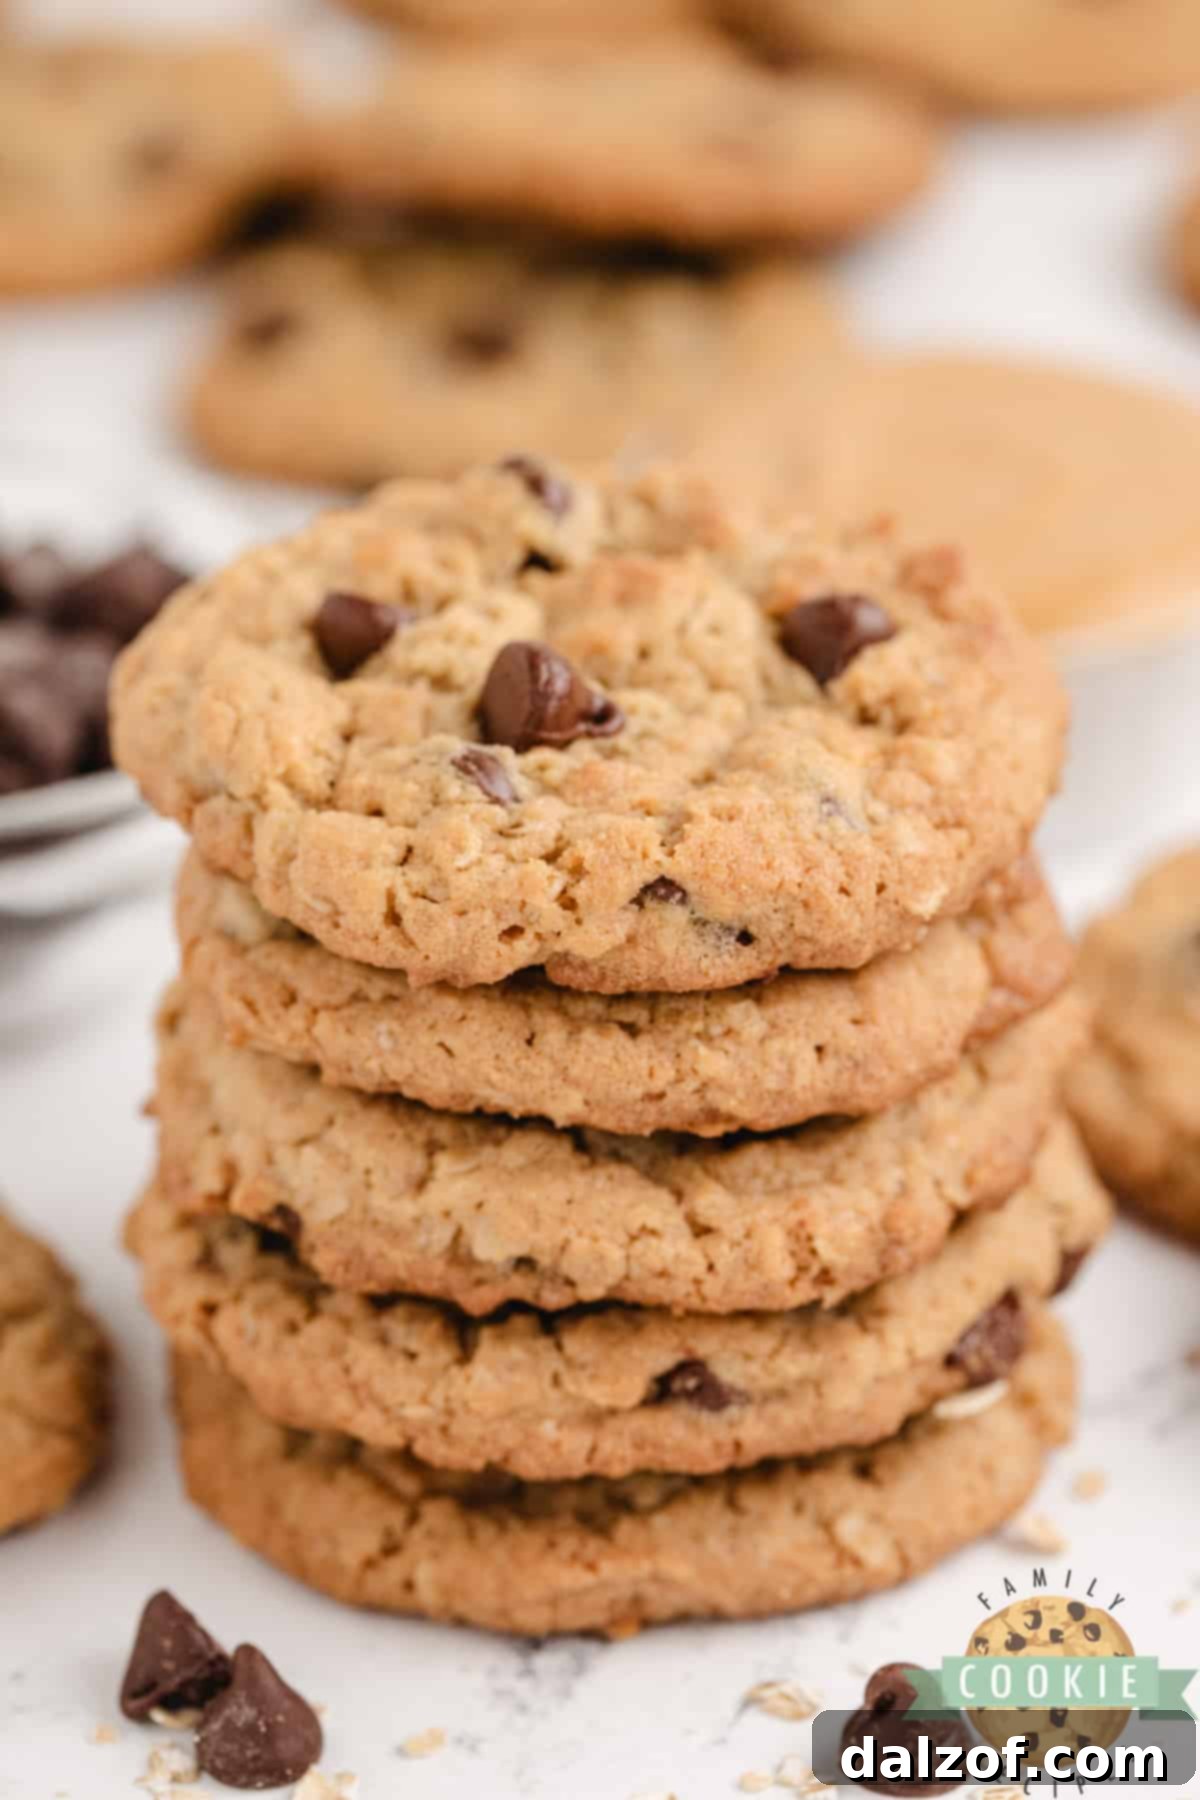
- Remarkably Soft, Thick, and Chewy Texture: Achieving the perfect cookie texture is an art, and these cookies master it with effortless grace. They are baked to be wonderfully soft in the center, generously thick and substantial, and delightfully chewy around the edges. This ideal balance means they not only taste incredible fresh out of the oven but also stay moist and delicious for days, maintaining their tender integrity without drying out.
- A Guaranteed Crowd-Pleaser for Any Occasion: Whether you’re baking for a casual family snack time, a bustling school event, a festive holiday gathering, a neighborhood potluck, or simply to treat yourself, these cookies are a guaranteed hit. Their irresistible combination of familiar and beloved tastes appeals to everyone, from children to adults, making them a go-to recipe that even the pickiest eaters find themselves reaching for repeatedly.
- Conveniently Freezer-Friendly for Anytime Enjoyment: Life often gets busy, but that doesn’t mean you have to sacrifice the joy of homemade treats. This recipe is incredibly freezer-friendly, offering flexibility and convenience. You can easily prepare the cookie dough in advance and freeze it, then bake fresh cookies whenever a craving strikes with minimal effort. Alternatively, baked cookies can also be frozen, providing an instant dessert solution for unexpected guests or a quick indulgent moment.
- Made with Simple, Everyday Pantry Ingredients: You won’t need a special trip to the grocery store for obscure or exotic ingredients. Everything required to craft these incredibly delicious cookies is likely already a staple in your kitchen pantry. This accessibility makes it an effortless and budget-friendly dessert hero, perfect for those spontaneous baking urges or when you need a reliable, comforting treat.
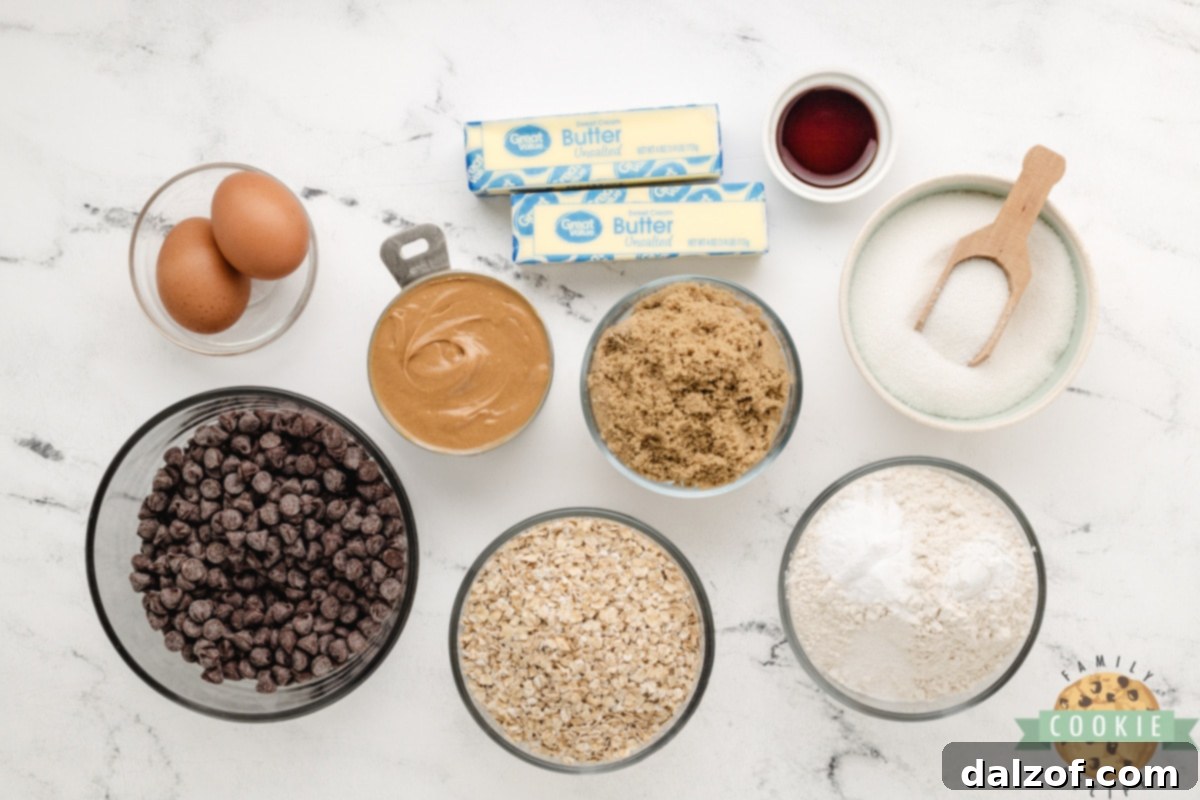
Essential Ingredients for Perfect Peanut Butter Oatmeal Chocolate Chip Cookies
Crafting the perfect cookie begins with understanding the role each ingredient plays and making the right choices. Here’s a closer look at what you’ll need and some valuable tips for selecting and preparing each component to ensure your cookies turn out beautifully every time:
- Oats: The star of the “oatmeal” component, oats provide a wonderful, wholesome chewiness and add a delightful texture to these cookies. For this recipe, we generally recommend using quick oats, as they blend seamlessly into the dough and contribute to a softer, more uniform chew. Alternatively, a combination of quick oats and old-fashioned oats can offer a pleasant balance, combining tenderness with a slightly heartier bite. If you prefer to use old-fashioned oats alone, be aware that the cookies will be noticeably chewier. For a less dense result when using old-fashioned oats exclusively, consider giving them a quick pulse in a food processor a few times to break them down slightly before adding them to the dough.
- All-Purpose Flour: This common baking staple forms the fundamental structural backbone of your cookies. All-purpose flour is incredibly versatile and works perfectly in this recipe, contributing to the desired soft yet sturdy crumb. For those seeking an even more tender cookie, you could experiment with cake flour, which has a lower protein content. Regardless of the type, always measure your flour correctly by first fluffing it in its container with a spoon, then gently scooping it into your measuring cup until it’s overflowing, and finally leveling it off with the back of a knife or a straight edge. This method prevents over-measuring, which can lead to dense, dry, and crumbly cookies.
- Baking Soda and Baking Powder: These two are the critical leavening agents responsible for the cookies’ rise, texture, and perfect spread. Baking soda, which is activated by the acidic brown sugar in the recipe, primarily helps with horizontal spread and contributes to a tender interior. Baking powder, on the other hand, provides vertical lift, resulting in a slightly lighter and softer texture. For optimal results, always ensure that your baking soda and baking powder are fresh and not expired; using old leavening agents is a common reason why cookies might turn out flat or overly dense.
- Salt: A small but mighty ingredient, salt doesn’t just add a touch of flavor; it plays a crucial role in enhancing and balancing all the other ingredients. Specifically, it helps to pop the sweetness of the chocolate chips and the richness of the peanut butter, preventing the cookies from tasting overly sweet or one-dimensional. Just a quarter teaspoon is enough to make all the other flavors sing in harmony.
- Butter: We recommend using high-quality butter for the best flavor and texture. Salted butter can be used, but if you do, you might slightly reduce the amount of added salt in the recipe to adjust for the sodium content in the butter. It’s imperative that your butter is softened to room temperature before you begin. This allows it to cream properly with the sugars, incorporating air to create a light and airy base for your dough, which is absolutely crucial for achieving those soft, tender, and chewy cookies. Avoid using margarine, as its different fat and water content can negatively affect the cookie’s texture and spread.
- Creamy Peanut Butter: The choice of peanut butter significantly impacts both the texture and the spread of your cookies. For these delightful cookies, a regular creamy peanut butter (such as Jif, Skippy, or a similar quality store-brand alternative) is highly recommended. These types of peanut butter contain stabilizers that help the cookies maintain their desired shape and thickness during baking. Many bakers have noted that using a more natural peanut butter, which tends to separate and be oilier, can cause the cookies to spread too much, resulting in a thinner, sometimes greasier texture. While chunky peanut butter can be used for an added textural crunch, creamy peanut butter will generally yield the most consistent and desired soft-chewy result.
- Granulated Sugar and Brown Sugar: This carefully balanced combination of sugars is absolutely key to the cookies’ exquisite texture and depth of flavor. Granulated sugar contributes to the cookies’ spread and helps create a slightly crisp edge. Brown sugar, with its molasses content, adds essential moisture, contributes significantly to the chewy texture, and imparts a lovely, subtle caramel-like flavor. Always ensure your brown sugar is soft and fresh; if it’s hardened, gently soften it before use to guarantee it incorporates smoothly and evenly into the dough, ensuring consistent results.
- Large Eggs: Eggs serve as a vital binding agent in this recipe, effectively holding all the other ingredients together while providing essential structure and richness to the cookie dough. Using two large eggs is standard for most cookie recipes, and for optimal incorporation into the butter and sugar mixture, it’s best if they are at room temperature.
- Vanilla Extract: A touch of high-quality vanilla extract is indispensable, as it elevates and harmonizes all the other flavors in the cookie. The quality of your vanilla extract truly makes a discernible difference, so opt for a good pure vanilla extract if possible. It adds a warm, inviting, and aromatic note that perfectly completes the overall flavor profile of these irresistible treats.
- Semi-Sweet Chocolate Chips: A generous 12-ounce bag of semi-sweet chocolate chips is typically perfect for ensuring a delightful scattering of chocolate in every single cookie. Semi-sweet chocolate offers a beautifully balanced sweetness that pairs wonderfully with the nutty peanut butter and hearty oats. However, feel free to customize to your heart’s content! Milk chocolate chips will yield a sweeter cookie, which is great for those with a serious sweet tooth, while dark chocolate chips will add a richer, slightly bitter counterpoint, creating an even more complex and sophisticated flavor profile. You can even mix different types of chocolate for a truly custom and varied chocolate experience.
Expert Tips for Baking Your Best Peanut Butter Oatmeal Chocolate Chip Cookies
While the full recipe instructions are detailed in the recipe card below, these expert tips will help ensure your Peanut Butter Oatmeal Chocolate Chip Cookies turn out perfectly soft, thick, and chewy every single time, making your baking experience even more successful:
- Prepare Dough Ahead for Ultimate Convenience: This cookie dough is an excellent candidate for making ahead. After you’ve mixed the dough, simply shape it into uniform balls using a cookie scoop and place them on a baking sheet lined with parchment paper. Flash freeze them for about 30-60 minutes until they are solid. Once firm, transfer the frozen dough balls to a zip-top freezer bag or an airtight container. They can be stored for up to 3 months. When you’re ready to bake, simply place the frozen dough balls on a prepared cookie sheet and bake directly from frozen, adding an extra 1–2 minutes to the suggested bake time. This is a fantastic way to have freshly baked, warm cookies with minimal effort whenever a craving strikes or unexpected guests arrive.
- Avoid Overbaking for Ultimate Softness: This is perhaps the most crucial tip for achieving that coveted soft, chewy cookie texture. When you remove the cookies from the oven, their centers may look slightly underdone, puffed, or even a bit shiny. Resist the powerful urge to bake them longer! They will continue to cook and set beautifully as they cool on the hot baking sheet. This carryover cooking results in that perfectly tender, melt-in-your-mouth texture you desire. Overbaking is the leading cause of dry, hard, and crumbly cookies, so trust the process.
- Master Accurate Flour Measurement: Incorrect flour measurement is a common baking pitfall that can drastically alter the final texture of your cookies. To measure flour correctly, first fluff the flour thoroughly in its container with a spoon. Then, gently scoop the fluffed flour into your measuring cup until it’s overflowing. Finally, use the back of a knife or any straight edge to carefully level off the excess flour. Never pack flour into the cup, as this can add up to 25% too much flour, leading to dense, dry, and unappealing cookies.
- Opt for Regular Creamy Peanut Butter: As highlighted in the ingredients section, the type of peanut butter you choose makes a significant difference in the cookie’s consistency and spread. For the most consistent results and to prevent excessive spreading, it’s best to stick to regular creamy peanut butter (like Jif or Skippy, or a similar quality brand). Natural peanut butter, with its higher and often separated oil content, can cause the cookies to spread much more thinly on the baking sheet and may result in a greasier or more delicate final product.
- Achieve Uniform Cookies with a Scoop: For beautifully consistent cookies that bake evenly and look professionally made, investing in a good quality cookie scoop is a game-changer. Using a scoop ensures that each cookie dough ball is exactly the same size. This consistency is vital because it means all your cookies will bake in approximately the same amount of time, preventing some from being overdone while others are still underbaked. Plus, it makes for a much more appealing and professional-looking batch.
- Cooling is Key for Setting and Flavor: While it’s incredibly tempting to grab a hot cookie right out of the oven, allowing them to cool on the baking sheet for at least 5 to 10 minutes before transferring them to a wire rack is essential. This initial cooling time allows the cookies to firm up and prevents them from breaking apart when you move them. Transferring them to a wire rack after this helps air circulate all around the cookies, ensuring they cool completely and develop their final, delightful texture without becoming soggy on the bottom.
- Preheat Your Oven Properly: Always give your oven ample time to fully preheat to the specified temperature before placing your cookie sheets inside. A properly preheated oven ensures that the cookies start baking at the correct temperature from the moment they enter, which is critical for consistent baking, optimal spread, and achieving that perfect soft and chewy texture. An under-heated oven can cause excessive spreading and uneven baking.
Storage Solutions for Your Delicious Cookies
Proper storage is essential to ensure your Peanut Butter Oatmeal Chocolate Chip Cookies remain as fresh, soft, and delightful as possible for an extended period. Here are the best methods to keep them tasting great, whether for a few days or several months:
- Storing at Room Temperature: Once your cookies have completely cooled to room temperature, transfer them to an airtight container. They will stay wonderfully fresh and soft for up to 5 days. For an extra touch that truly helps maintain their remarkable softness and chewiness, consider placing a slice of fresh plain white bread in the container with the cookies. The bread will naturally release its moisture, which the cookies will then gently absorb, helping them retain their tender texture. Remember to replace the bread slice every day or two as it begins to dry out.
- Freezing Baked Cookies: These incredible cookies freeze exceptionally well, making them perfect for meal prepping desserts or having treats on hand. Once the cookies have cooled completely, arrange them in a single layer on a baking sheet and flash freeze them for about 30 minutes to an hour, or until they are firm. This step prevents them from sticking together. After flash freezing, transfer the solid cookies to a freezer-safe zip-top bag or an airtight container, layering them with parchment paper if stacking. They can be stored in the freezer for up to 3 months without losing much flavor or texture. When you’re ready to enjoy, simply remove the desired number of cookies and thaw them at room temperature for an hour or two before serving.
- Freezing Cookie Dough for Future Baking: Freezing cookie dough is a brilliant way to ensure you always have access to warm, fresh-baked cookies with minimal effort. Prepare the dough as instructed in the recipe, then portion it into individual cookie balls using a scoop. Place these dough balls on a baking sheet lined with parchment paper and freeze them until they are completely solid (this typically takes 1-2 hours). Once frozen, transfer the dough balls to a heavy-duty freezer bag or an airtight container. You can store the frozen dough for up to 3 months. When you desire fresh-baked goodness, simply place the frozen dough balls directly on a prepared baking sheet and bake as usual, adding just an extra 1–2 minutes to the normal baking time until they are golden brown and set. This method offers unparalleled convenience for enjoying homemade cookies on demand!
PEANUT BUTTER OATMEAL CHOCOLATE CHIP COOKIES RECIPE
These thick, chewy Peanut Butter Oatmeal Chocolate Chip Cookies are a dream come true for anyone who loves the combination of nutty peanut butter, hearty oats, and sweet chocolate. This recipe delivers a soft and satisfying treat perfect for any occasion!
Rating: 5 out of 5 stars (based on 3 votes)
Pin Recipe
Rate This Recipe
Course: Cookies
Cuisine: American
Keyword: Peanut Butter Oatmeal Chocolate Chip Cookies
Prep Time: 10 minutes
Cook Time: 10 minutes
Servings: 30 cookies
Calories: 276 kcal per cookie
Author: Jessica & Nellie
Ingredients
- 2 cups quick oats
- 1 ¾ cups all-purpose flour
- 1 tsp baking powder
- 1 tsp baking soda
- ¼ tsp salt
- 1 cup butter, softened to room temperature
- 1 cup creamy peanut butter (regular, like Jif or Skippy)
- 1 cup granulated sugar
- 1 cup brown sugar, packed
- 2 large eggs
- 1 tsp vanilla extract (pure for best flavor)
- 12 oz bag semi-sweet chocolate chips (or milk/dark as preferred)
Instructions
- Preheat your oven to 350°F (175°C). Prepare two large baking sheets by lining them with parchment paper for easy cleanup and to prevent sticking.
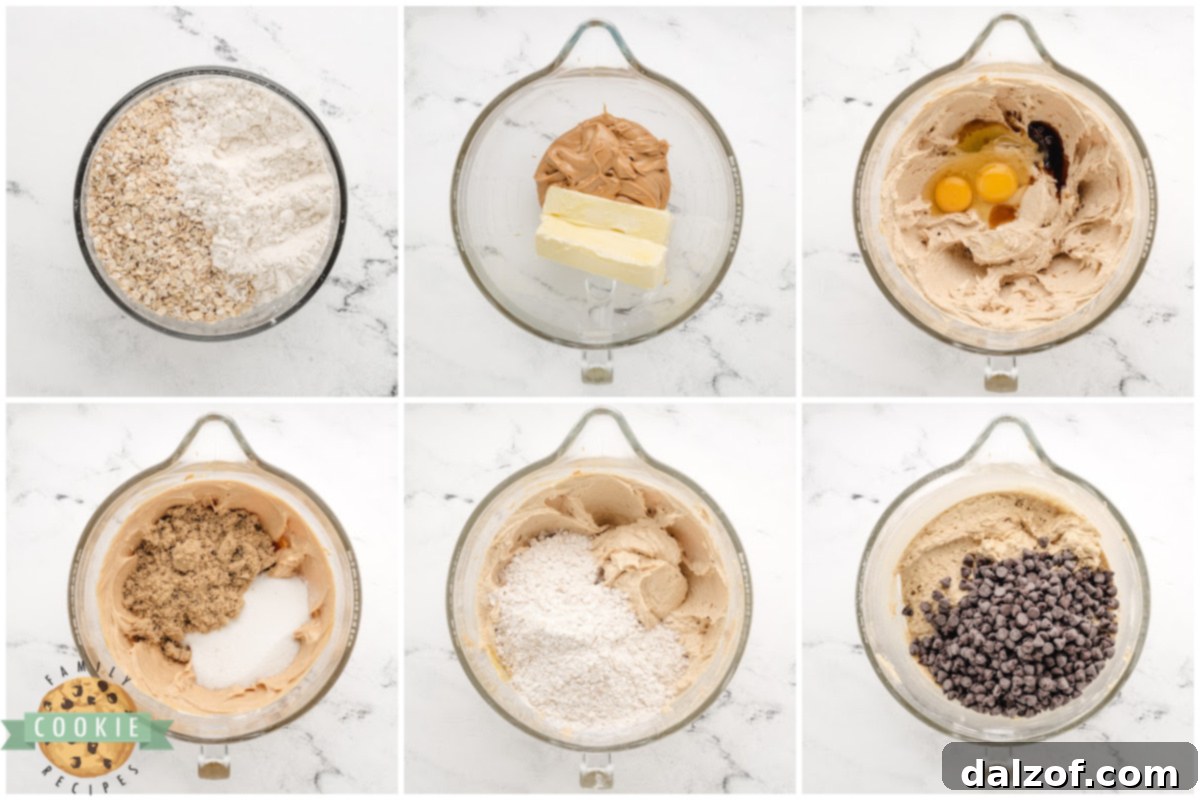
- In a medium bowl, whisk together the dry ingredients: quick oats, all-purpose flour, baking powder, baking soda, and salt. Set this mixture aside.
- In a large mixing bowl, using an electric mixer on medium speed, cream together the softened butter and creamy peanut butter until smooth and well combined, about 1-2 minutes.
- Add the granulated sugar and brown sugar to the butter mixture. Continue beating for another 2-3 minutes until the mixture is light, fluffy, and pale in color. Remember to scrape down the sides of the bowl as needed to ensure even mixing.
- Beat in the large eggs one at a time, ensuring each is fully incorporated into the batter before adding the next. Stir in the vanilla extract until just combined.
- Gradually add the reserved flour mixture to the wet ingredients, mixing on low speed until just combined. Be careful not to overmix the dough, as this can lead to tough cookies. Once the flour is mostly incorporated, fold in the semi-sweet chocolate chips by hand until they are evenly distributed throughout the dough.
- Drop rounded tablespoonfuls of dough (or use a cookie scoop for uniform size and even baking) about 2 inches apart onto your prepared baking sheets.
- Bake for 10-11 minutes, or until the edges are lightly golden brown and the centers still look slightly soft and puffed. It’s crucial not to overbake; the cookies will continue to set as they cool.
- Allow the cookies to cool on the baking sheets for 5 minutes before carefully transferring them to a wire rack to cool completely. This helps them firm up and prevents breakage. Enjoy these warm, freshly baked treats!
Nutrition Information (per cookie)
Calories: 276 kcal | Carbohydrates: 31g | Protein: 5g | Fat: 16g | Saturated Fat: 7g | Polyunsaturated Fat: 2g | Monounsaturated Fat: 5g | Trans Fat: 0.3g | Cholesterol: 28mg | Sodium: 149mg | Potassium: 169mg | Fiber: 2g | Sugar: 19g | Vitamin A: 211IU | Calcium: 30mg | Iron: 2mg
Tried this recipe? We’d love to see your delicious creations! Mention @familycookierecipes or tag #familycookierecipes on Instagram!
Frequently Asked Questions About Baking These Cookies
Here are answers to some common questions that arise when baking Peanut Butter Oatmeal Chocolate Chip Cookies. These insights are designed to help you achieve perfect results every time and troubleshoot any concerns you might have:
Can I use old-fashioned oats instead of quick oats?
Yes, you absolutely can use old-fashioned oats. However, it’s important to be aware that this will result in a noticeably chewier and perhaps slightly denser cookie texture. If you prefer a softer bite while still enjoying the wholesome essence of old-fashioned oats, a useful trick is to pulse them a few times in a food processor or blender. This action breaks them down slightly, creating a texture closer to quick oats without compromising on that rustic, hearty oat flavor. Alternatively, for a balanced texture, you can use a 50/50 mix of quick and old-fashioned oats.
Can I substitute dark chocolate chips?
Definitely! Swapping in dark chocolate chips is a fantastic idea, especially if you appreciate a richer, more sophisticated flavor profile in your baked goods. Dark chocolate introduces a slight bitterness and deeper cocoa notes that beautifully balance the sweetness of the cookie dough and the distinct nuttiness of the peanut butter. This creates a more complex and appealing taste experience. You can also get creative by using milk chocolate chips for extra sweetness, white chocolate chips for a creamy contrast, or even a delightful mix of different chocolate varieties to customize your batch to your exact preferences.
Do I need to chill the dough?
One of the great advantages and time-saving features of this particular recipe is that no chilling is strictly necessary! The cookies are specifically designed to bake up thick, soft, and chewy right away without this extra step, making them perfect for spontaneous baking. However, if you do have the time and desire slightly puffier cookies with minimal spread, chilling the dough for about 30 minutes to an hour before baking can certainly help. Chilled dough tends to spread less because the butter is firmer, resulting in a slightly taller, more compact, and chewier cookie. For a richer, more developed flavor, chilling the dough overnight can also deepen the taste profiles.
Can I make these cookies gluten-free?
Yes, making these delicious cookies gluten-free is quite achievable! The primary adjustments involve swapping the all-purpose flour for a high-quality gluten-free 1:1 baking blend (it’s crucial to ensure this blend already contains xanthan gum, or add it as recommended by the blend’s manufacturer). Additionally, make sure that your oats are certified gluten-free, as some oats can be processed in facilities that also handle wheat, leading to cross-contamination. While the texture of gluten-free versions will be very similar, gluten-free cookies can sometimes be a little more delicate or crumbly, so handle them with care, especially when they are warm.
Can I reduce the sugar in this recipe?
You can certainly try reducing the sugar if you prefer a less sweet cookie, but it’s important to do so judiciously. We recommend cutting back on both the granulated sugar and brown sugar by about ¼ cup each (totaling a ½ cup reduction) as a safe starting point. While this adjustment typically won’t drastically affect the overall texture, it’s essential to remember that sugar plays a significant role beyond just sweetness; it also contributes to the cookies’ chewiness, tenderness, and attractive browning during baking. Reducing sugar too much might result in cookies that are slightly less tender, spread a bit less, and might not achieve the same golden-brown color.
What’s the best way to keep them soft for days?
The secret to keeping these delicious cookies wonderfully soft and delightfully fresh for several days is a simple yet effective trick: store them in an airtight container along with a slice of fresh plain white bread. The bread naturally releases its moisture into the enclosed environment, which the cookies then gently absorb, helping them retain their tender, chewy texture. Just be sure to replace the bread slice every day or two as it begins to dry out, and always ensure the cookies are completely cooled before storing them to prevent any unwanted condensation from forming inside the container.
Can I freeze the dough for later?
Absolutely! This recipe is incredibly versatile and well-suited for freezing dough. To do so, simply shape the prepared dough into uniform balls using a cookie scoop, then place them on a baking sheet lined with parchment paper and freeze until they are completely solid (this usually takes 1-2 hours). Once firm, transfer the frozen dough balls to a freezer-safe zip-top bag or an airtight container. They can be stored in the freezer for up to 3 months. When you’re ready to bake, simply place the frozen dough balls directly on a prepared baking sheet and bake as usual, adding just an extra 1–2 minutes to the suggested baking time until they are golden brown and cooked through. It’s the perfect solution for enjoying warm, fresh-baked cookies on demand!
Can I double this recipe?
Yes, this recipe doubles (or even triples!) beautifully without encountering any issues. It’s an excellent and reliable choice for baking large batches, whether you’re preparing for a big party, contributing to a school bake sale, participating in a festive holiday cookie swap, or simply stocking up your freezer. Just ensure you have adequately large mixing bowls and enough baking sheets to comfortably accommodate the increased volume of dough and cookies.
How can I make them extra thick and bakery-style?
To achieve those coveted extra thick, bakery-style cookies that look like they came straight from a professional bakery, you can implement a few effective strategies. First, consider slightly increasing the flour by 2–3 tablespoons. Second, chilling the dough for at least 1 hour (or even overnight) before baking will significantly reduce spread and help the cookies hold their substantial shape. Third, using a larger cookie scoop (such as a 3-tablespoon size) will naturally result in bigger, thicker, and wonderfully substantial cookies that have that impressive bakery-quality appearance.
Can I add nuts or other mix-ins?
By all means, feel free to customize and get creative with additional mix-ins! These cookies provide a fantastic base for extra flavors and textures. Chopped nuts like peanuts, pecans, or walnuts can add an additional layer of crunch and intensify the nutty flavor profile. Shredded coconut, toffee bits, mini marshmallows, or even dried cranberries could also be delightful additions, offering varied tastes and textures. Just aim to keep the total quantity of extra mix-ins to around 1.5 to 2 cups to avoid overwhelming the dough and potentially affecting its texture or its ability to hold together properly.
More Delicious Peanut Butter Cookie Recipes to Explore
If you’ve fallen head over heels for the magical combination of peanut butter in cookies, you’ll be thrilled to discover these other fantastic recipes from our cherished collection. From unbelievably quick no-bake options to deeply indulgent and decadent treats, there’s a peanut butter cookie recipe here to satisfy every single craving and occasion:
- Fast and No-Bake Wonders: Short on time but craving something incredibly sweet and satisfying? These recipes deliver amazing flavor with minimal effort and no oven required. Try our incredibly easy No-Bake Peanut Butter Blossoms for a classic twist, or whip up the ever-popular Peanut Butter No-Bake Cookies for quick, delightful results in mere minutes. Perfect for last-minute treats!
- Timeless Classic Favorites: For those who truly appreciate tradition and the pure, unadulterated goodness of peanut butter, these recipes are tried-and-true winners that have stood the test of time. Our irresistibly chewy Peanut Butter Chocolate Chip Cookies and the comforting nostalgia of Grandma’s Peanut Butter Cookies are both packed with that unmistakable rich, nutty peanut flavor everyone adores.
- Extra Indulgent and Decadent Options: If you’re seeking a cookie experience that’s rich, gooey, and utterly luxurious, look no further than these show-stopping recipes. Explore the delightful surprises hidden within Peanut Butter Surprise Cookies, savor the luscious combination in our rich Peanut Butter Fudge Cookie Cups, and indulge in the irresistible charm of Reese’s Peanut Butter Pudding Cookies. Each offers a unique and decadent twist on classic peanut butter bliss that will satisfy even the most intense sweet cravings.
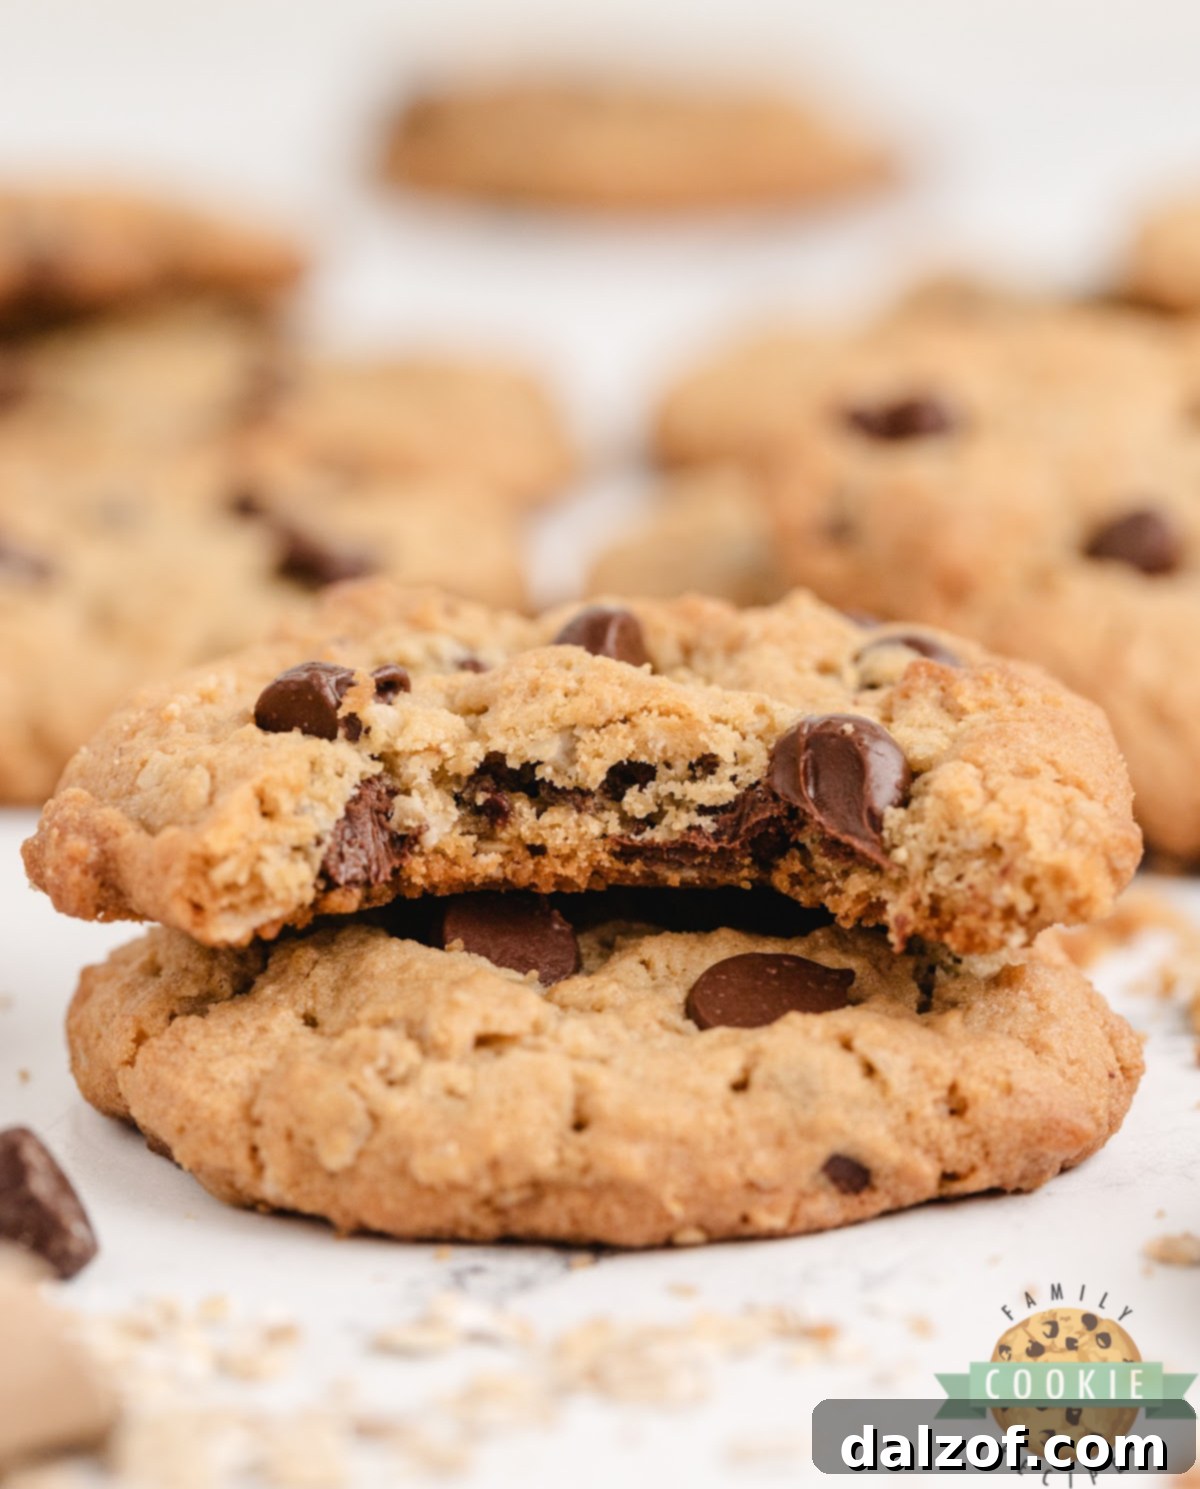
In conclusion, these **Peanut Butter Oatmeal Chocolate Chip Cookies** truly represent the ultimate mash-up of flavors and textures, making them a standout in any cookie jar. They consistently deliver a soft, wonderfully chewy, and deeply satisfying experience, generously packed with the delightful sweetness of chocolate and the comforting richness of nutty peanut butter. Whether you’re baking for family, friends, a special gathering, or simply to treat yourself to a moment of pure bliss, this recipe promises a delightful outcome that celebrates the very best of three classic cookies in one harmonious bite. Don’t wait – gather your ingredients and get ready to bake a batch of these unforgettable, crowd-pleasing cookies today!