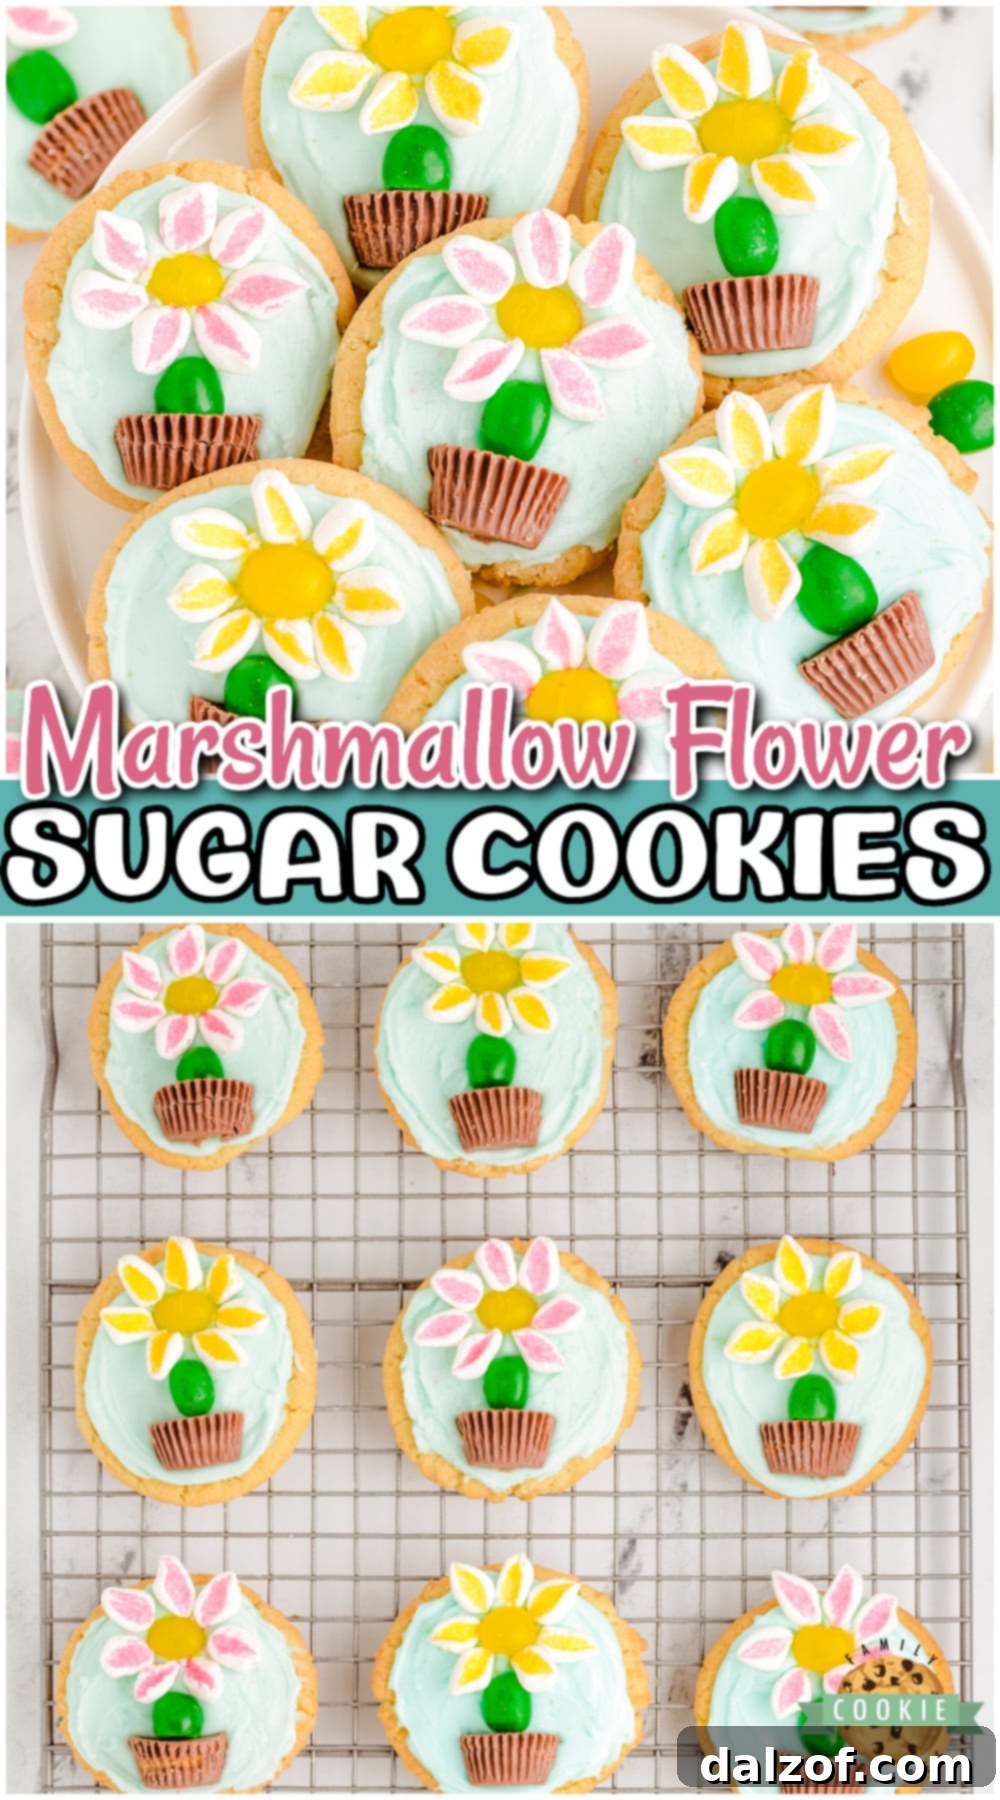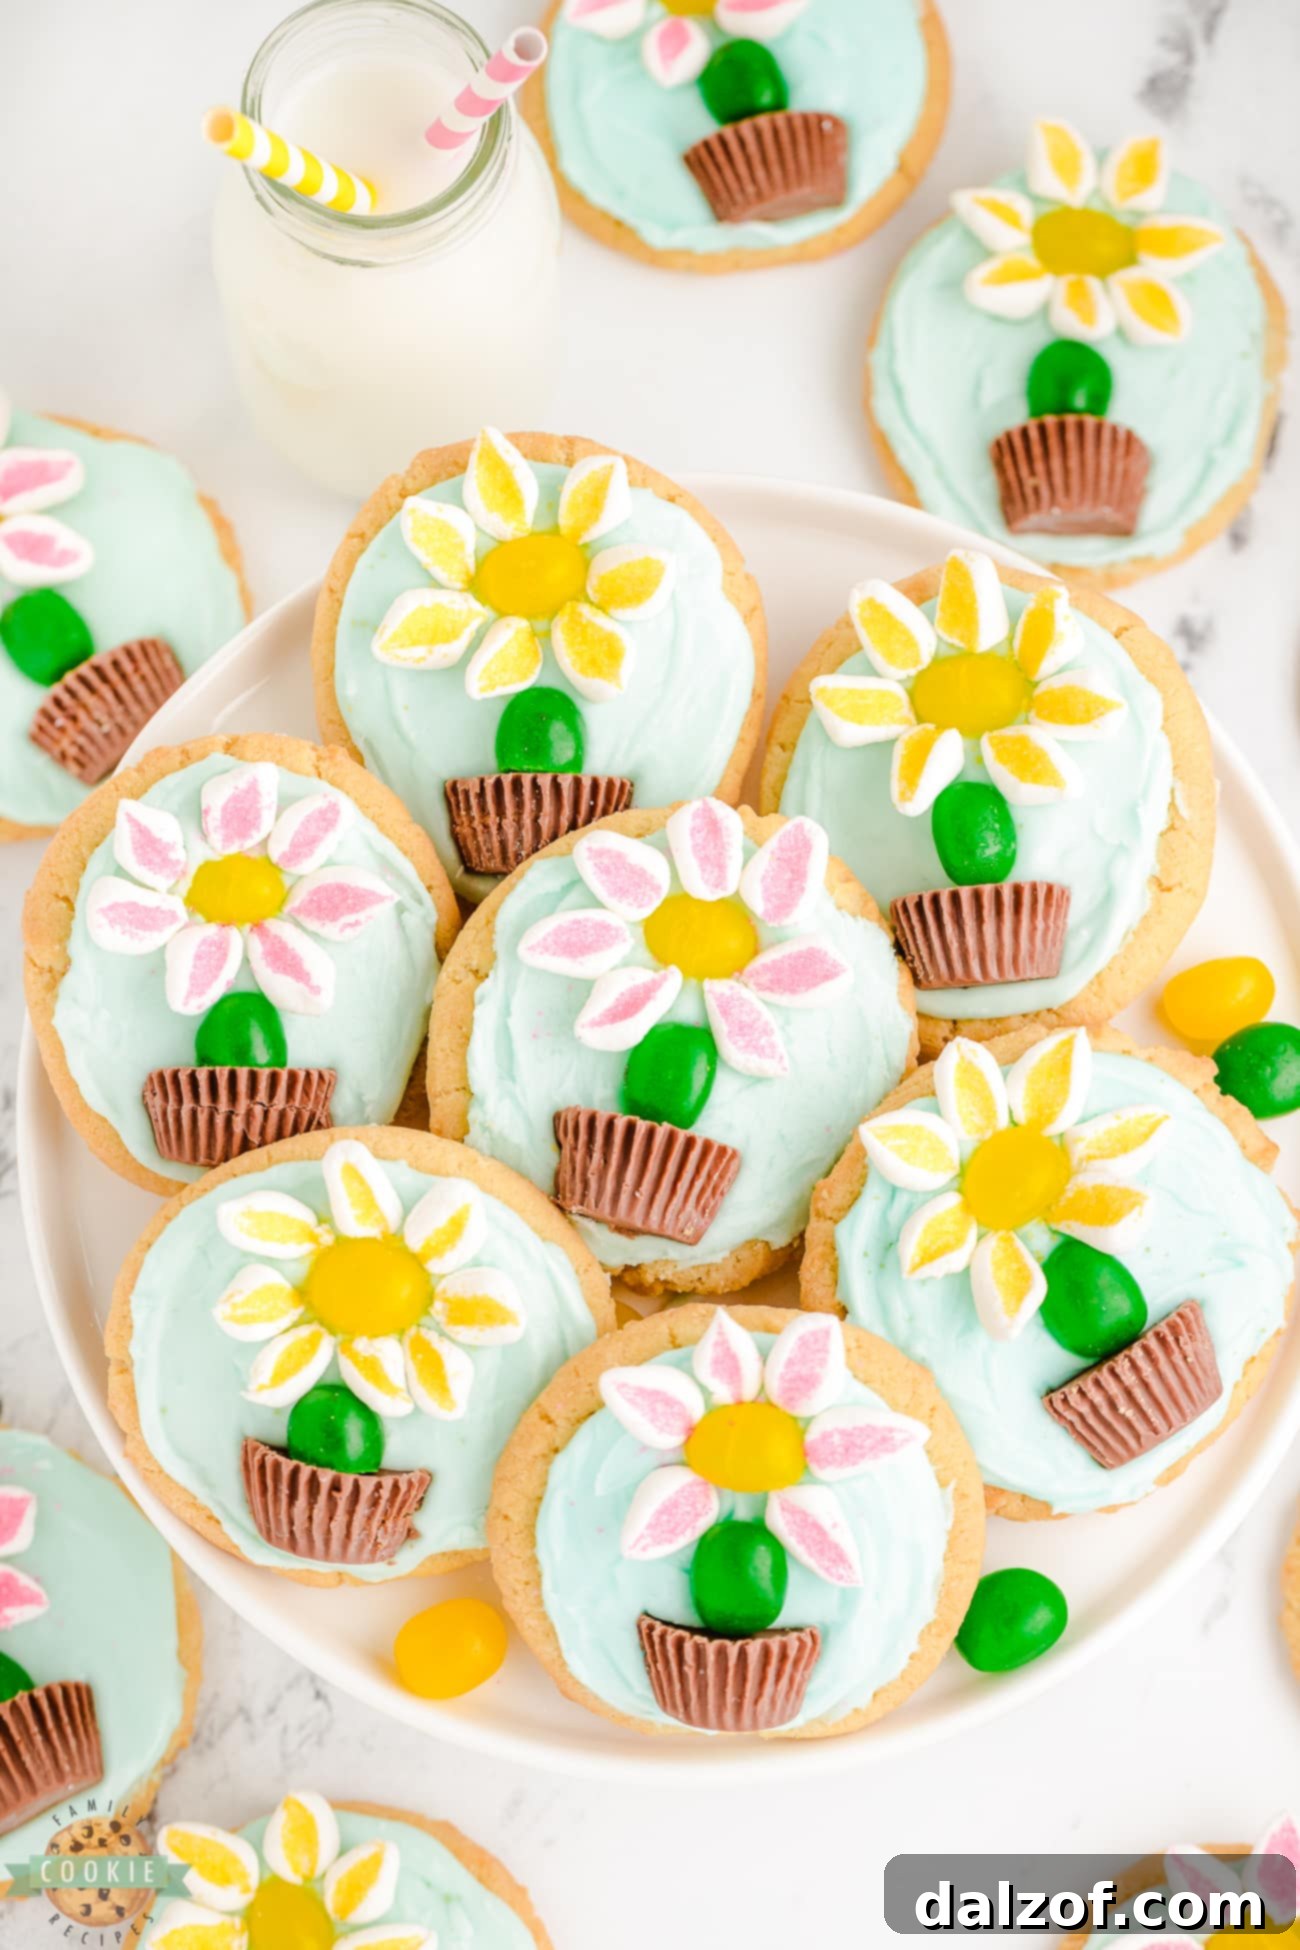
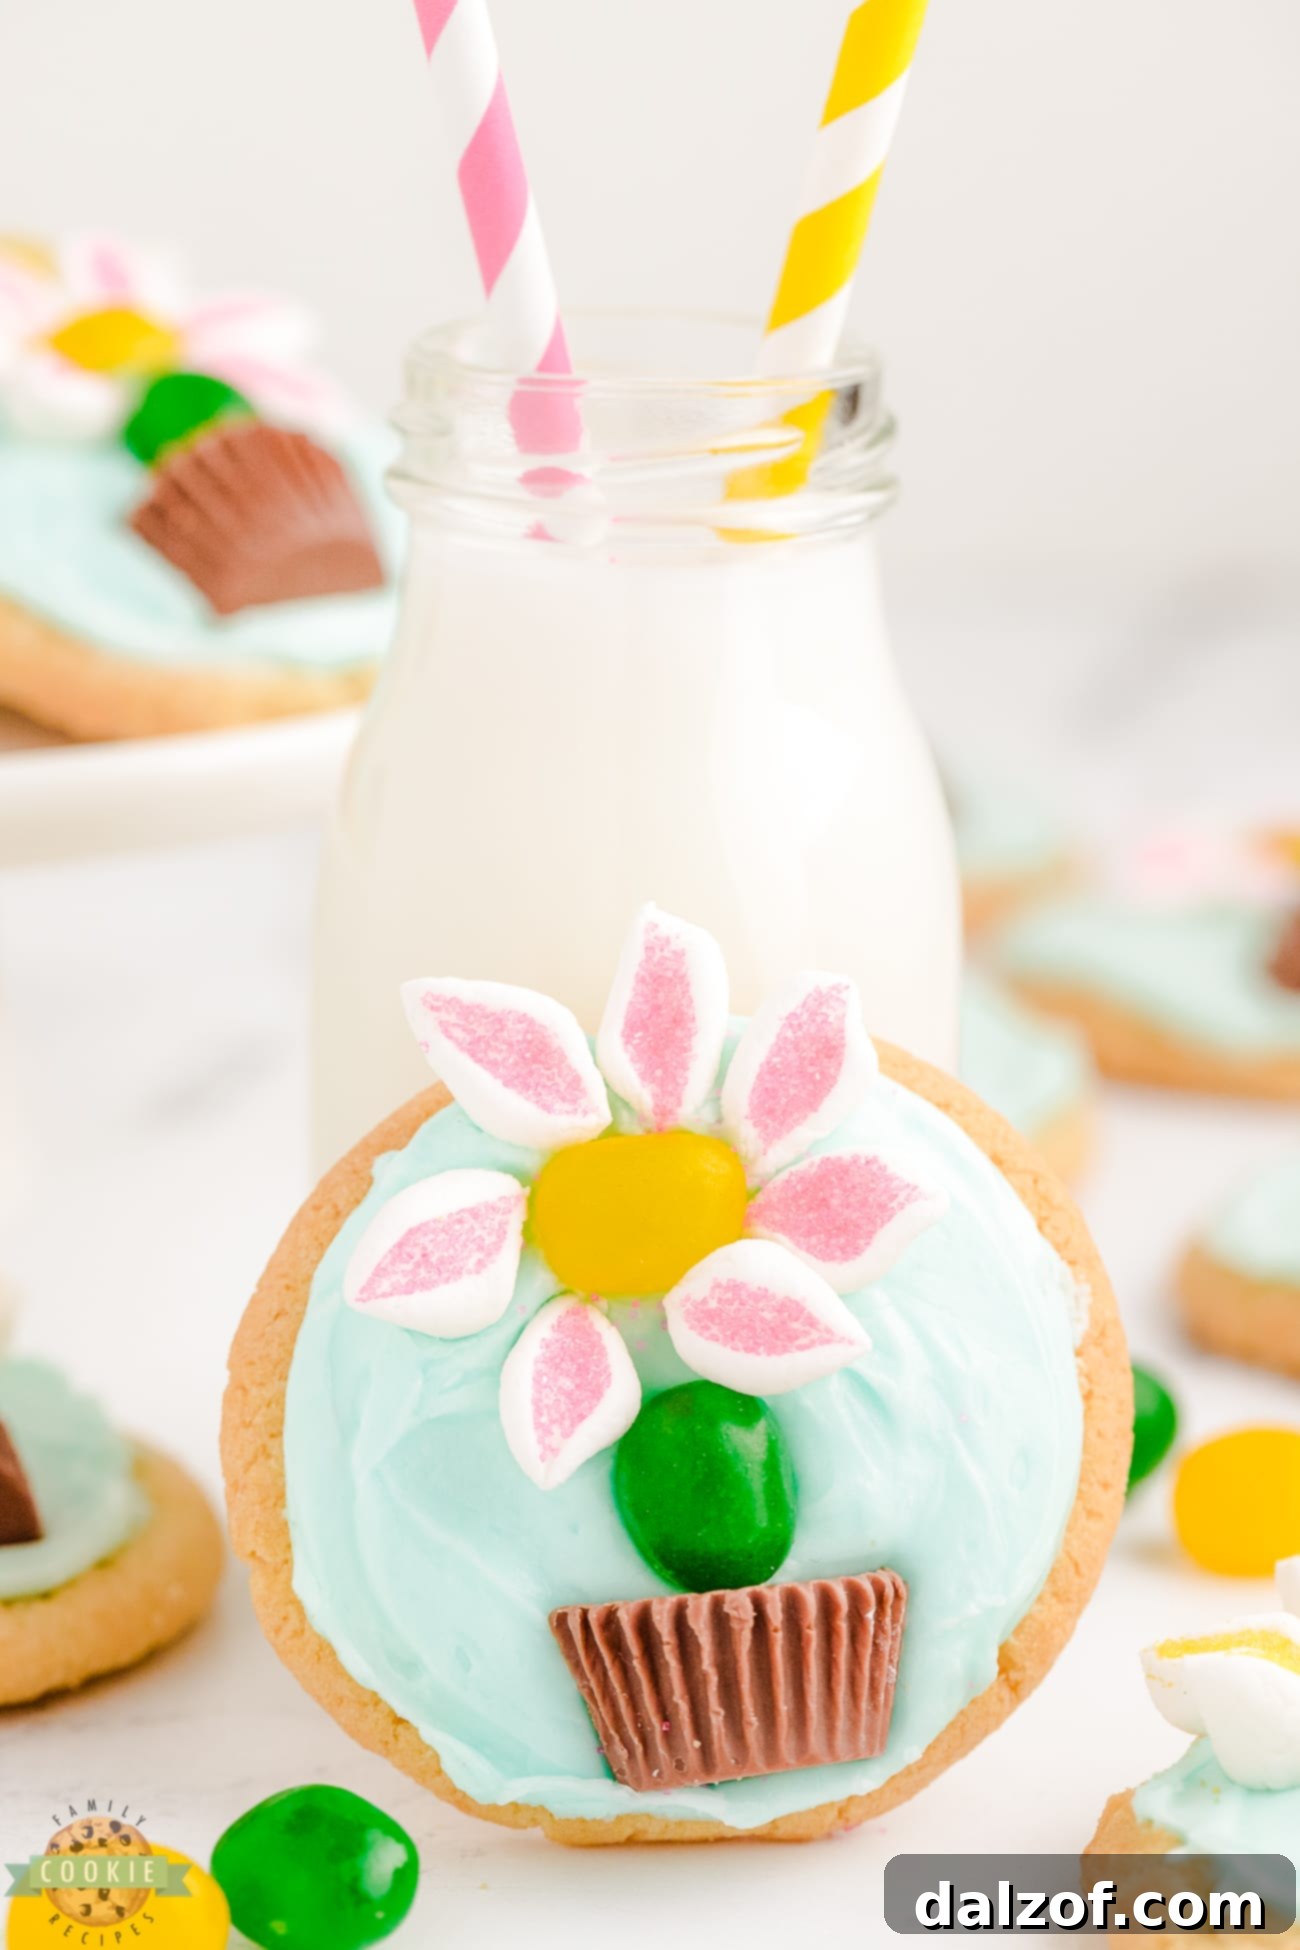
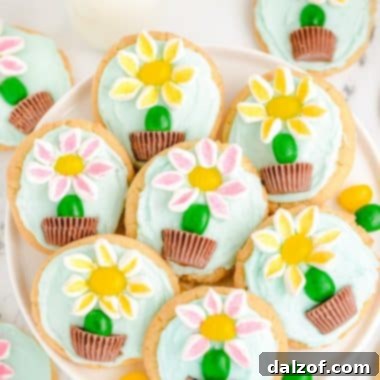
Welcome to the enchanting world of delightful Spring treats! These Marshmallow Flower Cookies are an absolute joy to create and perfect for welcoming warmer weather and vibrant colors into your kitchen. Imagine soft, tender flower sugar cookies, beautifully frosted with a sky-blue backdrop, crowned with whimsical marshmallow flowers, complete with a sweet jelly bean stem, all nestled in a charming peanut butter chocolate pot. They’re not just a dessert; they’re an edible art piece that promises to bring smiles to faces of all ages. Get ready to transform simple ingredients into a stunning, festive confection that tastes as good as it looks!
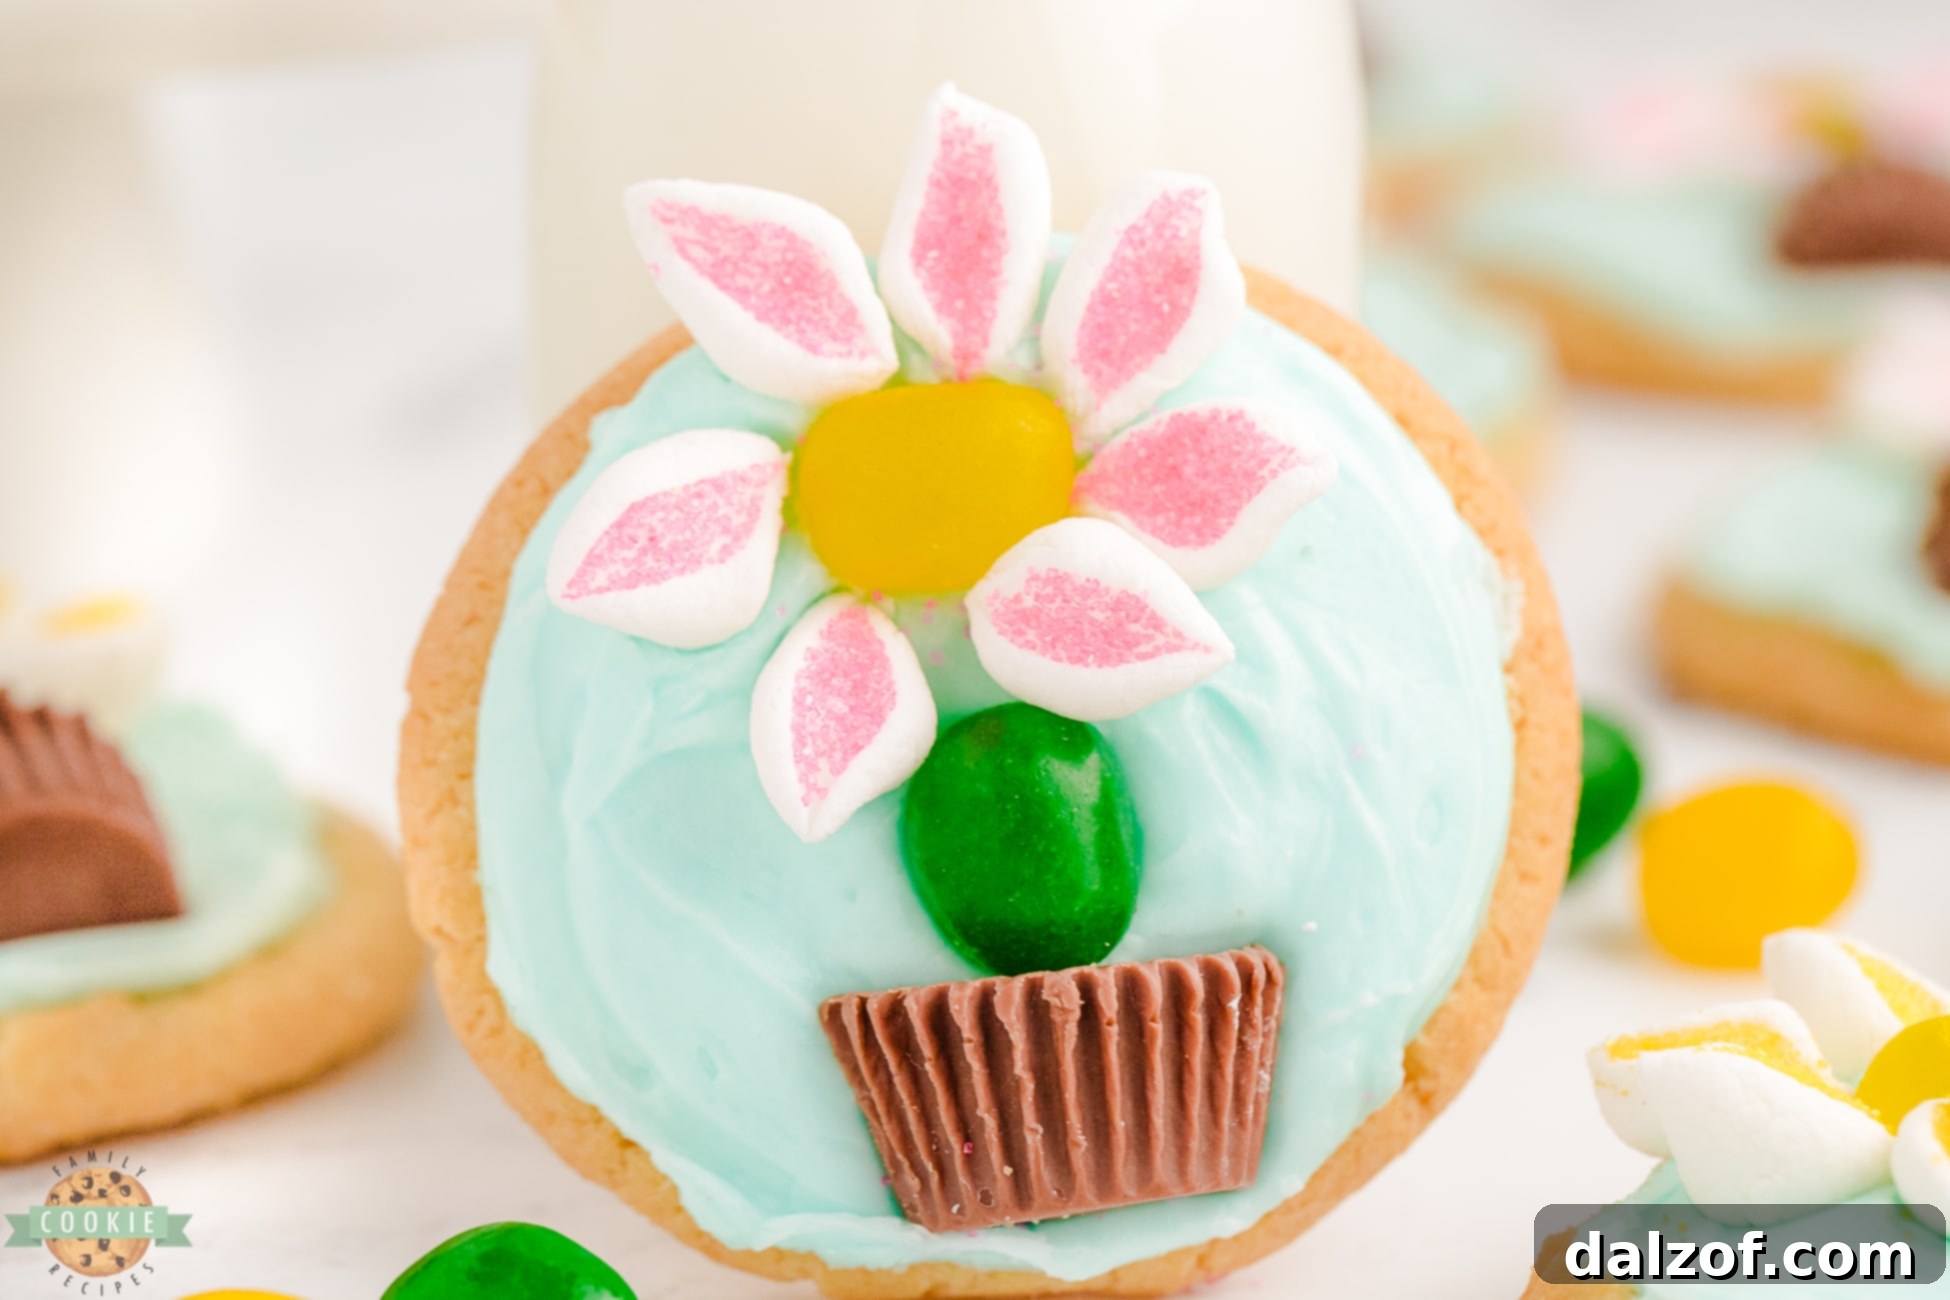
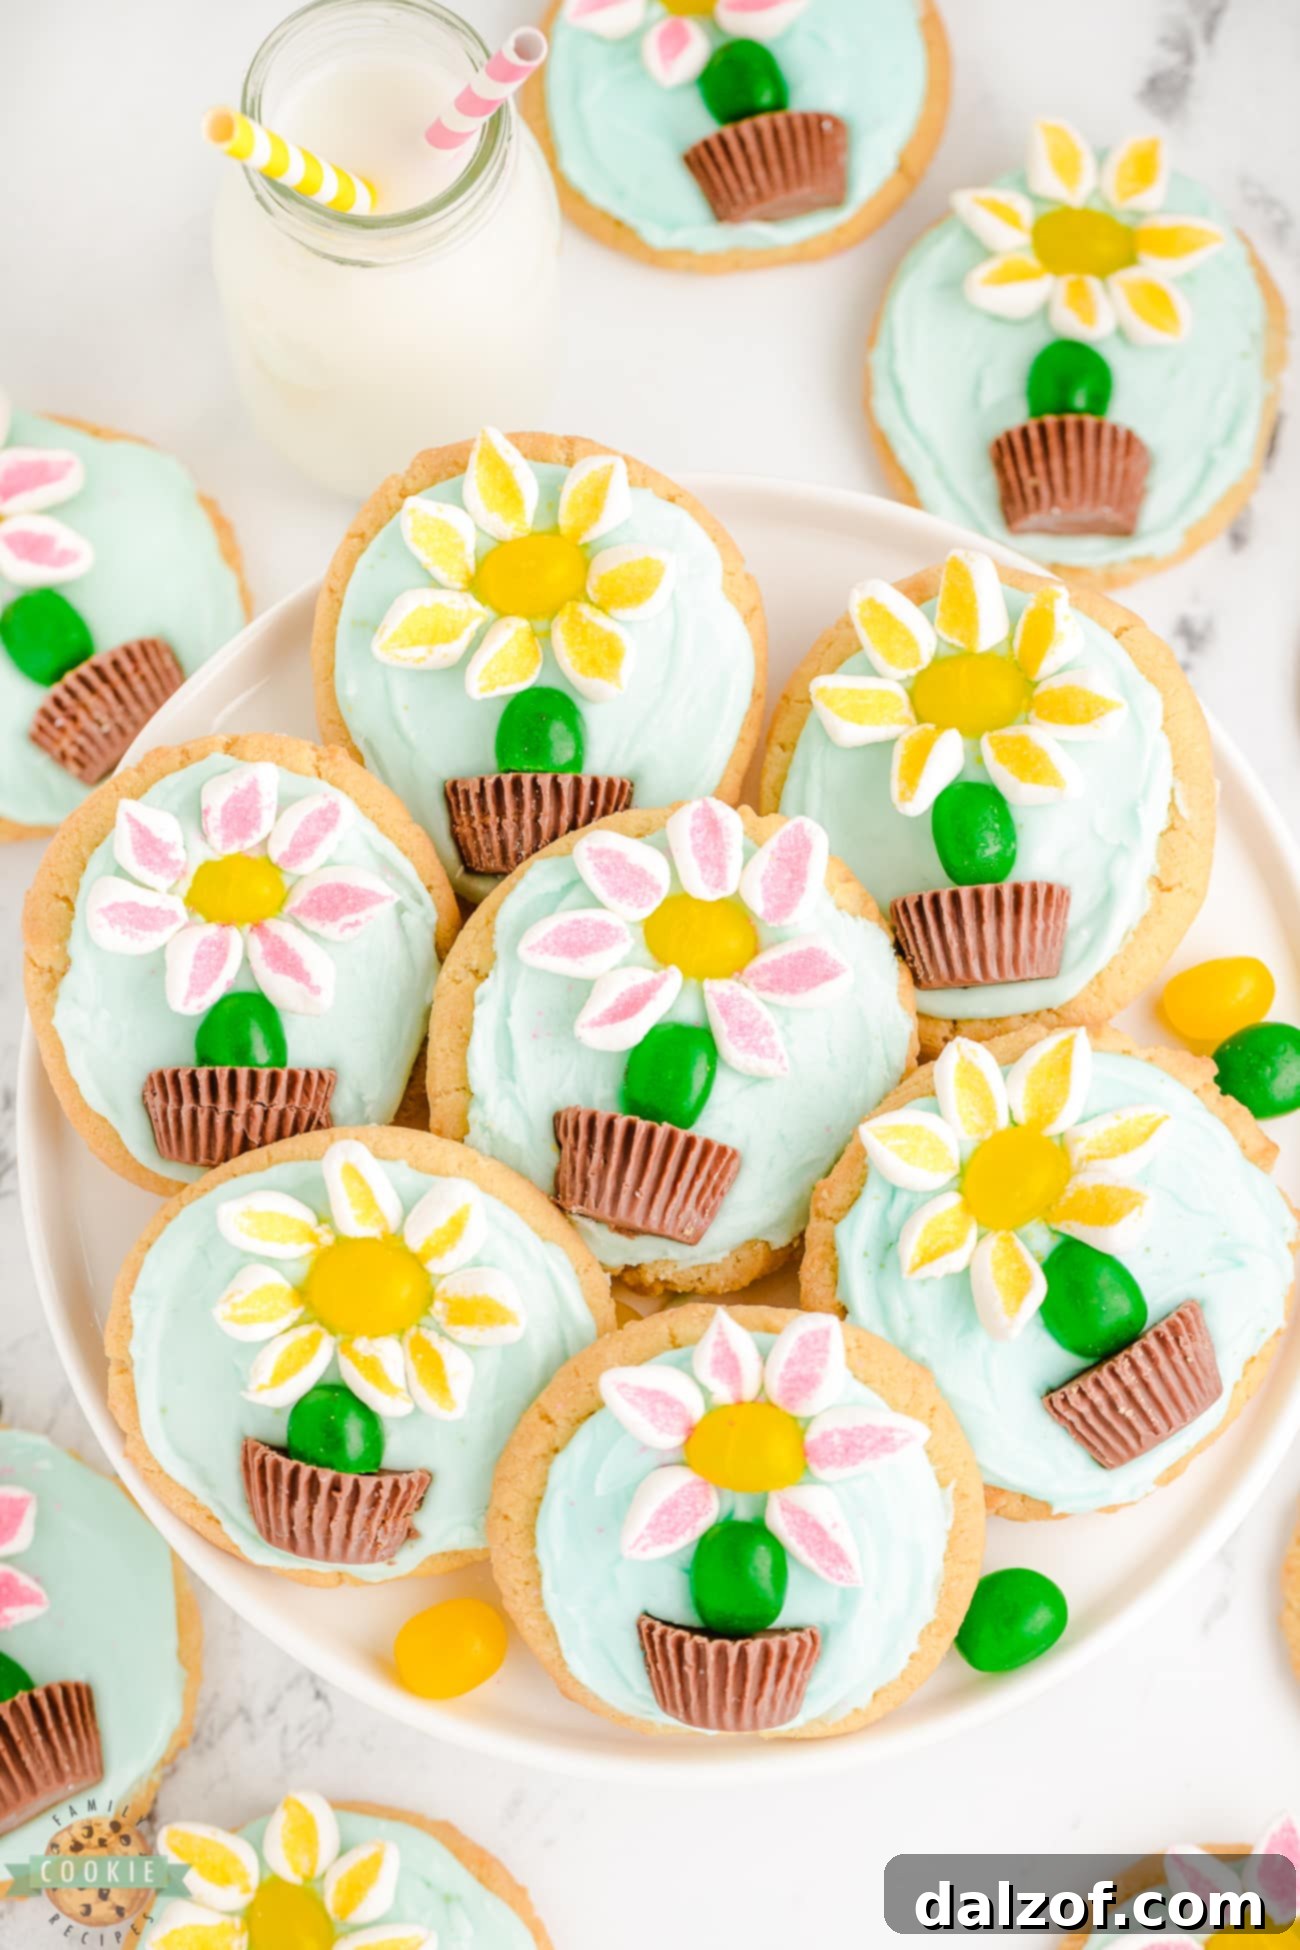
These adorable flower cookies are crafted from a foundation of classic, soft sugar cookies. What truly makes them special is their artistic topping: an arrangement of colorful candies meticulously designed to resemble blooming Spring flowers, elegantly potted in a miniature chocolate container. Whether you’re planning for a heartwarming baby shower, a lively birthday party, a special Mother’s Day brunch, or simply seeking a fun and festive activity to brighten an ordinary day, these marshmallow flower cookies are guaranteed to be a hit. Their unique presentation and delightful flavors make them a memorable treat for any occasion, big or small. They’re an effortless way to add a touch of Springtime magic to your dessert table, inviting everyone to indulge in a bite of pure happiness.
Blossom into Spring with These Adorable Flower Sugar Cookies
There’s something inherently charming about a dessert that looks as good as it tastes, and these Spring flower cookies truly embody that spirit. The inspiration for using a halved Reese’s Peanut Butter Cup as a “flower pot” came from a beloved old cookbook, and from there, the entire creative process bloomed effortlessly. The idea of using marshmallows to form delicate flower petals is a technique I’ve cherished for years, previously using it for delightful pudding cups. It’s a method that consistently brings a playful and festive touch to any sweet creation. These cookies are more than just a recipe; they are an invitation to get creative in the kitchen, offering a delightful project for bakers of all skill levels. They capture the essence of Spring’s renewal and joy in every colorful bite, making them a perfect centerpiece for your seasonal celebrations.
Why You’ll Fall in Love with These Festive Spring Cookies
Prepare to be captivated by the charm and deliciousness of these festive Spring cookies. They offer a unique combination of taste, simplicity, and visual appeal that makes them truly special:
- Unforgettable Flavor Harmony: Each bite delivers a symphony of textures and tastes. The tender, buttery base of the sugar cookie provides the perfect canvas, complemented by the soft, sweet chewiness of the marshmallows, the fruity burst of the jelly beans, and the rich, satisfying blend of peanut butter and chocolate from the “pot.” This combination creates a dessert experience you’ll want to revisit again and again, striking a perfect balance between classic comfort and playful innovation.
- Deceptively Simple Creation: Don’t let the intricate appearance of these cookies intimidate you. While they look like they require hours of professional decorating, this recipe is incredibly straightforward and comes together much faster than you might expect. The beauty lies in the clever use of readily available candies and a simple assembly process. For an even quicker route to cookie bliss, feel free to use store-bought sugar cookies. This allows you to focus purely on the fun and creative decorating, making it an ideal project for busy schedules or budding bakers.
- Celebratory and Engaging Fun: These aren’t just cookies; they’re a celebration in edible form! Creating these marshmallow flower cookies is a wonderful activity to share with family, especially kids, sparking creativity and joy in the kitchen. They are the ultimate dessert for any Spring gathering, holiday, or special event, guaranteed to elicit gasps of delight and compliments. Everyone appreciates receiving flowers, but when those flowers are a delicious, handcrafted sweet treat, the appreciation multiplies! They are perfect for brightening any day, adding a cheerful, homemade touch that shows thoughtfulness and flair.
- Versatility for Every Occasion: Beyond being a delightful Spring treat, these cookies are incredibly versatile. Their charming design makes them suitable for a wide array of events. Think about them for school bake sales, garden parties, bridal showers, Easter celebrations, or even as thoughtful homemade gifts. Their universal appeal ensures they’ll be a welcome addition to any gathering, making them a go-to recipe for those who love to impress with minimal fuss.
Essential Ingredients for Your Marshmallow Flower Cookies
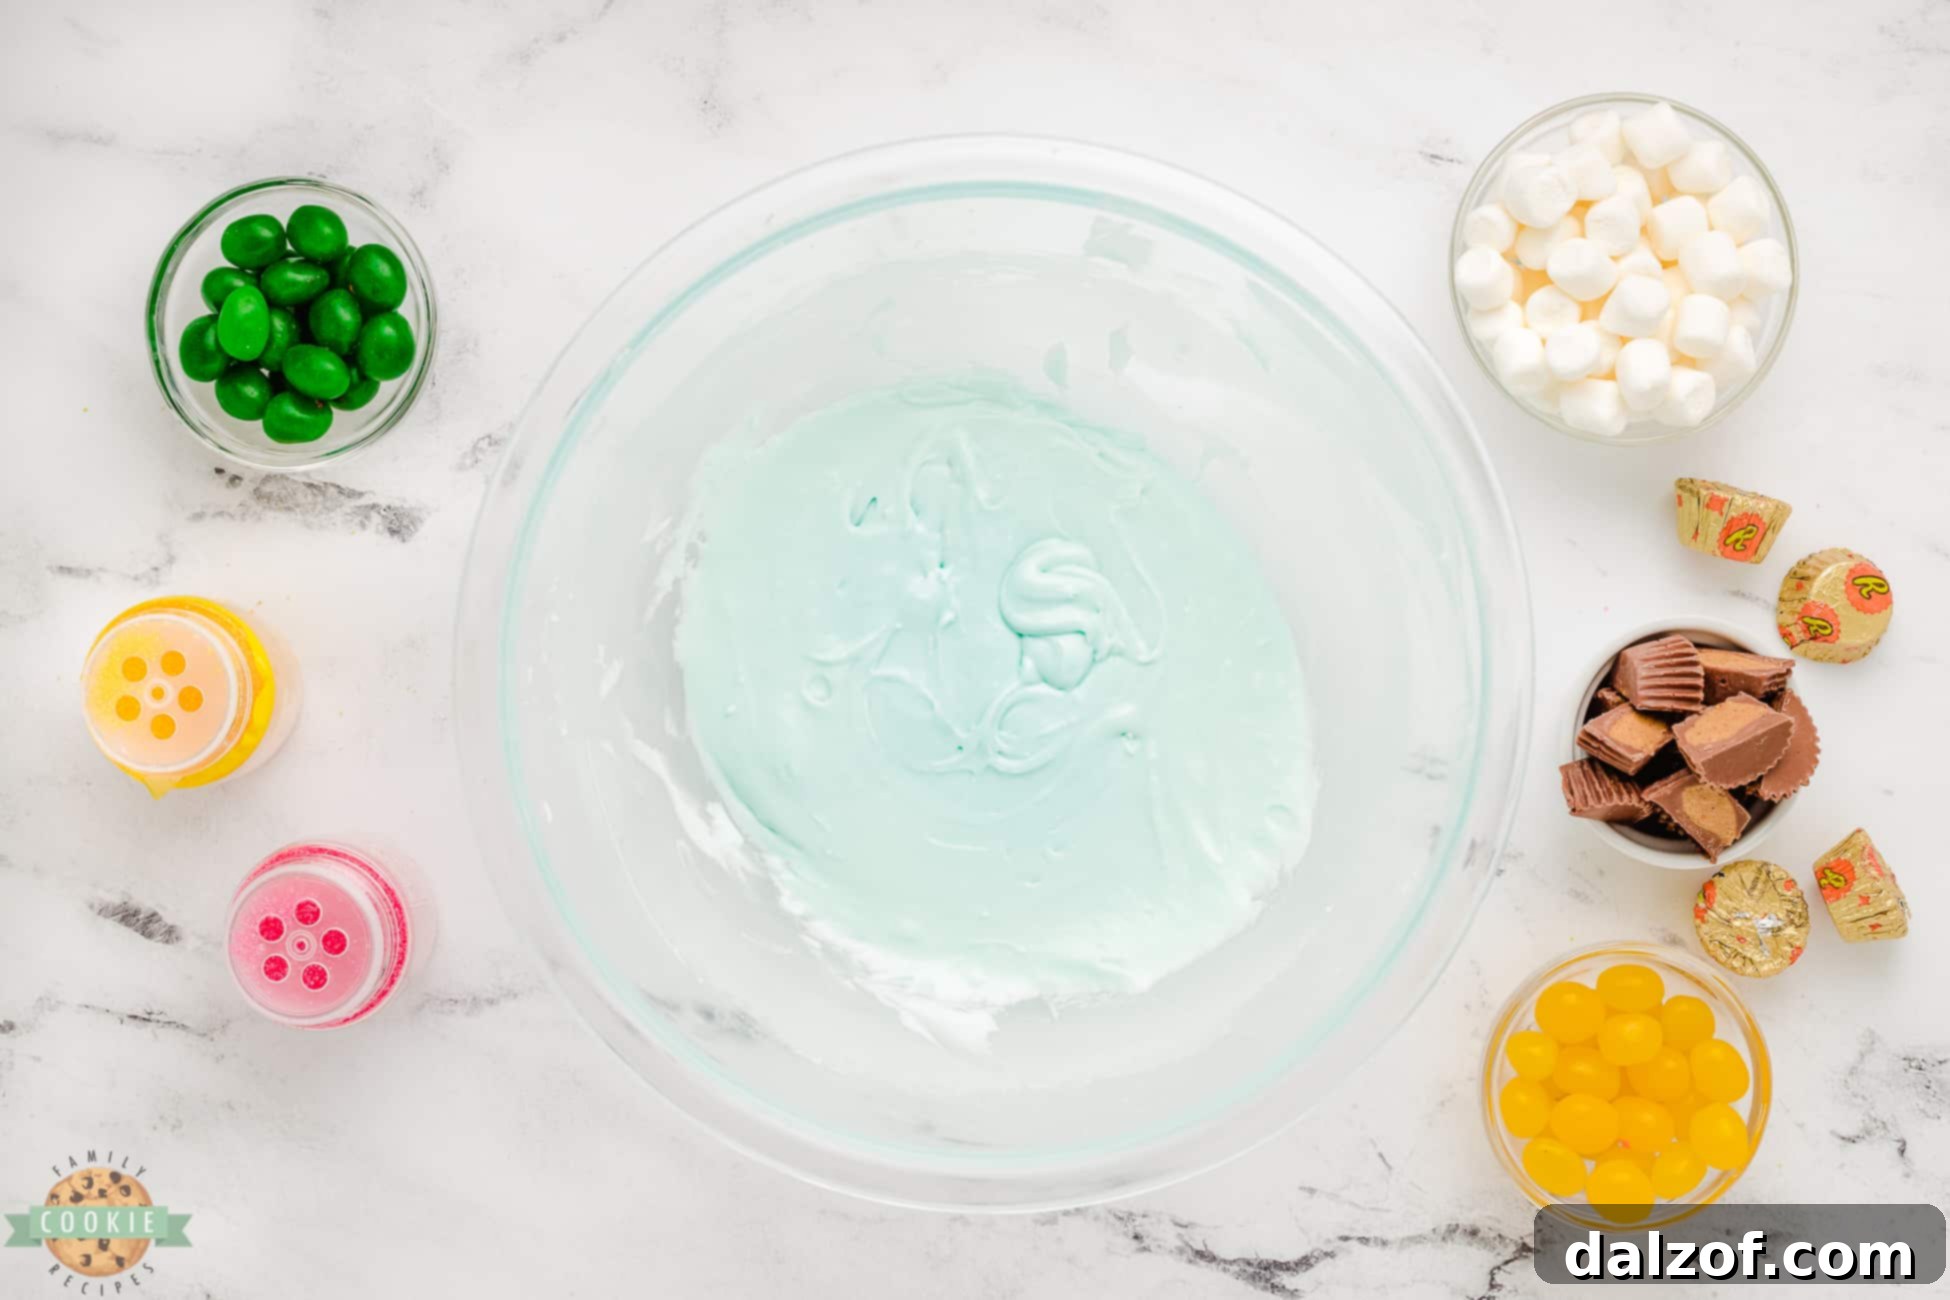
Gathering your ingredients is the first step towards creating your beautiful cookie garden. Here’s what you’ll need to bring these delightful marshmallow flower cookies to life:
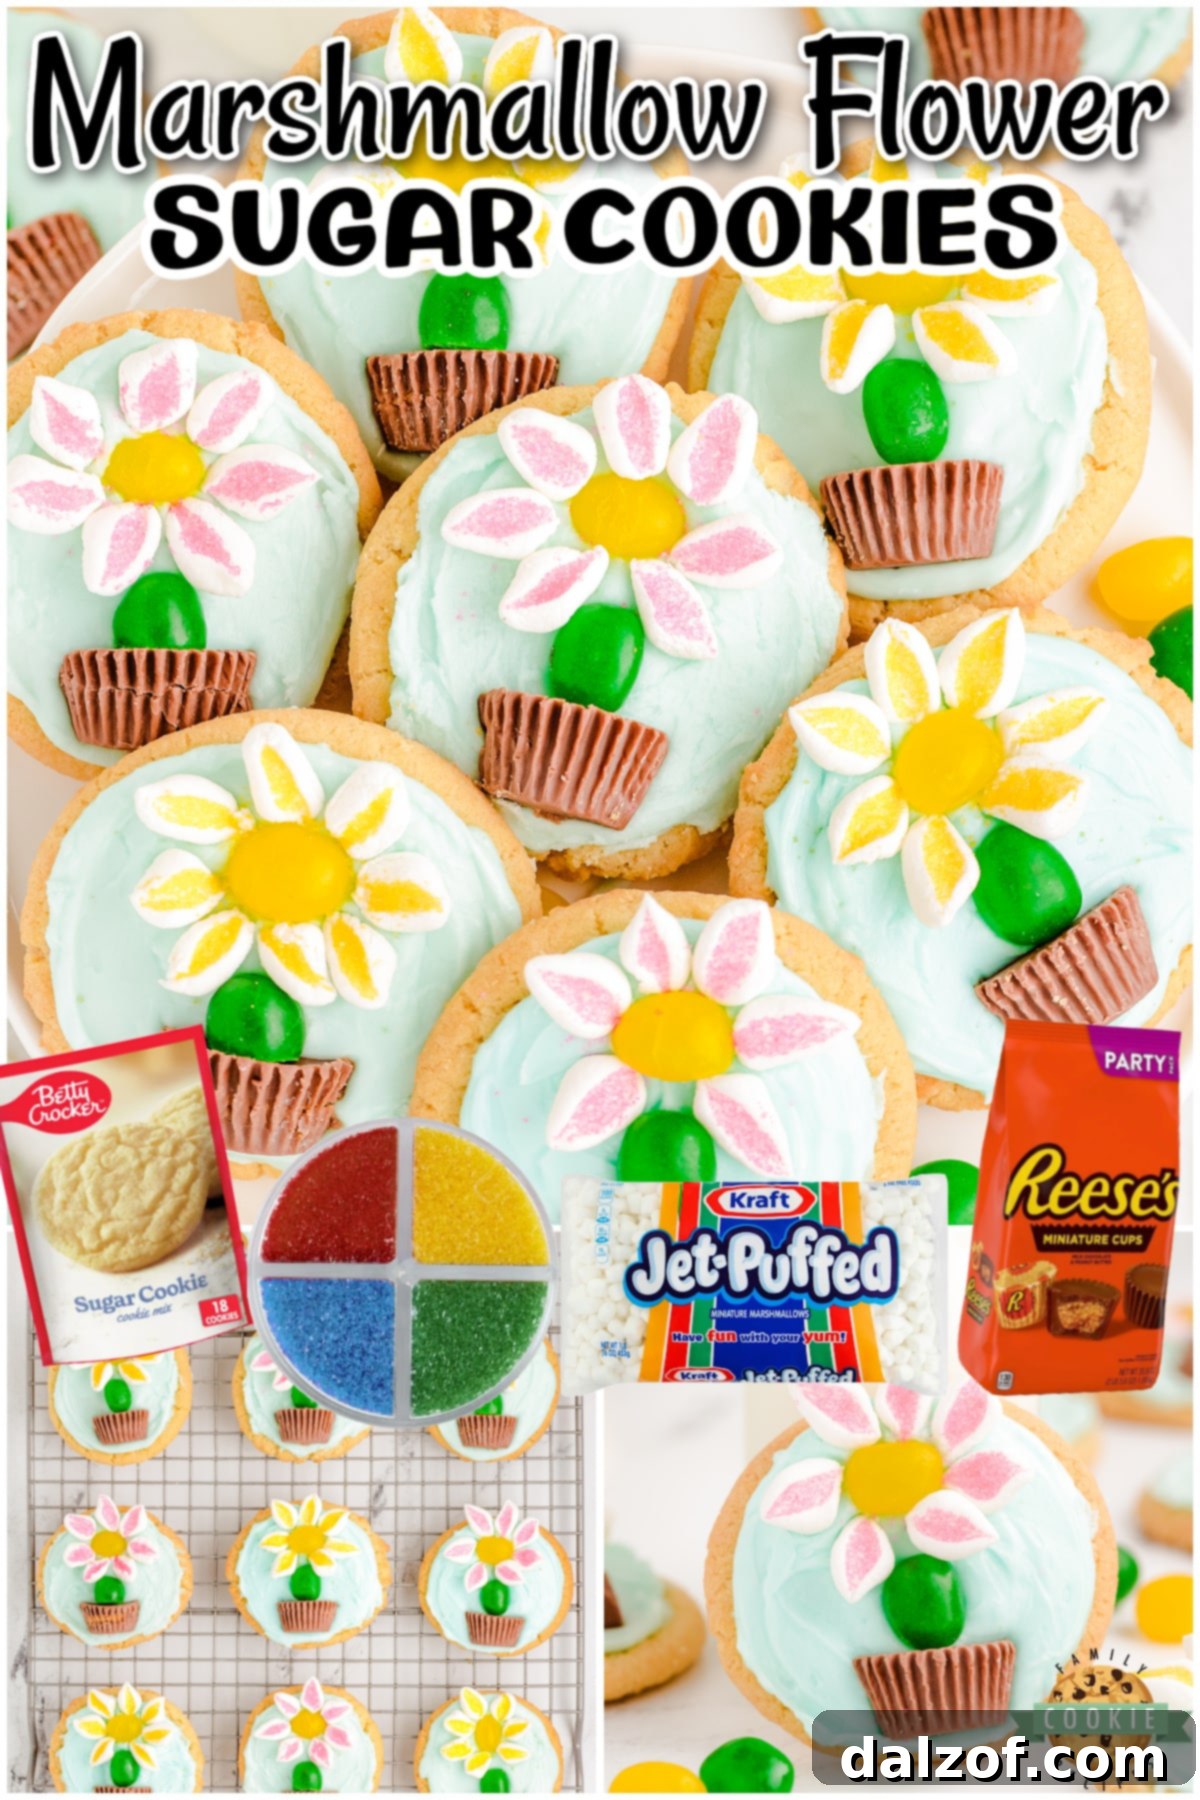
- Sugar Cookies: You will need approximately 2 dozen (24) baked and completely cooled sugar cookies. These form the essential base for our lovely Spring scene. Whether you opt for homemade for that extra personal touch or choose quality store-bought cookies for ultimate convenience, ensure they are flat and firm enough to hold the decorations.
- Light Blue Frosting: A serene blue frosting sets the perfect sky-like backdrop for your flowers. While a simple homemade recipe is provided below, feel free to use your favorite store-bought vanilla frosting. Simply add a few drops of blue food coloring until you achieve a soft, inviting light blue hue.
- Jelly Beans: These vibrant candies serve multiple purposes in our cookie design. You’ll need 24 green jelly beans to act as the sturdy “stems” for your flowers, and another 24 yellow jelly beans to form the bright, sunny “centers” of each marshmallow blossom. Choose good quality jelly beans for the best texture and color.
- Mini Reese’s Peanut Butter Cups: These iconic chocolate treats ingeniously transform into charming “flower pots.” You’ll need 12 mini Reese’s Peanut Butter Cups, each carefully cut in half. The combination of chocolate and peanut butter not only provides a delicious flavor contrast but also adds a realistic, rustic touch to your edible garden.
- Mini Marshmallows: The star of our flowers! Approximately 72 mini marshmallows are needed. Each marshmallow will be cut in half diagonally to create soft, petal-like shapes. Their light, fluffy texture and sweet taste are perfect for mimicking delicate flower petals.
- Colored Sugar Sprinkles: To add an extra sparkle and dimension to your marshmallow flowers, you’ll want both yellow and pink colored sugar sprinkles. Dipping the cut marshmallows into these sprinkles creates a dazzling, sugary coating, enhancing their visual appeal and adding a fun pop of color.
Whip Up Our Simple Homemade Frosting
While store-bought frosting offers convenience, crafting your own homemade vanilla buttercream adds a luscious, rich flavor that truly elevates these cookies. It’s incredibly easy to make and yields a silky-smooth consistency perfect for decorating:
- Butter: Start with 2 tablespoons of unsalted butter, softened to room temperature. This ensures your frosting will be smooth and creamy, without any lumps. Softened butter is key for proper incorporation with the other ingredients.
- Powdered Sugar: You’ll need 1 ½ cups of powdered sugar (also known as confectioners’ sugar). This finely milled sugar gives the frosting its characteristic smooth texture and delightful sweetness.
- Milk: Add 1 to 2 tablespoons of milk to achieve your desired frosting consistency. Start with 1 tablespoon and add more sparingly, a teaspoon at a time, until the frosting is smooth, spreadable, and holds its shape without being too stiff or too runny. Whole milk or even cream can make it richer.
- Vanilla Extract: A ½ teaspoon of pure vanilla extract is essential for enhancing the overall flavor profile, adding a warm, aromatic depth that complements the sweetness.
- Blue Food Coloring: Just 2 drops of blue food coloring are enough to create that beautiful, soft light blue shade reminiscent of a clear Spring sky, providing the perfect canvas for your cookie flowers.
Crafting Your Marshmallow Flower Cookies: Step-by-Step Guide
Let’s dive into the fun and creative process of assembling these charming Marshmallow Flower Cookies. It’s an enjoyable activity that yields beautiful, edible results!
Preparation is Key
- Cookie Base: To kick off this delightful recipe, ensure you have 24 sugar cookies that are already baked and completely cooled. The coolness is crucial, as warm cookies will melt your frosting and decorations. While making your own cookies from scratch is always rewarding, don’t hesitate to opt for good quality store-bought sugar cookies to streamline the process and save time. If you do choose to bake, consider a sturdy recipe that bakes flat, like a classic Crispy Sugar Cookie, but remember to omit any frosting from that particular recipe.
- Whip Up the Frosting: Next, it’s time to create your silky smooth homemade frosting (or prepare your store-bought frosting). In a small mixing bowl, combine the softened butter, powdered sugar, milk, vanilla extract, and blue food coloring. Using an electric mixer or a whisk, beat these ingredients together until the mixture is completely smooth, lump-free, and beautifully uniform in color. Adjust milk quantity as needed to reach a spreadable, yet firm, consistency.
Assembling Your Edible Spring Garden
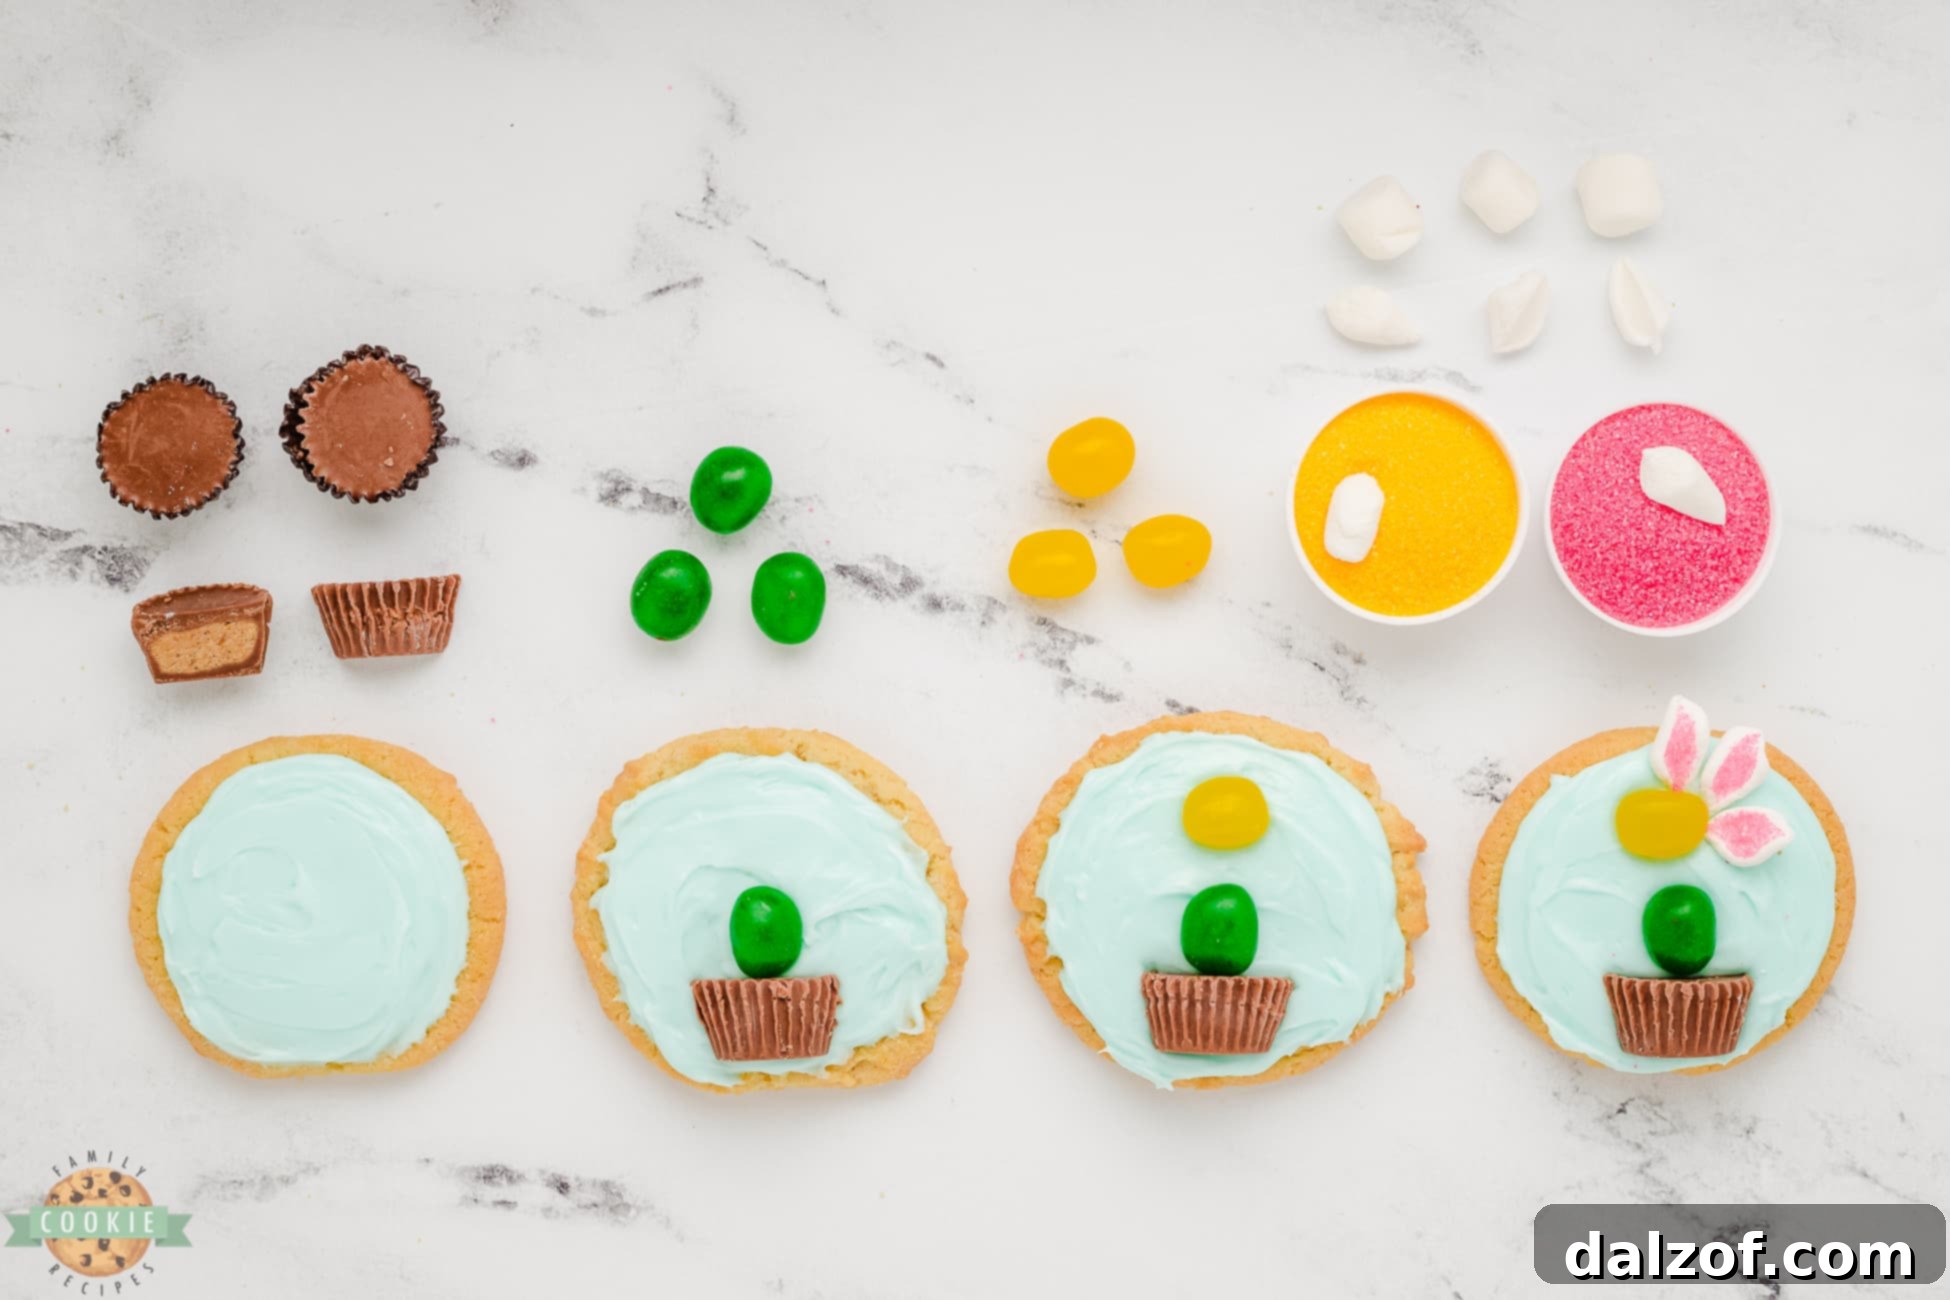
- Frost the Canvas: Gently spread a layer of your prepared light blue frosting over the top surface of each cooled sugar cookie. Aim for an even, smooth coat, as this blue frosting will serve as the “sky” or “ground” for your charming Spring scene. As you frost them, place the cookies on a parchment-lined baking sheet to make cleanup easier and prevent sticking.
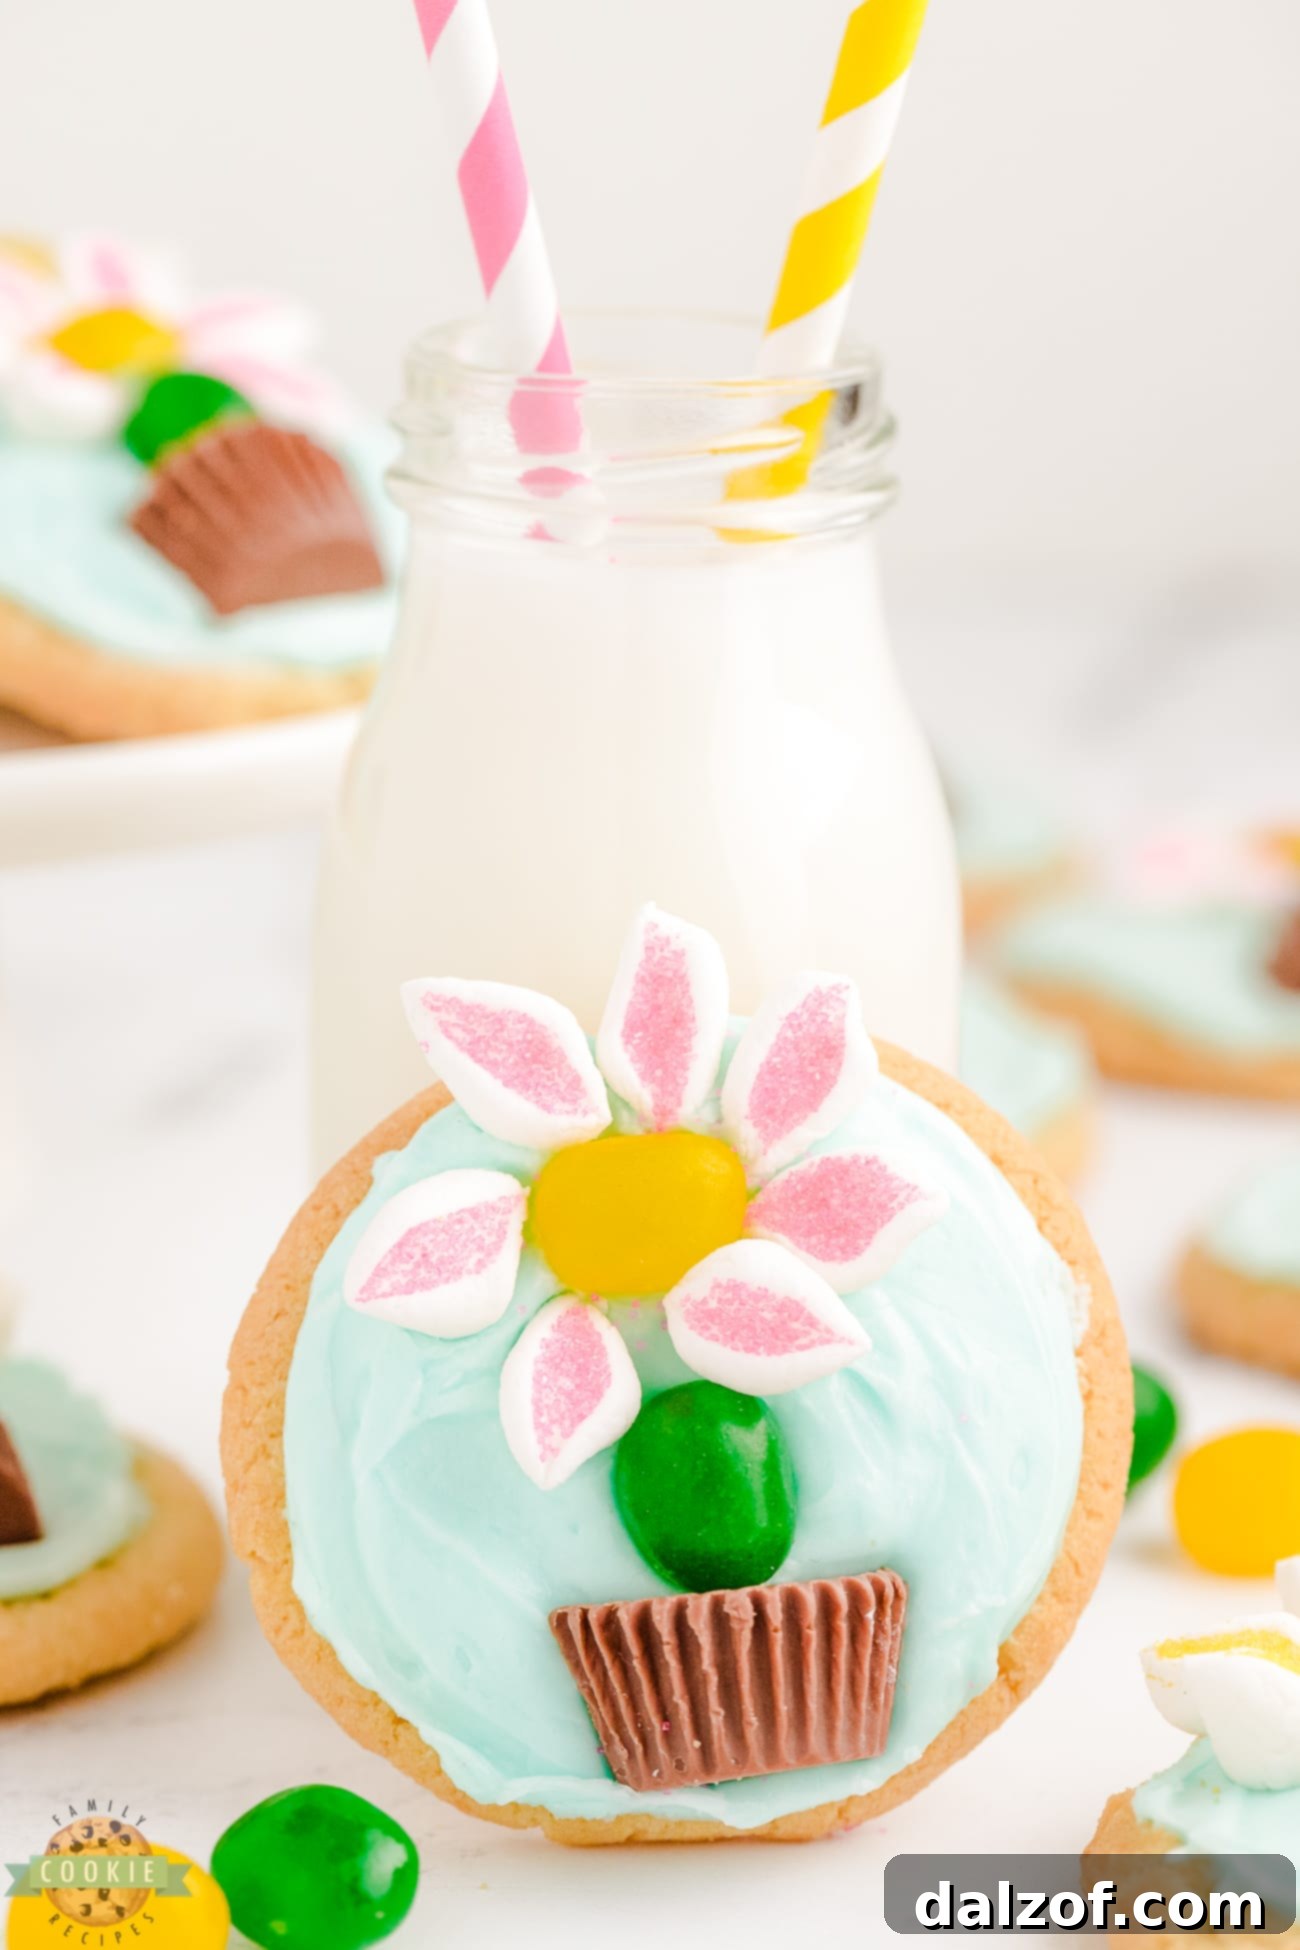
- Construct the Flower Pot and Stem: Take your mini Reese’s Peanut Butter Cups and carefully cut each one in half. Place one half towards the bottom edge of each frosted cookie, creating a chocolatey “flower pot.” Immediately above this chocolate pot, arrange a single green jelly bean lengthwise. This forms the vibrant “stem” from which your marshmallow flower will beautifully sprout.
- Craft the Marshmallow Flowers: Now for the artistic part! Take your mini marshmallows and cut each one diagonally. This creates two smaller, tear-drop shaped halves that resemble delicate flower petals. While the cut side is still sticky, gently dip it into your yellow or pink colored sugar sprinkles. Arrange five or six of these sugar-coated marshmallow halves in a circular pattern around the top portion of the cookie, just above the green jelly bean stem, to form the petals of your flower. For the final touch, place a yellow jelly bean in the very center of your marshmallow flower, completing the charming blossom.
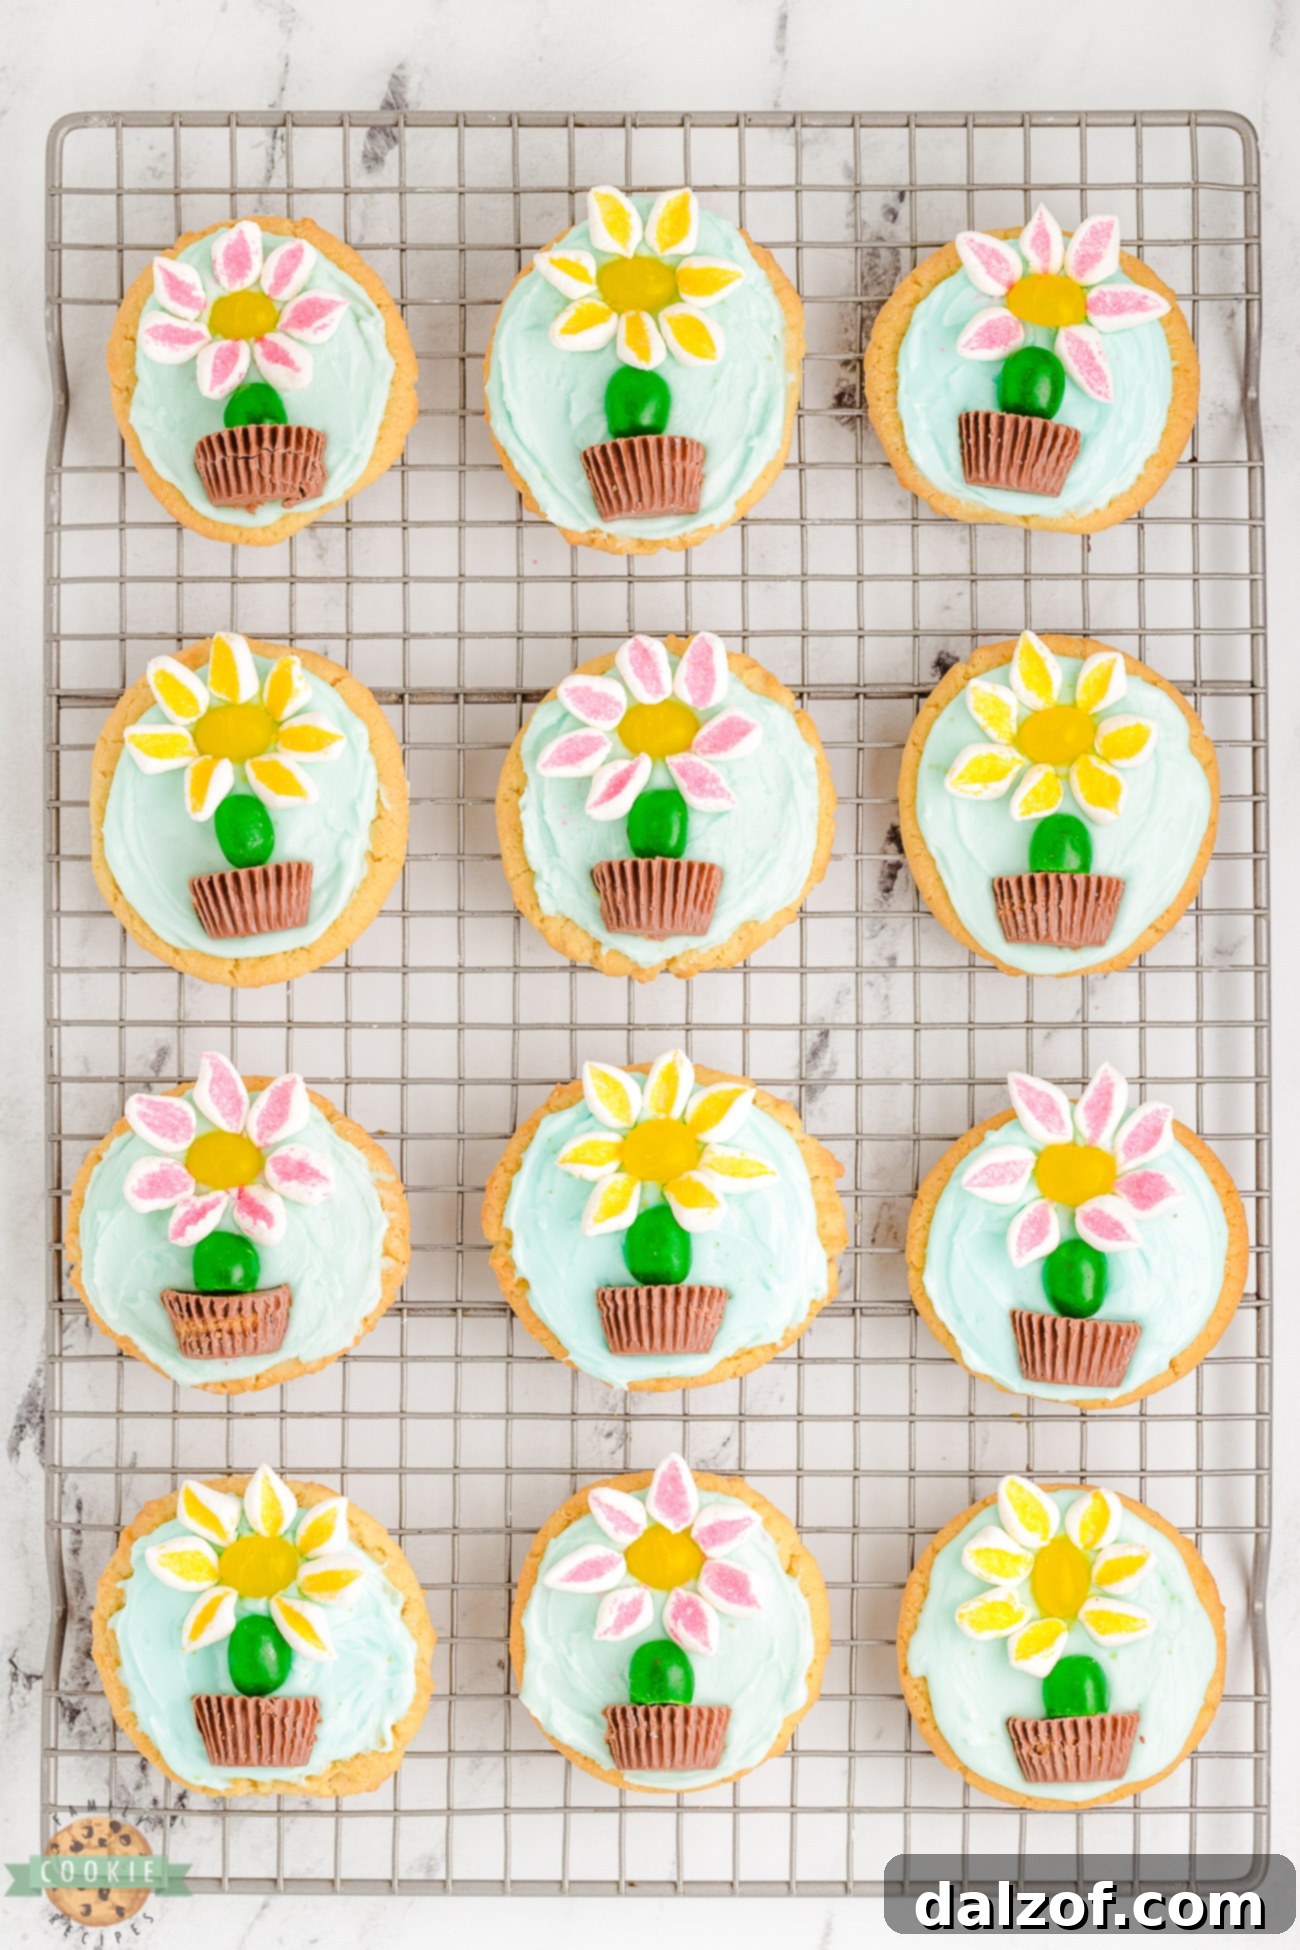
- Repeat and Admire: Continue this enjoyable process for all your cookies until your baking sheet (or kitchen counter!) transforms into a vibrant, edible garden. Don’t be afraid to mix and match the pink and yellow sugar sprinkles for your marshmallow petals to create a truly beautiful and colorful cookie collection. Once all your cookies are decorated, allow them to sit for a little while to let the frosting set slightly, which will help keep all the decorations firmly in place.
- Serve with Joy: Once your cookie garden is complete, it’s time to share and enjoy these delightful creations! They are perfect for immediate indulgence or for showcasing at your next gathering.
Marshmallow Flower Cookies
Marshmallow Flower Cookies are effortlessly simple to prepare and an ideal choice for Spring baking! Everyone adores these charming flower sugar cookies, each adorned with soft marshmallow petals, a bright jelly bean stem, all cradled in a miniature peanut butter chocolate pot.
Course: Cookies, Treat
Cuisine: American
Keyword: flower sugar cookies, Marshmallow Flower Cookies
Prep Time: 20 minutes
Total Time: 20 minutes
Servings: 24 cookies
Calories: 93 kcal
Author: Jessica & Nellie
Ingredients
For the Marshmallow Flower Cookies:
- 24 Sugar cookies (baked & cooled)
- Light blue frosting (recipe below or store-bought)
- 48 Jellybeans (24 green ones & 24 yellow ones)
- 12 Mini Reese’s Peanut Butter Cups (cut in half)
- 72 Mini marshmallows (cut in half diagonally)
- Colored sugar sprinkles – yellow & pink
For the Vanilla Buttercream Frosting:
- 2 TBSP Butter (softened)
- 1 ½ cups Powdered sugar
- 1-2 TBSP Milk
- ½ tsp Vanilla extract
- 2 drops Blue food coloring
Instructions
- Preparation: Begin by ensuring you have 24 sugar cookies that are fully baked and completely cooled. You can purchase ready-made cookies for convenience or bake your own.
- Homemade Frosting: In a small bowl, combine the softened butter, powdered sugar, milk, vanilla extract, and blue food coloring. Whisk thoroughly until the mixture is smooth and well combined, achieving a consistent light blue color.
- Assemble Spring Scene (Part 1 – Base): With a spatula or knife, frost each cooled cookie evenly with the light blue frosting. Carefully place the frosted cookies onto a baking sheet lined with parchment paper.
- Assemble Spring Scene (Part 2 – Pot & Stem): Cut each mini Reese’s Peanut Butter Cup in half. Position one half at the bottom portion of each frosted cookie. Above the peanut butter cup, lay one green jelly bean lengthwise to form the flower’s stem.
- Assemble Spring Scene (Part 3 – Flower Petals & Center): Take each mini marshmallow and slice it diagonally. While the cut side is still slightly sticky, dip it into your chosen colored sugar sprinkles (yellow or pink). Arrange 5-6 marshmallow halves in a circular pattern at the top of the cookie, creating the flower petals. Place one yellow jelly bean in the very center of the marshmallow petals.
- Final Touches: Repeat this decorating process for all remaining cookies, creating a vibrant garden of sweet treats. Let the frosting set slightly before serving.
Notes
Store your finished marshmallow flower cookies in an airtight container at room temperature. To prevent them from sticking together, place a piece of parchment paper or wax paper between each layer of cookies. When stored properly, these cookies will remain fresh and delicious for up to 5 days. For longer storage, see freezing instructions below.
Nutrition
Calories: 93kcal | Carbohydrates: 20g | Protein: 1g | Fat: 5g | Saturated Fat: 2g | Polyunsaturated Fat: 1g | Monounsaturated Fat: 1g | Trans Fat: 0.04g | Cholesterol: 3mg | Sodium: 58mg | Potassium: 23mg | Fiber: 0.3g | Sugar: 6g | Vitamin A: 41IU | Vitamin C: 0.01mg | Calcium: 5mg | Iron: 0.3mg
How Long Do These Delightful Flower Sugar Cookies Last?
Proper storage is essential to keep your beautiful flower sugar cookies fresh and enjoyable. These marshmallow-decorated treats will maintain their quality and flavor for up to 5 days when stored correctly in an airtight container. The key is to keep them at room temperature, away from direct sunlight or excessive heat, which could cause the chocolate to melt or the frosting to soften. To prevent the cookies from sticking together and potentially damaging their delicate decorations, always place a piece of parchment paper or wax paper between each layer when stacking them in the container. This simple step ensures that every cookie remains pristine and ready to delight.
Can I Freeze Frosted Marshmallow Flower Cookies?
Absolutely! Freezing these charming marshmallow flower cookies is a fantastic way to prepare them in advance or preserve any leftovers for a future sweet craving. When stored correctly, they can last in the freezer for up to 3 months, making them perfect for meal prepping desserts or for having a quick treat on hand. Here’s the best way to freeze them to maintain their beauty and flavor:
- Initial Freeze (Flash Freeze): Arrange your fully frosted and decorated cookies on a baking sheet in a single layer. Make sure the cookies aren’t touching each other. Place the baking sheet in the freezer for approximately 2 hours, or until the frosting and all the candy decorations are completely solid. This flash freezing prevents the decorations from smudging or sticking together when they are later transferred.
- Transfer to Airtight Storage: Once the cookies are firm, carefully transfer them from the baking sheet into an airtight freezer-safe container. To ensure they remain separate and protected, place a sheet of parchment paper or wax paper between each cookie layer. This crucial step prevents them from freezing into a single block and makes it easy to grab just one or two at a time.
- Individual Portions (Optional): For even more convenience, after the initial flash freeze, you can individually wrap each cookie in plastic wrap or place them into separate small zip-top freezer bags. This method is ideal for quick access to a single sweet treat without having to thaw the entire batch.
- Thawing: When you’re ready to enjoy your frozen cookies, simply remove them from the freezer and let them thaw at room temperature for about 30-60 minutes before serving. They will taste just as fresh and delicious as the day you made them!
Tips for Achieving Perfect Marshmallow Flower Cookies
While these cookies are designed to be easy, a few expert tips can help you achieve professional-looking results every time:
- Cookie Consistency Matters: If baking your own sugar cookies, ensure they are not too thin, as they might break under the weight of the decorations. A slightly thicker, sturdy sugar cookie works best. Also, make sure they are completely cooled to prevent frosting from melting.
- Frosting Application: For a smooth, even blue background, use an offset spatula or the back of a spoon to spread the frosting. Don’t worry about perfection; slight imperfections add to the homemade charm!
- Marshmallow Cutting Technique: When cutting mini marshmallows diagonally, a sharp, clean pair of kitchen shears or a small, sharp knife works wonders. For less stickiness, lightly grease your cutting tool with a tiny bit of non-stick spray or dip it in powdered sugar.
- Sprinkle Adhesion: Dip the sticky, freshly cut side of the marshmallow directly into the colored sugar sprinkles. Gently press it to ensure good coverage. This provides a sparkling, textured look to your petals.
- Creative Placement: Experiment with the arrangement of your marshmallow petals. You can place them closer together for a more compact flower, or slightly spaced out for a more open bloom. You can even try using different color combinations for your jelly bean centers and marshmallow sprinkles to create a varied garden.
- Kid-Friendly Activity: This recipe is fantastic for involving children. Kids can help with frosting the cookies, placing the peanut butter cups and jelly bean stems, and especially dipping the marshmallows into sprinkles. It’s a fun, hands-on activity that fosters creativity.
- Alternative “Pots”: If peanut butter is an allergy concern or simply not preferred, consider using other small chocolate candies cut in half, or even small pieces of chocolate wafers as the “flower pot.”
Explore More of Our Favorite Spring and Summer Cookie Recipes:
- Refreshing Watermelon Sugar Cookies
- Light and Fluffy Strawberry Cool Whip Cookies
- Decadent Cheesecake Stuffed Funfetti Cookies
- Whimsical Under the Sea Cookies
- Festive Easy 4th of July Cookies
- Zesty Frosted Lemon Sugar Cookies
- Sweet Frosted Strawberry Cookies
- Colorful JELLO Sugar Cookies
- Elegant FROSTED ROSE SUGAR COOKIES



Just like the joyful, candid moments captured in “jumping pictures” – a favorite trick to elicit happy smiles from kids during photo sessions – these Marshmallow Flower Cookies are designed to bring instant cheer. When little ones are less than enthusiastic about posing, the promise of an “epic jumping picture” often works wonders, transforming frowns into delighted grins. It’s these small, creative incentives that make life, and baking, so much more fun. And truthfully, a smile in any form is a success!
These Marshmallow Flower Cookies are truly a wonderful Spring treat, perfect for sharing with cherished family and dear friends. Each adorable flower sugar cookie is a testament to simple artistry, topped with soft marshmallow flowers and a vibrant jelly bean stem, all charmingly nestled within a rich peanut butter chocolate pot. They embody the spirit of the season, offering not just a dessert, but a moment of joy and connection. So go ahead, bake a batch, and let these sweet blossoms brighten your day and those around you!