
Cadbury Mini Egg Cookies are a delightful Easter treat, offering a perfect blend of soft, chewy texture and the irresistible crunch of your favorite seasonal candy. This ultimate cookie recipe masterfully combines classic chocolate chips with vibrant, crushed Cadbury Mini Eggs, creating a festive indulgence that’s sure to become a holiday tradition in your home.

Unleash Easter Joy with Every Bite: Why You’ll Love These Cookies
There’s something undeniably magical about Cadbury Mini Eggs. Their distinct crispy shell and creamy milk chocolate interior make them a staple of the Easter season. While they are undoubtedly delicious on their own, incorporating them into a rich, buttery cookie elevates them to an entirely new level of culinary bliss. These cookies aren’t just a dessert; they’re a celebration in every bite, bursting with color and flavor that captures the essence of spring.
Imagine a perfectly golden-brown cookie, soft and tender on the inside with slightly crisp edges, generously studded with both classic chocolate chips and those iconic pastel-hued Mini Eggs. Each bite offers a symphony of textures – the smooth melt of chocolate, the comforting chewiness of the cookie, and the satisfying crunch of the Mini Egg shell. This recipe is designed to be straightforward, ensuring even novice bakers can achieve spectacular results that will impress family and friends. Get ready to bake a batch of pure joy that tastes like childhood memories and springtime happiness!
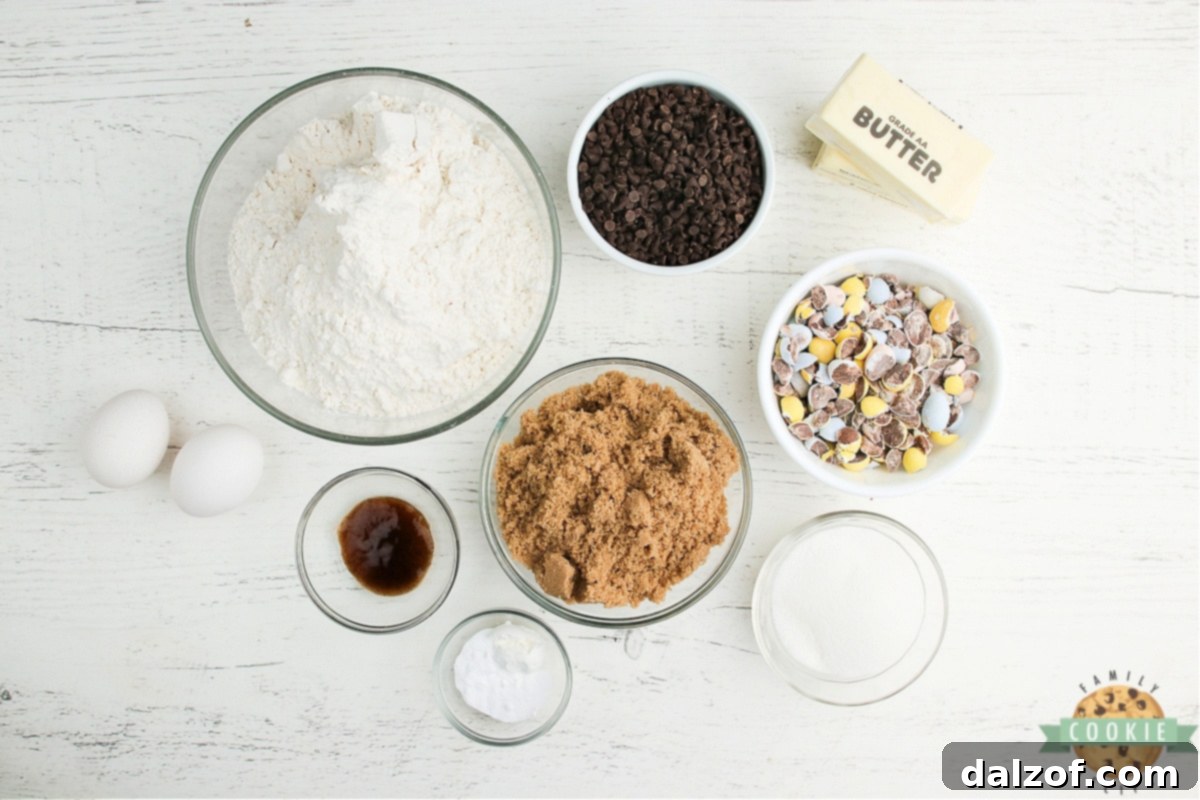
Essential Ingredients for Perfect Cadbury Mini Egg Cookies
Crafting these delectable cookies begins with a careful selection of ingredients, each playing a crucial role in achieving that sought-after soft and chewy texture, vibrant flavor, and perfect appearance. Here’s a detailed look at what you’ll need and why:
- Butter: You’ll need 1 cup (2 sticks) of high-quality unsalted butter, softened to room temperature. Real butter is absolutely essential for the rich flavor and tender crumb of these cookies. Softened butter creams beautifully with sugar, creating air pockets that contribute to a lighter, chewier texture. Avoid melted butter, as it can lead to flat, greasy cookies.
- Granulated Sugar: 1/2 cup of granulated sugar provides the foundational sweetness and helps the cookies spread slightly for that classic rounded shape. It also interacts with the butter to create a tender texture.
- Brown Sugar: For that signature chewy texture and deep, caramel-like flavor, 1 ¼ cups of lightly packed brown sugar is key. The molasses in brown sugar adds moisture and acidity, contributing to the cookies’ softness and chewiness. Always ensure your brown sugar is fresh and soft for the best results; hardened brown sugar won’t blend as well and can affect the cookie’s texture.
- Vanilla Extract: Two teaspoons of good quality vanilla extract are non-negotiable. Vanilla enhances all the other flavors in the cookie dough, adding warmth and depth. Opt for pure vanilla extract over imitation for a truly superior taste.
- Eggs: Two large eggs act as a binding agent, bringing all the ingredients together and providing structure to the cookies. They also contribute to the richness and moisture of the dough, ensuring a beautifully tender crumb.
- All-Purpose Flour: You’ll need 3 cups of all-purpose flour. This forms the primary structure of the cookies. While all-purpose flour works best, a gluten-free all-purpose baking blend can be substituted if needed, though results may vary slightly in texture.
- Cornstarch: Just one teaspoon of cornstarch is the secret ingredient for incredibly soft and chewy cookies. It interferes with gluten development, resulting in a more tender crumb that doesn’t become tough. Don’t skip this for that bakery-style chew!
- Baking Soda: One teaspoon of baking soda is the leavening agent that helps your cookies rise and spread, giving them a light, airy quality without being cakey. Ensure your baking soda is fresh and active for optimal results; expired baking soda will lead to flat cookies.
- Cadbury Mini Eggs: The star of the show! You will need a 10-ounce bag of Cadbury Mini Eggs. It’s crucial to crush them up a bit before adding them to the dough. Whole Mini Eggs are quite large and might make the cookies difficult to form and bake evenly. The best way to crush them is to place them in a sturdy Ziplock bag and gently tap them with a meat mallet or rolling pin. Aim for a mix of larger chunks and smaller pieces – avoid crushing them into a fine powder, as you want those delightful bursts of color and crunch in every bite.
- Mini Chocolate Chips: A cup of mini chocolate chips complements the Cadbury Mini Eggs perfectly. Mini chips distribute more evenly throughout the dough, ensuring chocolate in every mouthful. However, regular semi-sweet chocolate chips can be used if you prefer a bolder chocolate presence.

Simple Steps to Bake Irresistible Cadbury Mini Egg Cookies
Baking these festive cookies is a straightforward and rewarding process. Follow these easy steps to create a batch that will bring smiles to everyone’s faces:
- Prepare Your Oven and Baking Sheets: Begin by preheating your oven to 350°F (175°C). Line a baking sheet with parchment paper or a silicone baking mat. This prevents sticking and ensures even baking and easy cleanup.
- Cream Butter and Sugars: In a large mixing bowl, beat the softened butter, granulated sugar, and brown sugar together for 2-3 minutes using an electric mixer. This creaming process incorporates air, resulting in light and fluffy cookies.
- Add Wet Ingredients: Incorporate the eggs one at a time, beating well after each addition. Then, stir in the vanilla extract. Continue beating for another 1-2 minutes until the mixture is light and well combined.
- Combine Dry Ingredients: In a separate medium bowl, whisk together the flour, cornstarch, and baking soda. This ensures the leavening agent and cornstarch are evenly distributed throughout the dry mixture.
- Mix Wet and Dry: Gradually add the dry flour mixture to the wet butter mixture, mixing on low speed just until well combined. Be careful not to overmix, as this can lead to tough cookies.
- Fold in the Goodies: Gently fold in the crushed Cadbury Mini Eggs and mini chocolate chips. For an extra visual appeal, consider reserving about 1/4 cup of the Mini Eggs to press onto the tops of the cookie dough balls before baking.
- Scoop and Shape: Use a cookie scoop (approximately 1.5-2 tablespoons) to portion the dough into heaping tablespoonfuls. Place them onto the prepared cookie sheets, leaving enough space between each for spreading. If you reserved some Mini Eggs, gently press a few pieces onto the top of each cookie dough ball.
- Bake to Perfection: Bake for approximately 10 minutes, or until the edges of the cookies are lightly golden brown and the centers still appear slightly soft. Remember, cookies continue to bake for a few minutes after they are removed from the oven.
- Cool and Enjoy: Allow the cookies to cool on the baking sheet for a few minutes before transferring them to a wire rack to cool completely. This helps them set and prevents breakage. Once cooled, they are ready to be devoured!


Cadbury Mini Egg Cookies
Cadbury Mini Egg Cookies are soft, chewy, and brimming with your favorite Easter candy! This delightful cookie recipe is enhanced with chocolate chips and expertly crushed Cadbury Mini Eggs.
Print Recipe
Pin Recipe
Rate This Recipe
Dessert, Cookies
American
Cadbury Mini Egg Cookies, Easter Cookies, Chocolate Chip Cookies
10 minutes
10 minutes
30 cookies
230kcal
Recipe Creator
Ingredients
- 1 cup butter softened to room temperature
- ½ cup granulated sugar
- 1 ¼ cups brown sugar lightly packed
- 2 tsp vanilla extract
- 2 large eggs
- 3 cups all-purpose flour
- 1 tsp cornstarch
- 1 tsp baking soda
- 10 oz bag Cadbury Mini Eggs crushed (place in a Ziplock bag and gently crush with a meat mallet or rolling pin – aim for large chunks, not a fine powder)
- 1 cup mini chocolate chips
Instructions
-
Preheat oven to 350°F (175°C). Line a baking sheet with parchment paper or a silicone baking mat.
-
In a large bowl, beat softened butter, granulated sugar, and brown sugar together for 2-3 minutes until light and fluffy. Add eggs and vanilla extract, then beat for another 1-2 minutes.
-
In a separate medium bowl, whisk together the flour, cornstarch, and baking soda.
-
Gradually add the flour mixture to the butter mixture, mixing on low speed just until well combined. Fold in the crushed Cadbury Mini Eggs and chocolate chips. (Optional: Reserve about 1/4 cup of Mini Eggs to press onto cookie tops).
-
Use a cookie scoop to drop heaping tablespoonfuls of dough onto the prepared cookie sheets. If desired, press a few reserved Mini Egg pieces onto the top of each cookie ball for extra appeal.
-
Bake for about 10 minutes, or until the edges are lightly golden and the centers are still slightly soft. Cool on the cookie sheet for a few minutes before transferring to a wire rack to cool completely.
Nutrition Information (per cookie)
Calories: 230kcal |
Carbohydrates: 33g |
Protein: 2g |
Fat: 10g |
Saturated Fat: 6g |
Polyunsaturated Fat: 1g |
Monounsaturated Fat: 2g |
Trans Fat: 1g |
Cholesterol: 29mg |
Sodium: 108mg |
Potassium: 32mg |
Fiber: 1g |
Sugar: 22g |
Vitamin A: 240IU |
Vitamin C: 1mg |
Calcium: 31mg |
Iron: 1mg
Tried this recipe?Mention @familycookierecipes or tag #familycookierecipes!

Expert Tips for Making Amazingly Delicious Cadbury Mini Egg Cookies
Achieving bakery-quality cookies at home is easier than you think with a few essential tips. Follow these guidelines to ensure your Cadbury Mini Egg Cookies turn out perfectly every time:
- Ensure Proper Flour Amount: The right amount of flour is crucial for cookie texture. If your dough feels overly sticky after mixing, you might need to add a tablespoon or two more flour. This is especially important when adding ingredients like fruit (though not applicable here, the original text had a note about cherries, which has been removed for relevance). If you notice your first batch of cookies spreading too much, adjust by adding a small amount of flour before baking the rest. The dough should be soft but manageable, not excessively sticky.
- Do Not Melt the Butter: This is perhaps the most important rule for chewy cookies. The butter needs to be softened to room temperature, but definitely not melted. Melted butter will cause the cookies to spread excessively, resulting in flat, greasy, and brittle cookies instead of soft and chewy ones.
- Cream Butter and Sugars Thoroughly: Dedicate 2-3 minutes to creaming the butter and sugars together until the mixture is light and fluffy. This step incorporates air into the dough, which contributes significantly to the cookies’ final texture, making them tender and airy rather than dense.
- Always Preheat Your Oven: A properly preheated oven is vital for consistent baking. Placing cookie dough into a cold or partially heated oven can lead to uneven baking, causing cookies to spread too much or not cook through properly. Give your oven ample time to reach and stabilize at the desired temperature.
- Use a Cookie Scoop for Uniformity: For perfectly shaped, evenly sized cookies, a cookie scoop is your best friend. This tool ensures that each cookie bakes consistently, leading to a batch of uniformly golden and delicious treats. It also makes the scooping process much faster and less messy.
- Utilize Parchment Paper or a Silicone Baking Mat: These baking aids are game-changers for easy removal and cleanup. Cookies will effortlessly slide off the sheet in perfect shape, eliminating the need for scraping and preventing any sticking. They also promote even heat distribution for better baking.
- Avoid Overbaking: This is critical for soft and chewy cookies. When you take your cookies out of the oven, they should still look slightly underbaked in the center with edges just barely beginning to brown. They will continue to bake and set on the hot cookie sheet for a few minutes after removal, resulting in that ideal soft, chewy texture. Overbaked cookies will be hard and dry.
- Allow Adequate Cooling Time: While it’s tempting to grab a hot cookie right away, allowing them to cool on the baking sheet for 5-10 minutes before transferring to a wire rack is important. This allows the cookies to firm up, preventing them from breaking apart when moved and ensures they maintain their shape.
- Proper Crushing of Mini Eggs: As mentioned in the ingredients, crush the Mini Eggs to create a mix of chunks and smaller pieces. This ensures a delightful crunch and visual appeal without having whole, hard candies disrupting the cookie texture.

How to Perfectly Soften Butter for Baking
Softened butter is essential for many baking recipes, especially cookies, as it creams with sugar to create a light and airy texture. Here are a few methods to get your butter to the perfect room temperature:
- Microwave Defrost Method: This is a quick and effective way if you’re in a hurry. For a full stick (1/2 cup) of butter, you can leave it in its paper wrapper. If you only need a portion, place it in a glass or porcelain bowl. Use your microwave’s lowest defrost setting and run it for 10-20 seconds. Check the butter by pressing it gently with your finger or a rubber scraper. It should indent easily without melting. If it’s still too firm, microwave for another 5-10 seconds, watching it very closely. Butter can go from perfectly softened to melted in a matter of seconds.
- Room Temperature Method: The simplest method is to simply leave your butter out on the counter. Depending on your room temperature, this can take anywhere from 30 minutes to 2 hours. This is often the preferred method as it softens the butter evenly.
- Warm Water Bath: For a slightly faster approach than room temperature, place the wrapped stick of butter in a bowl of warm (not hot) water for about 10-15 minutes. Check for softness by pressing it.
The ideal consistency for softened butter is when it’s pliable enough to leave an indentation when pressed, but still holds its shape and isn’t greasy or shiny.
Do I Need to Chill Cookie Dough?
For this specific Cadbury Mini Egg Cookie recipe, chilling the cookie dough is generally not required. The mixture has been carefully formulated to have a fantastic consistency right after mixing, allowing you to bake them immediately without worrying about excessive spreading.
However, there are instances when chilling cookie dough can be beneficial, even if not strictly necessary for this recipe:
- Flavor Development: Chilling allows the flavors in the dough to meld and deepen, often resulting in a more complex and rich taste.
- Texture Control: While this recipe is stable, for some cookies, chilling can prevent excessive spreading, leading to thicker, chewier cookies. The cold butter in chilled dough takes longer to melt, providing more structure during baking.
- Convenience and Planning: If you’re planning ahead for an event or simply want to have fresh cookies on demand, chilling the dough is a great option. The dough can be prepared up to 24 hours in advance and stored in a covered bowl in the refrigerator.
If you do choose to chill the dough, whether for convenience or enhanced flavor, make sure to let it come closer to room temperature for about 30 minutes before baking. Extremely cold dough can lead to underbaked centers or uneven spreading. This short rest allows the butter to soften slightly again, ensuring optimal baking performance.

Storage and Freezing Guidelines for Cadbury Mini Egg Cookies
Ensuring your delicious Cadbury Mini Egg Cookies stay fresh and enjoyable for as long as possible is simple with these storage and freezing tips:
How Long Do Cadbury Mini Egg Cookies Last?
These chocolate chip cookies are best enjoyed fresh, but they will maintain their quality for approximately 3-4 days when stored properly. To keep them at their peak freshness, place them in an airtight container at room temperature. This prevents them from drying out and helps maintain their soft and chewy texture.
Can You Freeze Cadbury Mini Egg Cookies?
Absolutely! Freezing is an excellent way to extend the shelf life of these delightful cookies, allowing you to enjoy them long after Easter. You can freeze baked cookies for up to 6 months in an airtight container or freezer-safe bag. For best results, allow them to cool completely before freezing. To prevent them from sticking together, you can flash freeze them first by placing them in a single layer on a baking sheet in the freezer for about an hour until solid, then transfer them to your container.
Freezing Cookie Dough for Freshly Baked Treats Anytime
For the ultimate convenience, I highly recommend freezing the raw cookie dough. This means you can bake a fresh batch (or even just one or two cookies) whenever a craving strikes! Here’s how to do it:
- Scoop the Dough: Prepare the cookie dough as directed in the recipe. Use a cookie scoop to form individual balls of dough, just as you would for baking.
- Flash Freeze: Place the dough balls in a single layer on a parchment-lined baking sheet. Transfer the baking sheet to the freezer for about 1 hour, or until the dough balls are solid.
- Store: Once frozen solid, transfer the dough balls to an airtight, freezer-safe container or a heavy-duty Ziplock bag. Label with the date and store in the freezer for up to 3 months.
- Bake from Frozen: When you’re ready for warm, fresh cookies, simply pull out however many frozen dough balls you need. There’s no need to thaw them before baking. Place them on a prepared baking sheet and bake as usual, but you may need to add an extra 1-2 minutes to the baking time to ensure they are fully cooked. This method guarantees warm, homemade cookies with minimal effort whenever you desire!

Delicious Variations & Customizations
While these Cadbury Mini Egg Cookies are perfect as is, you can easily customize them to suit your preferences or to match other festive occasions. Here are some ideas to inspire your creativity:
- Nutty Addition: For an added layer of flavor and crunch, fold in half a cup of chopped pecans or walnuts along with the chocolate chips and Mini Eggs.
- Different Candies: While Cadbury Mini Eggs are iconic for Easter, you can swap them out for other seasonal candies throughout the year. Think M&M’s for any celebration, crushed peppermints for Christmas, or even different types of chocolate candies.
- Citrus Zest: A teaspoon of orange or lemon zest can brighten up the cookie dough, offering a subtle, refreshing contrast to the sweetness of the chocolate and candy.
- Extract Experiments: Beyond vanilla, consider adding a hint of almond extract for a marzipan-like nuance, or a touch of mint extract for a refreshing twist (especially with dark chocolate chips).
- White Chocolate Bliss: Replace half or all of the mini chocolate chips with white chocolate chips for a creamier, sweeter profile that pairs wonderfully with the milk chocolate of the Mini Eggs.
- Sprinkle Fun: For an extra festive touch, roll the cookie dough balls in colorful sprinkles before baking. This adds a delightful pop of color and a slight textural variation.
- Chocolate Drizzle: Once cooled, drizzle the baked cookies with melted milk, dark, or white chocolate for an elegant finish and an extra dose of chocolatey goodness.
No matter how you choose to customize them, these Cadbury Mini Egg Cookies provide a versatile base for endless delicious possibilities!

Love Chocolate Chip Cookies? So Do We! Here are Some of Our Favorite Chocolate Chip Cookie Recipes!
- Double Chocolate Chip Cookies
- Banana Chocolate Chip Cookies
- Pumpkin Chocolate Chip Cookies
- Chocolate Chip Cookie Bars
- Avocado Chocolate Chip Cookies
- Oatmeal Chocolate Chip Cookie Bars
- Oatmeal Chocolate Chip Cookies
- Best Chocolate Chip Cookies
- Raspberry Chocolate Chip Cookies
- Chocolate Cake Mix Cookies
- Butter Pecan Chocolate Chip Cookies
- Mint Chocolate Chip Cookies
- Cherry Chocolate Chip Cookies
- Peanut Butter Chocolate Chip Cookies
- Peanut Butter Oatmeal Chocolate Chip Cookies
- Eggless Chocolate Chip Cookies
No matter the occasion or your favorite flavor profile, there’s a chocolate chip cookie recipe for everyone to love!


We hope you enjoy baking and sharing these delightful Cadbury Mini Egg Cookies as much as we do. They truly embody the spirit of Easter with their festive colors and irresistible taste, making them a perfect addition to any holiday celebration or a simple sweet treat to brighten your day. Happy baking!