
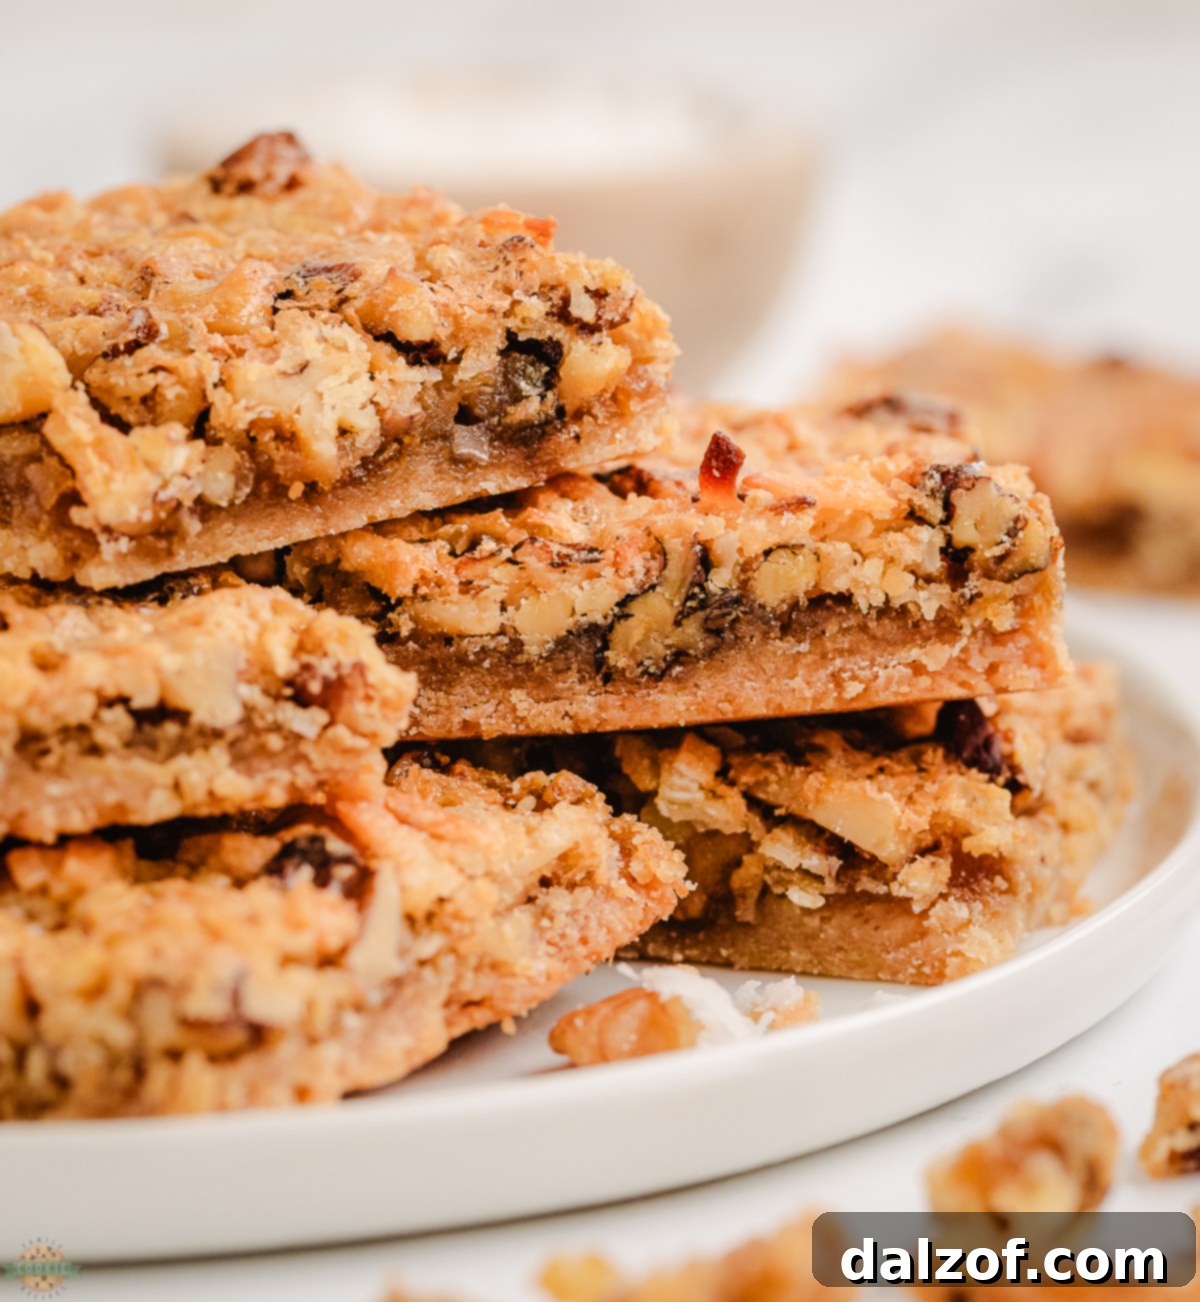
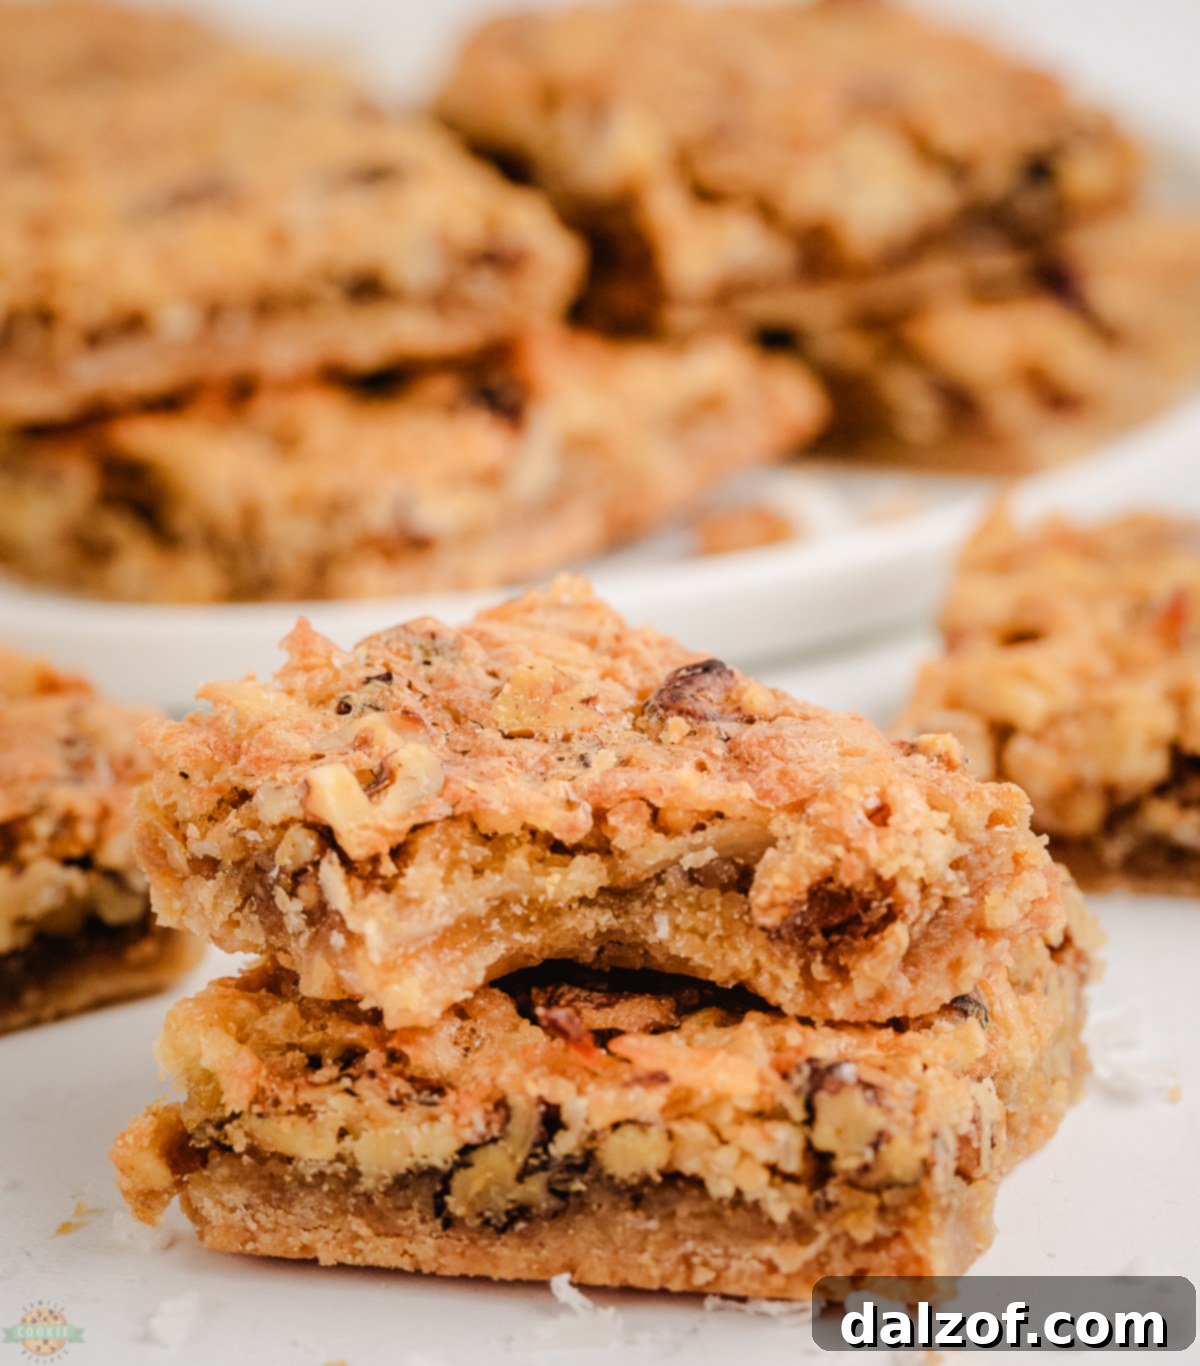
Indulge in a truly spectacular dessert experience with our irresistible Coconut Dream Bars. These soft, chewy, and utterly delightful golden bars feature a rich, buttery shortbread crust perfectly complemented by a luscious brown sugar coconut filling. Each bite offers a harmonious blend of textures and tropical flavors, enhanced by the satisfying crunch of walnuts. Perfect for any occasion, these walnut coconut bars are a guaranteed crowd-pleaser that will leave everyone dreaming of their next bite.
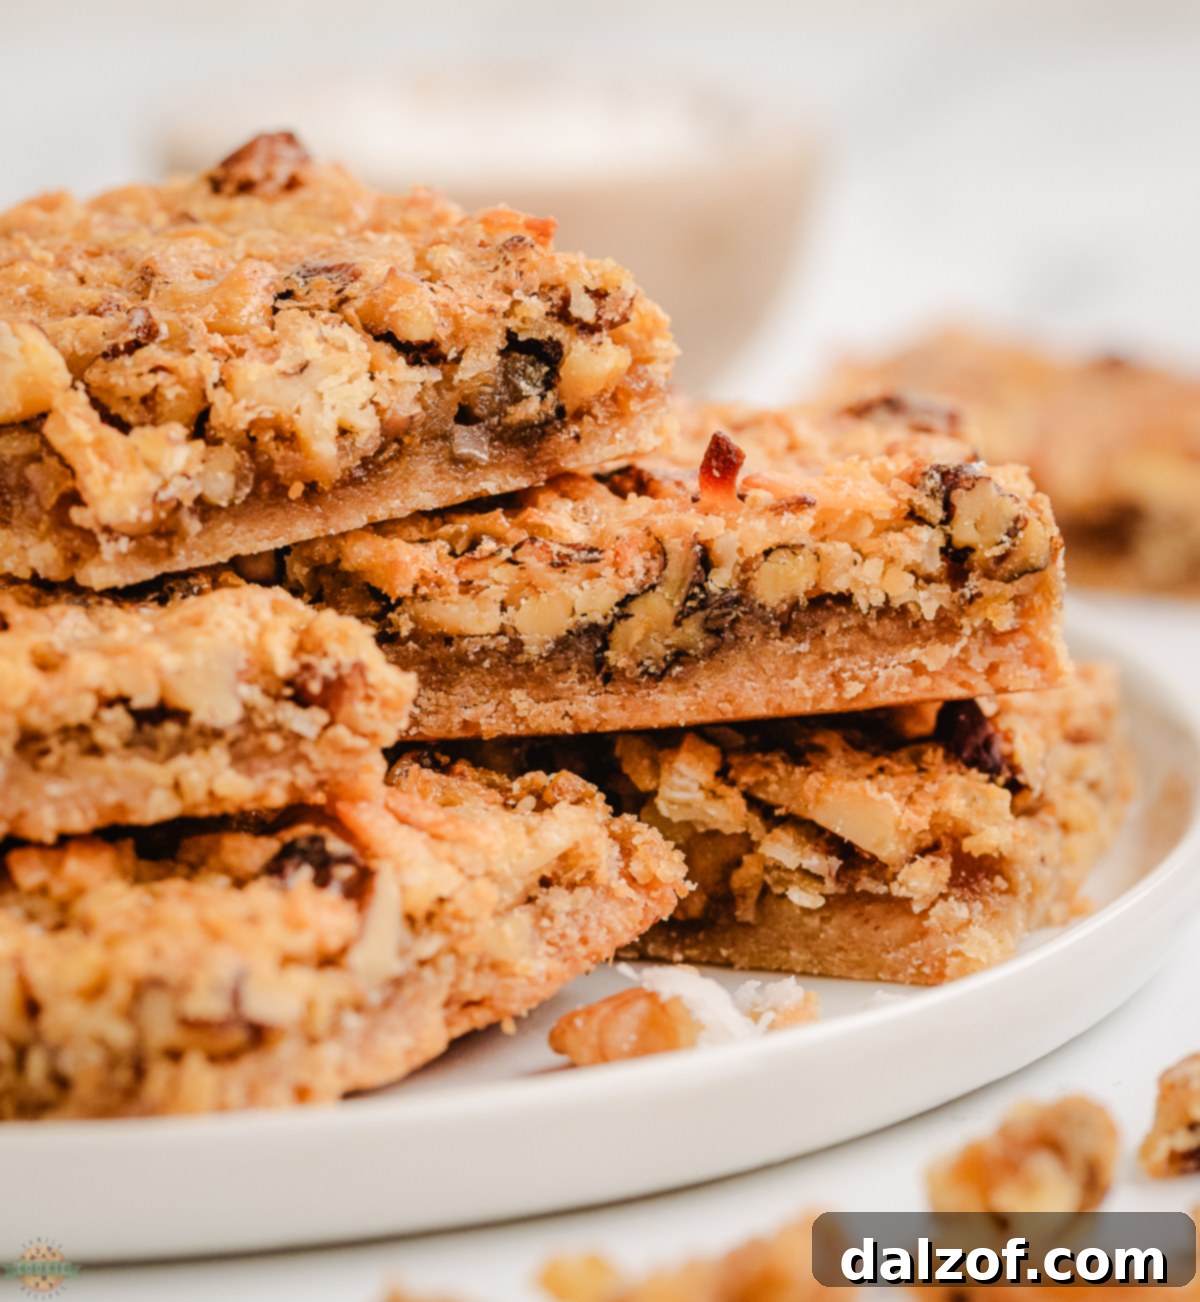
There’s something uniquely comforting about homemade bar desserts, and these coconut dessert bars are no exception. They strike a perfect balance between an indulgent treat and a remarkably simple recipe, making them an ideal choice for large gatherings, bake sales, or simply a sweet everyday indulgence. The contrast between the firm, crunchy base and the smooth, sweet, and incredibly flavorful topping makes each square an absolute sensation. Prepare to fall in love with these easy-to-make, utterly satisfying treats.
Why You’ll Adore These Coconut Dream Bars
- Unforgettable Buttery Shortbread Crust: The foundation of these delectable bars is a homemade buttery crust, crafted to perfection. Its rich flavor and tender-crisp texture provide the ideal counterpoint to the soft, sweet coconut filling, creating a truly balanced dessert. This isn’t just a base; it’s an integral part of the flavor profile, contributing to the overall melt-in-your-mouth experience of these coconut dream bars.
- Explosion of Tropical Coconut Flavor: The star of these dream bars is undoubtedly the filling. Infused with warm brown sugar, fragrant vanilla extract, and a generous dose of coconut extract, it delivers an intensely aromatic and sweet coconut experience that is simply divine. Every mouthful transports you to a tropical paradise, making these more than just a dessert – they’re an escape into rich, natural coconut goodness.
- Perfect for Any Gathering: Whether you’re hosting a family dinner, preparing for a festive holiday, or contributing to a potluck, these easy coconut bars are your go-to solution. They’re incredibly simple to prepare, transport well, and can be cut into neat squares for effortless serving. Their appealing golden appearance and universally loved taste make them an impressive addition to any dessert spread, sure to garner compliments from family and friends alike, solidifying their status as a favorite among homemade dessert bars.
- Delightful Texture Contrast: Beyond the flavor, these bars excel in texture. The firm, slightly crumbly crust gives way to a soft, chewy, and wonderfully moist coconut filling. The inclusion of chopped walnuts adds an extra layer of delightful crunch, making each bite a multi-dimensional sensory pleasure. This interplay of textures is what makes these walnut coconut dessert bars so incredibly satisfying.
- Effortless Preparation: Despite their sophisticated taste and appearance, making these homemade coconut dream bars is surprisingly straightforward. With clear, easy-to-follow steps, even novice bakers can achieve perfect results, transforming simple ingredients into an extraordinary dessert. The minimal fuss involved means more time to enjoy the delightful results.
Essential Ingredients for Your Coconut Dream Bars
Crafting these heavenly bars requires a thoughtful selection of ingredients, ensuring each component contributes to the ultimate flavor and texture. Here’s a detailed look at what you’ll need to create the perfect coconut dream bars:
For the Buttery Crust
The crust is more than just a base; it’s a critical layer of flavor and texture that elevates the entire bar. Using quality ingredients here sets the stage for perfection, delivering a tender yet crisp foundation for our chewy coconut bars:
- All-Purpose Flour: You’ll need 1 cup of all-purpose flour. This provides the fundamental structure for a sturdy yet tender shortbread crust. Ensure it’s measured accurately for the best consistency.
- Brown Sugar: Add ½ cup of brown sugar to the crust mixture. Unlike white sugar, brown sugar lends a subtle caramel note and a softer, chewier texture, enhancing the overall depth of flavor in the base and complementing the rich coconut topping.
- Cold Butter: Crucial for a flaky and tender crust, ½ cup of cold, unsalted butter is cut into small cubes. Cold butter prevents overmixing and creates steam pockets during baking, resulting in a wonderfully crisp and tender base that truly melts in your mouth.
For the Irresistible Coconut Filling
This is where the magic truly happens, bringing together rich, sweet, and aromatic components to form the heart of our coconut walnut dessert bars. Each ingredient plays a vital role in achieving that perfect chewy, flavorful consistency:
- Eggs: Two large eggs act as the primary binder for the filling, creating a rich, thick, and custardy texture that holds all the delicious ingredients together beautifully. They also contribute to the appealing golden-brown finish of the baked bars.
- Brown Sugar: A full 1 cup of brown sugar sweetens the filling and imparts its signature molasses notes, deepening the overall flavor profile and complementing the coconut perfectly. It’s key to the bar’s moistness and chewiness.
- Vanilla Extract: 1 teaspoon of pure vanilla extract is essential for rounding out the sweetness and adding a warm, aromatic depth that enhances all the other flavors, making the coconut notes truly pop.
- Coconut Extract: To intensify that authentic tropical taste, 1 teaspoon of coconut extract is a must. It significantly boosts the natural coconut flavor, ensuring these bars deliver an undeniable tropical punch. Don’t skip this for the best, most vibrant results!
- All-Purpose Flour: Just 2 tablespoons of flour are added to the filling to provide a slight thickening agent. This ensures the filling sets up perfectly without being overly dense, giving it that ideal soft-chewy consistency.
- Salt: A mere ½ teaspoon of salt might seem small, but it plays a vital role. It expertly balances the sweetness of the brown sugar and coconut, highlighting their flavors and preventing the bars from being cloyingly sweet.
- Flaked Coconut: The star ingredient! 1 cup of flaked coconut (sweetened or unsweetened, depending on your preference for sweetness) adds the characteristic texture and robust coconut flavor that defines these bars. It creates the quintessential chewy interior.
- Chopped Walnuts: For that delightful textural crunch and a hint of nutty richness, 1 cup of chopped walnuts is folded into the filling. They pair wonderfully with coconut, adding a satisfying bite and enhancing the overall complexity of these golden coconut bars.
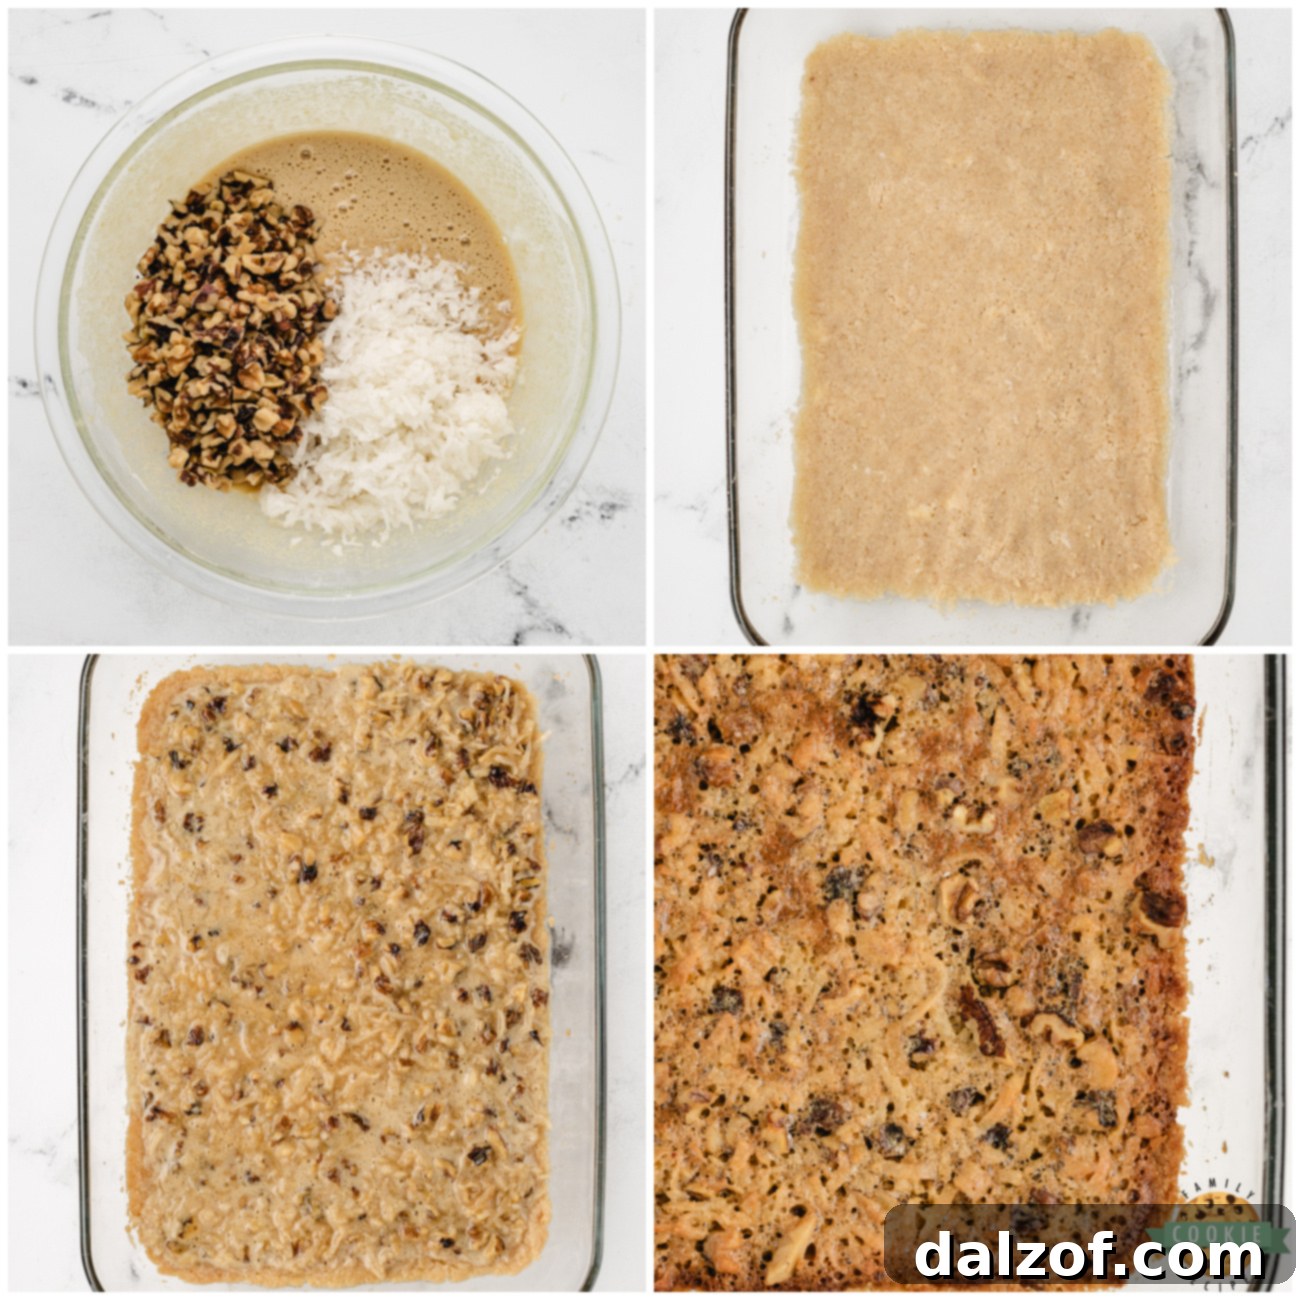
Baking Your Perfect Coconut Dream Bars: A Step-by-Step Guide
Making these chewy coconut bars is a rewarding process, and following these key steps will ensure your success in creating a truly exceptional dessert. Each stage is designed to build layers of flavor and achieve that perfect texture everyone craves in a homemade treat.
- Prepare Your Baking Pan and Oven: Begin by thoroughly spraying a 9×13 inch baking pan with non-stick cooking spray. This crucial step ensures that your baked bars can be easily removed and cut without sticking. For even cleaner edges and effortless lifting, you can line the pan with parchment paper, allowing some overhang on the sides to create convenient “handles.” Preheat your oven to 350°F (175°C), ensuring it’s at the correct temperature for even baking.
- Craft the Buttery Shortbread Crust: In a medium-sized mixing bowl, combine the all-purpose flour and brown sugar for the crust. Next, cut the cold butter into small cubes and add it to the flour mixture. Using a pastry blender, a fork, or even your fingertips, work the butter into the flour until the mixture resembles coarse crumbs. This technique helps achieve that perfect tender-crisp shortbread texture. Transfer this crumbly dough to your prepared baking pan and press it down evenly and firmly across the entire bottom. A flat-bottomed glass or the palm of your hands can help create a compact, even layer, which is essential for a sturdy base for your coconut dream bars.
- Pre-Bake the Crust for Stability: Place the pressed crust into the preheated oven and bake for 10 minutes. This pre-baking step is vital as it creates a solid, partially baked foundation that will hold up beautifully under the moist coconut filling, preventing a soggy bottom and ensuring structural integrity. While the crust is pre-baking, you can swiftly prepare the filling, maximizing your baking efficiency.
- Prepare the Luscious Coconut Filling: In a separate, larger mixing bowl, whisk together the two large eggs, the remaining 1 cup of brown sugar, 1 teaspoon of vanilla extract, and 1 teaspoon of coconut extract until well combined and slightly frothy. This ensures all the wet ingredients are evenly distributed, forming a smooth base. Next, sprinkle the 2 tablespoons of all-purpose flour and ½ teaspoon of salt over the mixture and whisk again until everything is fully incorporated and smooth. Finally, gently fold in the 1 cup of flaked coconut and the 1 cup of chopped walnuts using a spatula. Be careful not to overmix; simply combine until the nuts and coconut are evenly dispersed throughout the rich filling.
- Assemble and Bake to Golden Perfection: Carefully pour the prepared coconut filling evenly over the hot, pre-baked crust in the baking pan. Spread it gently to cover the crust completely. Return the pan to the oven and bake for an additional 20-25 minutes, or until the filling is set, golden brown around the edges, and slightly firm to the touch in the center. The exquisite aroma filling your kitchen will be your cue that these homemade coconut bars are nearly ready!
- The Art of Cooling and Cutting: This step is paramount for perfect presentation and texture. After baking, remove the pan from the oven and allow the coconut bars to cool completely in the pan on a wire rack. This is non-negotiable! Cooling fully allows the filling to set properly, preventing the bars from crumbling or becoming messy when cut. Once completely cool (which might take a couple of hours or more), use the parchment paper overhang (if used) to lift the entire slab out, or carefully run a thin knife around the edges if you just used cooking spray. Cut into even squares or rectangles for serving. Now, prepare to serve and enjoy the fruits of your labor!
Storage and Freezing Tips for Your Coconut Dream Bars
Ensuring your homemade coconut cookie bars stay fresh and delicious is simple with these effective storage guidelines, allowing you to enjoy them over an extended period or prepare them in advance:
These delightful coconut bars can be stored at room temperature for approximately 1 week. To maintain their ideal softness, chewiness, and delightful flavor, always keep them in an airtight container. This crucial step prevents them from drying out and helps preserve their wonderful texture and aromatic qualities.
For longer preservation, these bars freeze exceptionally well, making them perfect for meal prepping desserts or having a treat on hand. You can freeze them for up to 3 months without compromising their quality. To freeze, first arrange the completely cooled, cut squares in a single layer on a baking sheet and freeze until firm (this usually takes about 1-2 hours). Once firm, transfer them to a freezer-safe airtight container or a heavy-duty freezer bag, layering them with parchment paper between each bar to prevent sticking. When you’re ready to enjoy them, thaw the frozen bars in the refrigerator overnight for the best texture and taste. You can also let them come to room temperature for a softer bite before serving.
Coconut Dream Bar Recipe
Coconut Dream Bar Recipe
Soft & chewy Coconut Dream Bars made with a buttery crust and a delightful brown sugar coconut filling. Golden dessert bars with lovely coconut flavor everyone enjoys! These versatile treats are perfect for any gathering or a simple sweet craving, promising a taste of paradise in every bite.
Course: Cookie Bars, Dessert
Cuisine: American
Keyword: Coconut Dream Bars, Walnut Coconut Bars, Easy Coconut Dessert, Homemade Cookie Bars
Prep Time: 15 minutes
Cook Time: 25 minutes
Total Time: 40 minutes
Servings: 30 servings
Author: Jessica & Nellie
Ingredients
Crust
- 1 cup all-purpose flour
- ½ cup brown sugar
- ½ cup butter (cold, cut into cubes)
Coconut Filling
- 2 large eggs
- 1 cup brown sugar
- 1 tsp vanilla extract
- 1 tsp coconut extract
- 2 TBSP all-purpose flour
- ½ tsp salt
- 1 cup flaked coconut (sweetened or unsweetened, as preferred)
- 1 cup chopped walnuts
Instructions
- Preparation: Preheat your oven to 350°F (175°C). Lightly spray a 9×13 inch baking pan with non-stick cooking spray, or line it completely with parchment paper for effortless removal.
- Crust Creation: In a medium bowl, combine 1 cup of all-purpose flour and ½ cup of brown sugar. Add the cold butter, cut into small cubes. Using a pastry blender or fork, cut the butter into the flour mixture until it resembles coarse crumbs. Press this mixture firmly and evenly into the bottom of the prepared baking pan, creating a compact base.
- Initial Bake: Place the crust in the preheated oven and bake for 10 minutes. This foundational bake ensures the crust is firm before adding the moist filling.
- Filling Preparation: While the crust bakes, in a separate large mixing bowl, whisk together the 2 large eggs, 1 cup of brown sugar, 1 teaspoon of vanilla extract, and 1 teaspoon of coconut extract until thoroughly combined. Sprinkle in the 2 tablespoons of all-purpose flour and ½ teaspoon of salt, then whisk again until the mixture is smooth. Gently fold in the 1 cup of flaked coconut and 1 cup of chopped walnuts until they are evenly dispersed throughout the rich filling.
- Final Bake: Carefully pour the prepared coconut filling evenly over the hot, pre-baked crust in the pan. Spread it gently to ensure full coverage. Return the pan to the oven and bake for an additional 20-25 minutes, or until the filling is beautifully golden brown and set in the center.
- Cooling and Serving: This step is essential for perfect bars. Allow the Coconut Dream Bars to cool completely in the pan on a wire rack before attempting to cut them. This might take a couple of hours. Once fully cooled, lift the bars using the parchment paper (if used) or carefully run a knife around the edges. Cut into approximately 30 even squares and savor your homemade tropical treat!
Notes
These exquisite coconut bars store beautifully at room temperature for up to one week when kept in an airtight container, ensuring they remain soft and chewy. For extended freshness, they can be frozen for up to 3 months. To enjoy, simply thaw them in the refrigerator overnight before serving for the optimal texture and flavor experience.
Nutrition Information (per serving, approximate)
Calories: 135kcal | Carbohydrates: 16g | Protein: 2g | Fat: 8g | Saturated Fat: 4g | Polyunsaturated Fat: 2g | Monounsaturated Fat: 1g | Trans Fat: 0.1g | Cholesterol: 19mg | Sodium: 72mg | Potassium: 58mg | Fiber: 1g | Sugar: 11g | Vitamin A: 111IU | Vitamin C: 0.1mg | Calcium: 17mg | Iron: 1mg
When is the Perfect Time to Serve These Coconut Dream Bars?
The versatility of Coconut Dream Bars makes them suitable for an impressive array of occasions throughout the year. Their delightful flavor profile and convenient bar format mean they are always a welcome addition, effortlessly fitting into any event. Consider serving these beloved treats at:
- Holiday Gatherings: From festive Easter brunches to cozy Christmas potlucks, these bars add a seasonal and unique touch. Their golden hue and rich, comforting flavors perfectly complement the celebratory spirit of any holiday.
- Birthday Parties: A fantastic alternative to traditional cake, especially for those who prefer handheld bar desserts. They are incredibly easy to serve to a crowd of any size, from intimate family gatherings to larger celebrations.
- Baby Showers & Bridal Showers: Their elegant yet comforting nature makes them a lovely, sophisticated treat for these joyous events. They pair wonderfully with coffee, tea, or sparkling beverages, adding a touch of homemade charm to your dessert table.
- Potlucks & Picnics: Extremely portable and sturdy, these bars hold up exceptionally well during transport, making them ideal for outdoor events or gatherings where a fuss-free dessert is appreciated. Simply cut them into squares, pack them in an airtight container, and they’re ready for sharing.
- Everyday Indulgence: You don’t need a special occasion to enjoy these delightful coconut dessert bars! They’re perfect for a quiet evening treat with a cup of coffee, a delightful afternoon snack, or even a welcome surprise in a lunchbox.
- Bake Sales: Due to their appealing appearance, universally loved taste, and convenient portioning, they are always a resounding hit at charity events or school bake sales, often selling out quickly.
Their ability to be prepared in advance and stored with ease makes them a stress-free option for any event planning, ensuring you can relax and enjoy the occasion without last-minute baking rushes. These walnut coconut bars are truly a gift that keeps on giving!
Creative Variations for Your Coconut Dream Bars
While the classic Coconut Dream Bar recipe is truly exceptional on its own, it also serves as a fantastic canvas for culinary creativity. Don’t hesitate to experiment with different additions and flavors to tailor these bars to your personal preferences, seasonal availability, or even dietary needs. Here are some inspiring variations to spark your imagination:
- Chocolate Lover’s Dream: For those who can’t resist the allure of chocolate, simply fold in ½ cup to 1 cup of your favorite chocolate chips (milk, semi-sweet, or dark) into the coconut filling mixture. The melting chocolate adds a rich, decadent layer that pairs beautifully with the tropical coconut. White chocolate chips are another excellent choice for a sweeter, creamier contrast, creating a stunning visual appeal as well.
- Fruity & Tropical Twist: Enhance the tropical notes by incorporating various dried fruits. Try adding ½ cup of finely diced dried cranberries for a tart counterpoint that brightens the flavor, or chopped dried pineapple for an even more intense island flavor profile. Dried mango, apricots, or even candied ginger would also be delicious, adding chewiness and a burst of fruitiness to your chewy coconut bars.
- Nutty Adventures: While walnuts provide a classic crunch and a lovely earthy note, feel free to experiment with other nuts to vary the texture and flavor. Pecans offer a buttery, slightly richer flavor, while slivered or chopped almonds provide a more delicate crunch and a subtle almond essence. Toasted macadamia nuts would be a truly luxurious addition, emphasizing the tropical theme and adding a rich creaminess. Ensure nuts are chopped to an appropriate size for even distribution.
- Citrus Zest Brightness: For a brighter, fresher flavor profile that cuts through the sweetness, add the zest of one lemon, lime, or even an orange to the coconut filling. The vibrant citrus oils will add a wonderful aromatic lift and a delightful tang.
- Spiced Delights: A pinch of warm ground spices, such as ¼ to ½ teaspoon of ground cinnamon, nutmeg, or even a touch of cardamom, can introduce a comforting and intriguing spice note to the filling, making these bars especially appealing during cooler months or festive seasons.
- Nut-Free Option: If you or your guests have nut allergies, simply omit the walnuts from the recipe. The bars will still be incredibly delicious with their rich coconut filling. Alternatively, you could add toasted pumpkin seeds or sunflower seeds for a similar textural contrast without the nuts, ensuring everyone can enjoy these delightful treats.
- Gluten-Free Crust: For a gluten-free version of these homemade dessert bars, substitute the all-purpose flour in the crust with a 1:1 gluten-free baking flour blend. Ensure the blend contains xanthan gum or add ¼ teaspoon per cup of flour for the best results in terms of binding and texture.
Each variation offers a unique spin, transforming the familiar into something new and exciting while maintaining the core deliciousness of these beloved bars. Don’t be afraid to let your culinary imagination soar and customize your perfect batch of coconut dream bars!
More Irresistible Coconut-Inspired Recipes to Explore
If you find yourself enchanted by the tropical allure and versatile nature of coconut, then you’re in for a treat! We share your passion for this incredible ingredient and have curated a collection of other fantastic recipes that prominently feature coconut. Dive into these delightful creations and expand your coconut recipe repertoire, discovering new ways to enjoy this beloved flavor:
- Our easy no-bake coconut cheesecake bars are a delightful and refreshing treat made with only 6 simple ingredients. They are absolutely perfect for warmer months when you crave a delicious dessert without the need to turn on your oven.
- For a classic cookie with an enticing tropical twist, try these coconut shortbread cookies. This simple recipe delivers big on buttery flavor combined with a lovely, delicate hint of coconut, making them wonderfully addictive.
- These coconut cream cookies are not only incredibly tasty but also beautifully presented. Their elegant appearance makes them a wonderful addition to any dessert table or holiday platter, sure to impress your guests.
- Seeking a bit more decadence in your dessert? Look no further than this rich and comforting chocolate chip coconut pie. It’s a simple homemade dessert that’s perfect for special events, festive holidays, and even casual get-togethers, offering a truly comforting slice of heaven.
- You absolutely can’t go wrong with these frosted coconut sugar cookies. These soft, tender cookies are crowned with a luscious coconut buttercream topping, creating an irresistible combination of flavors and textures that will have everyone asking for the recipe.
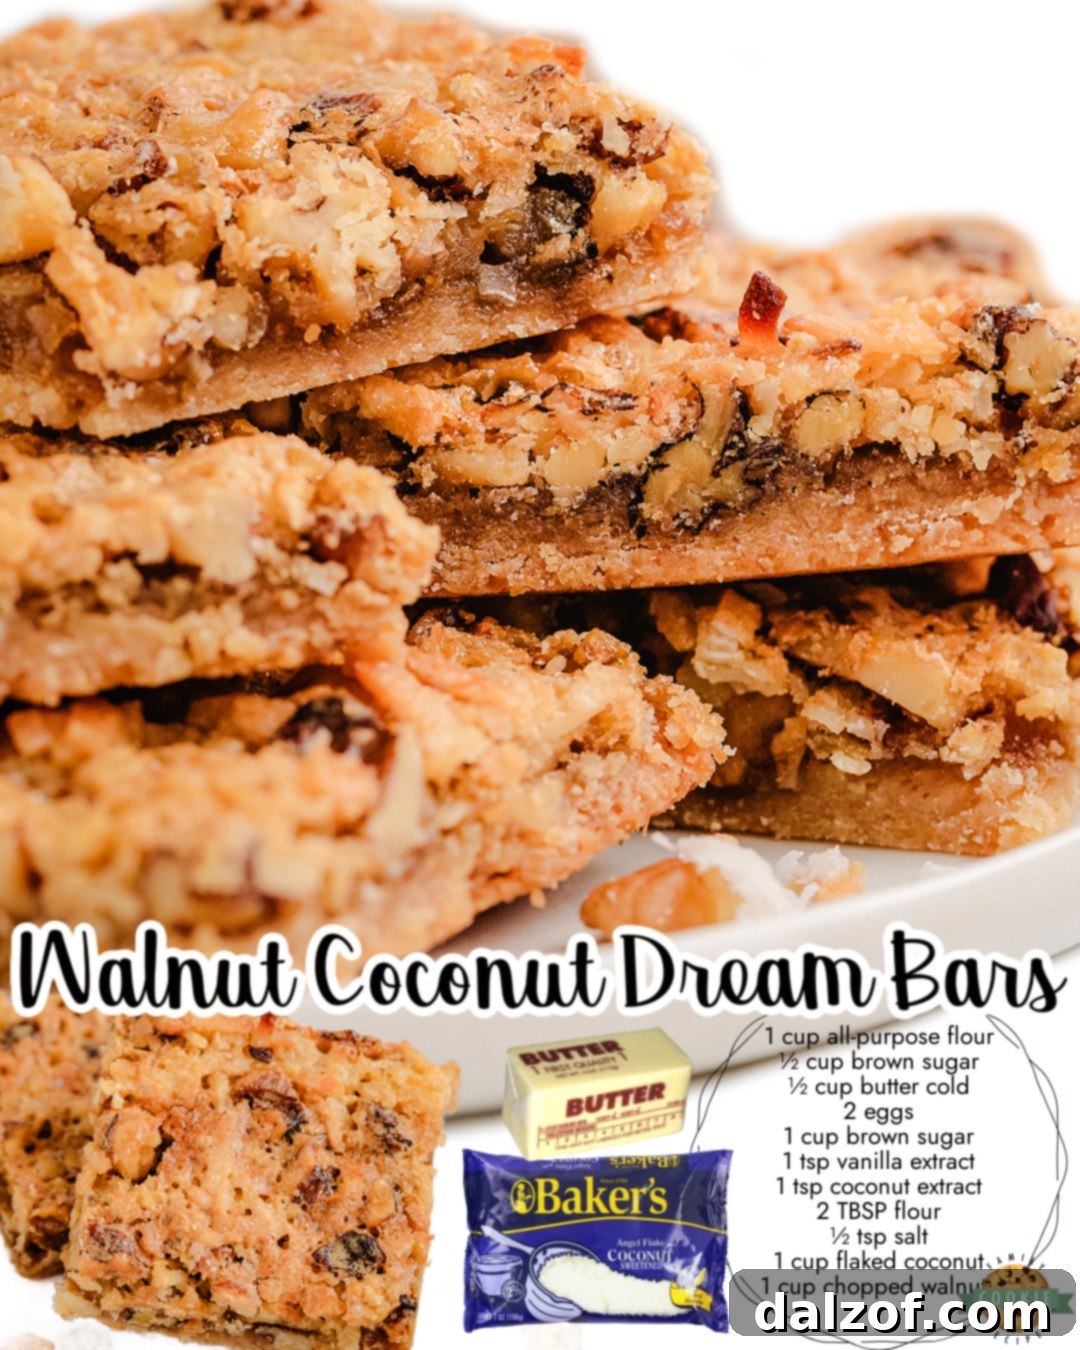
In conclusion, these Coconut Dream Bars truly live up to their name, offering a dreamy combination of textures and flavors that captivate from the first bite. With a tender, buttery shortbread crust providing the perfect base and a sweet, intensely flavorful coconut and walnut filling, they are a testament to how simple ingredients can create an extraordinary dessert. Whether you’re a seasoned baker looking for a reliable crowd-pleaser or just starting your culinary journey, this recipe provides an accessible and rewarding experience. Easy to make, delightful to share, and always a guaranteed hit, these golden coconut bars are destined to become a cherished addition to your recipe collection. Gather your ingredients, preheat your oven, and prepare to bake a batch of pure happiness – your taste buds will thank you!