
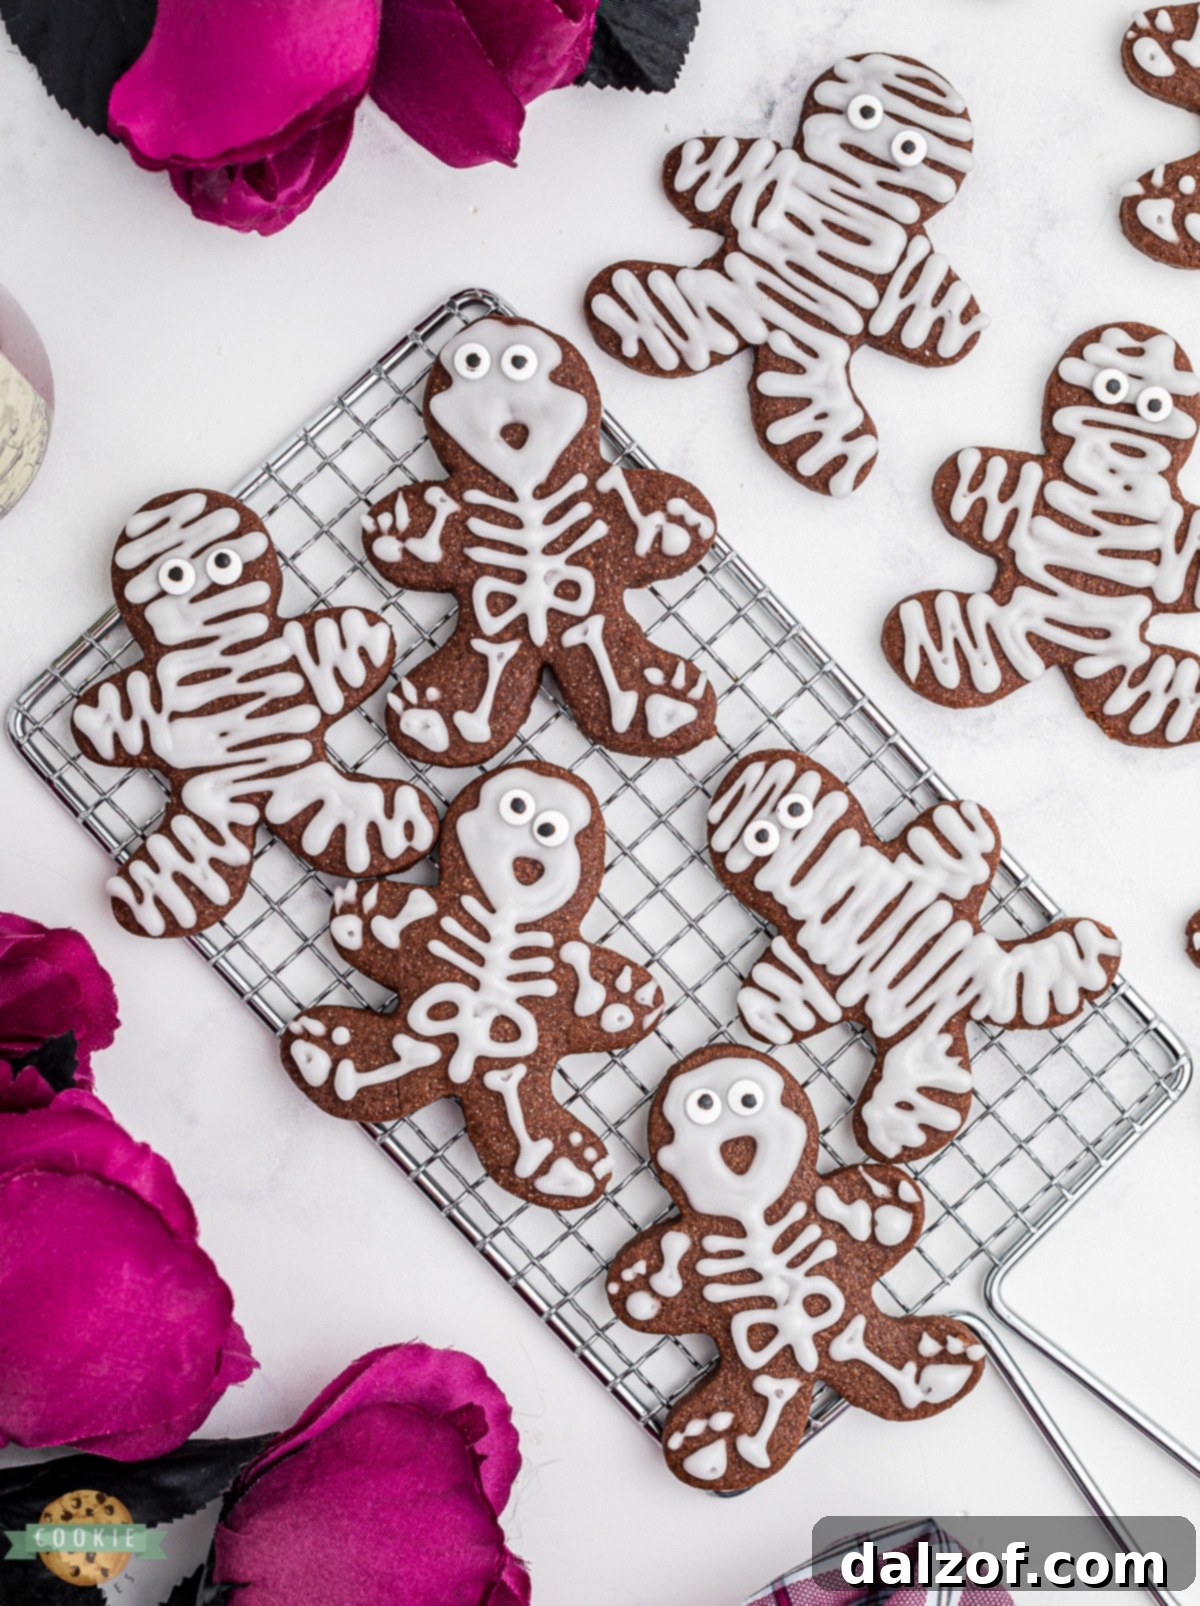
Get ready to add a delightful touch of spooky fun to your Halloween celebrations with these incredible Halloween Skeleton Cookies! These aren’t just any ordinary chocolate sugar cookies; they are a canvas for creativity, transforming simple cut-out shapes into perfectly creepy, yet charming, skeletal masterpieces. Imagine the joy and excitement as you and your loved ones embark on this delicious baking adventure, resulting in treats that are as much fun to decorate as they are to devour.
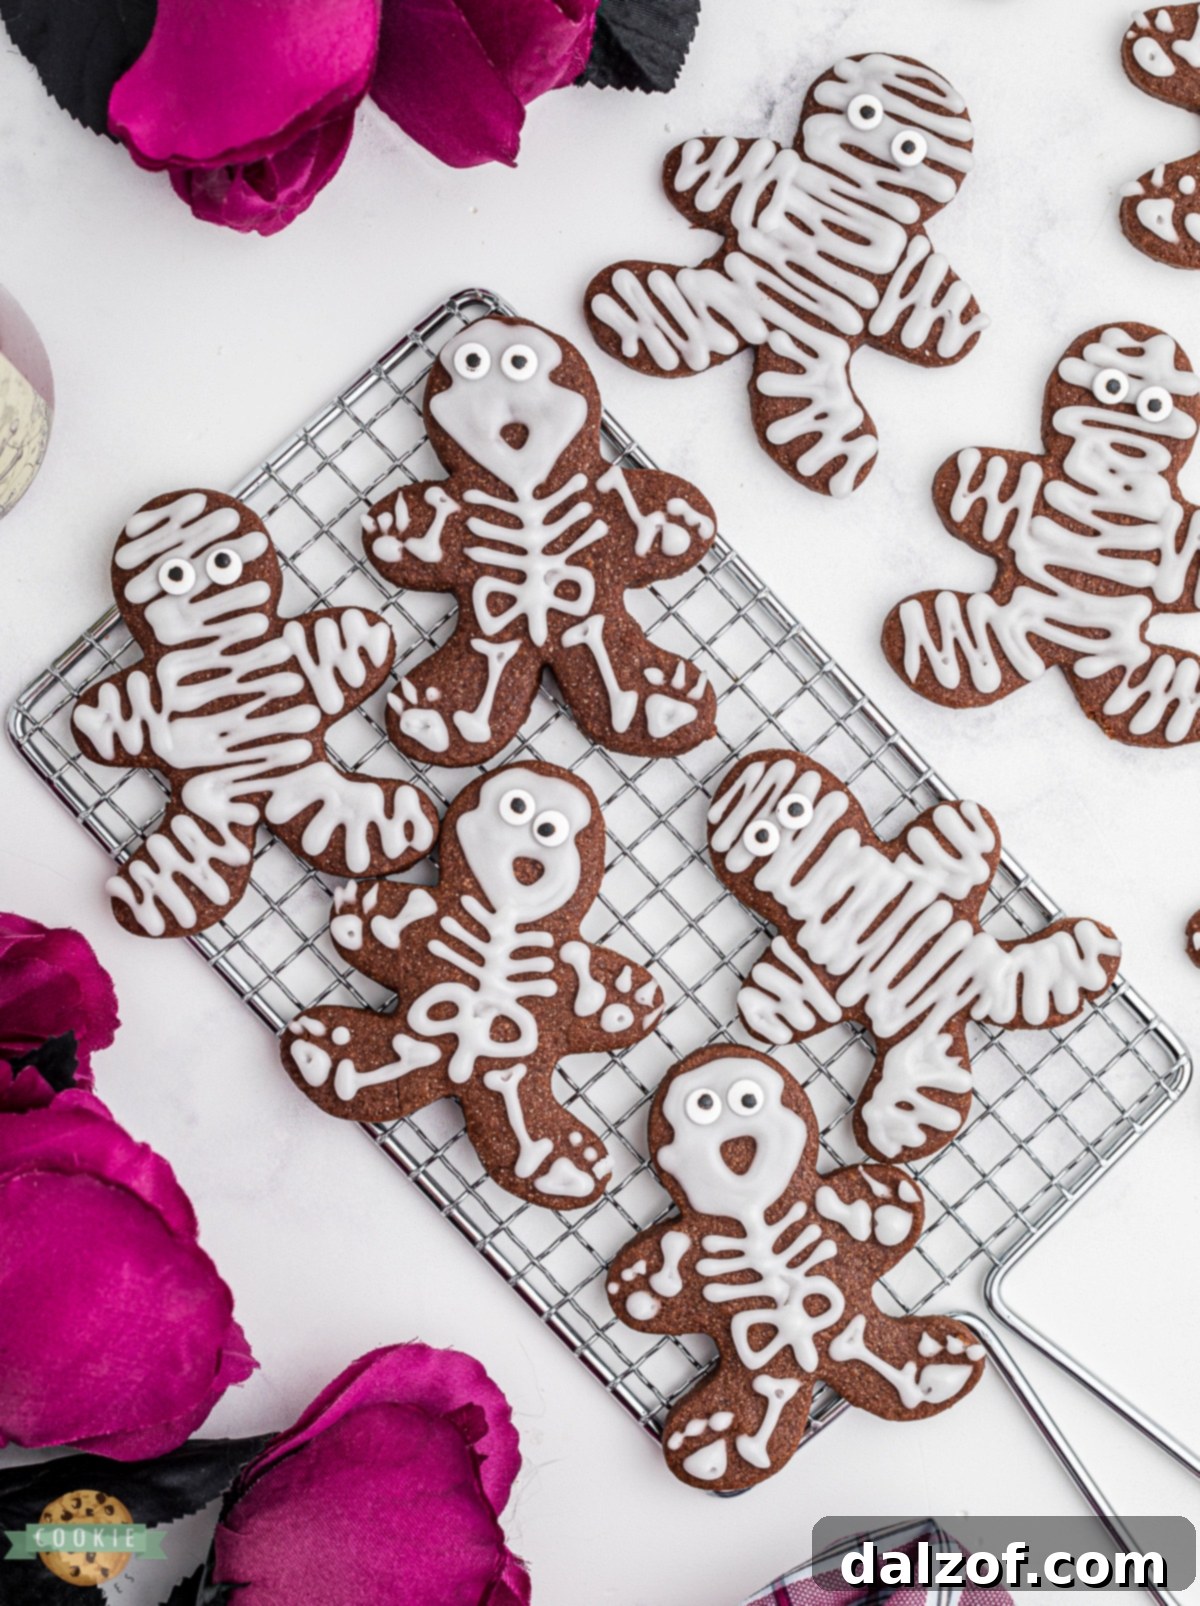
These wonderfully festive and spooky sugar cookies are designed for maximum enjoyment, offering a fantastic opportunity for family bonding in the kitchen. Gather the kids, unleash your inner artist, and watch everyone squeal with delight as they reach for their very own sweet, chocolatey skeleton treat. This Halloween sugar cookie recipe is truly a dessert and an art project rolled into one!
Crafting Spooktacular Chocolate Sugar Cookies for Halloween
Making chocolate sugar cookies from scratch is a surprisingly straightforward process, though it involves a few steps that can even be spread across a couple of days if needed. The effort is absolutely worth it, as these unique skeleton sugar cookies promise to be the star attraction at any Halloween party. Each cookie is made with love and attention, ensuring a uniquely wonderful result that will quickly become a cherished part of your annual Halloween traditions. Encourage your children and their friends to join in the decorating fun – it’s a party activity in itself, fostering creativity and delicious memories.
Why This Halloween Cookie Recipe Will Be Your New Favorite
- Effortless Ingredients: You’ll be pleasantly surprised to discover that most of the ingredients for these delicious cookies are likely already stocked in your pantry. Think everyday staples like flour, baking powder, salt, butter, and sugar.
- Smart Preparation for Busy Schedules: The cookie dough requires a minimum of 2 hours of chilling before it can be rolled and shaped, but this offers a fantastic advantage! You can easily prepare the dough up to two days in advance, allowing you to roll, cut, bake, and decorate at your convenience, making party prep a breeze.
- Clever Cookie Cutter Reuse: Don’t let those gingerbread man cookie cutters sit dormant after Christmas! This recipe ingeniously repurposes them, transforming them into the perfect base for our adorable (or eerie) skeleton cookies. It’s a fun way to extend the life of your kitchen tools and add a unique twist.
- A Delight for All Ages: These cookies are designed to be a family affair! From mixing the dough to the exciting decorating phase, everyone can get involved, making memories as sweet as the cookies themselves.
- Irresistibly Delicious Chocolate Flavor: Unlike traditional sugar cookies, our recipe incorporates cocoa powder, creating a rich, deep chocolate flavor that pairs perfectly with the sweet royal icing.
Essential Ingredients for Your Spooky Skeleton Cookies
Creating the perfect chocolate sugar cookie base and smooth, delicious glaze requires a few key ingredients. Here’s what you’ll need to gather:
For the Chocolate Sugar Cookies:
- Unsalted Butter: 1 cup (2 sticks), softened to room temperature. This ensures a smooth, creamy texture when mixed.
- Granulated Sugar: 1 cup, contributing to the cookies’ delightful sweetness and tender crumb.
- Clear Vanilla Extract: ½ tsp, providing a classic, sweet aroma without adding color to your icing.
- Almond Extract: ¼ tsp, for a subtle, complementary flavor that elevates the chocolate.
- Large Egg: 1, acting as a binder to hold all the ingredients together.
- All-Purpose Flour: 2 cups, plus an additional 2 tablespoons for dusting your workspace while rolling the dough. This forms the essential structure of your cookies.
- Unsweetened Natural Cocoa Powder: ½ cup, giving these cookies their signature rich chocolate taste and dark hue.
- Baking Powder: ¾ tsp, to help the cookies rise slightly and achieve a pleasant texture.
- Salt: ¾ tsp, crucial for balancing the sweetness and enhancing all the other flavors.
For the Royal Icing Glaze and Decoration:
- Powdered Sugar: 3 cups, sifted. This forms the smooth, sweet base for your glaze. Sifting prevents lumps and ensures a silky finish.
- Milk: ¼ cup, used to achieve the ideal consistency for piping and coating.
- Light Corn Syrup: 2 tablespoons. This magical ingredient gives your glaze a beautiful, glossy finish and helps prevent it from crystallizing, keeping it smooth.
- Clear Vanilla Extract: ½ tsp, for flavor in the icing.
- Candy Eyeballs: These are absolutely essential for bringing your skeletons and mummies to life! You can usually find them in the cake decorating aisle of craft stores, major supermarkets, or readily available online (e.g., here on Amazon).
- Edible Ink Pens (Optional): For adding intricate details or fun designs onto your hardened icing. These can be purchased from baking supply stores or online (e.g., here on Amazon).
Step-by-Step Decorating Instructions for Your Halloween Cookies
The real fun begins once your chocolate sugar cookies are baked and cooled! Here’s how to transform them into perfectly creepy skeletons and cute mummies:
Decorating Skeletons:
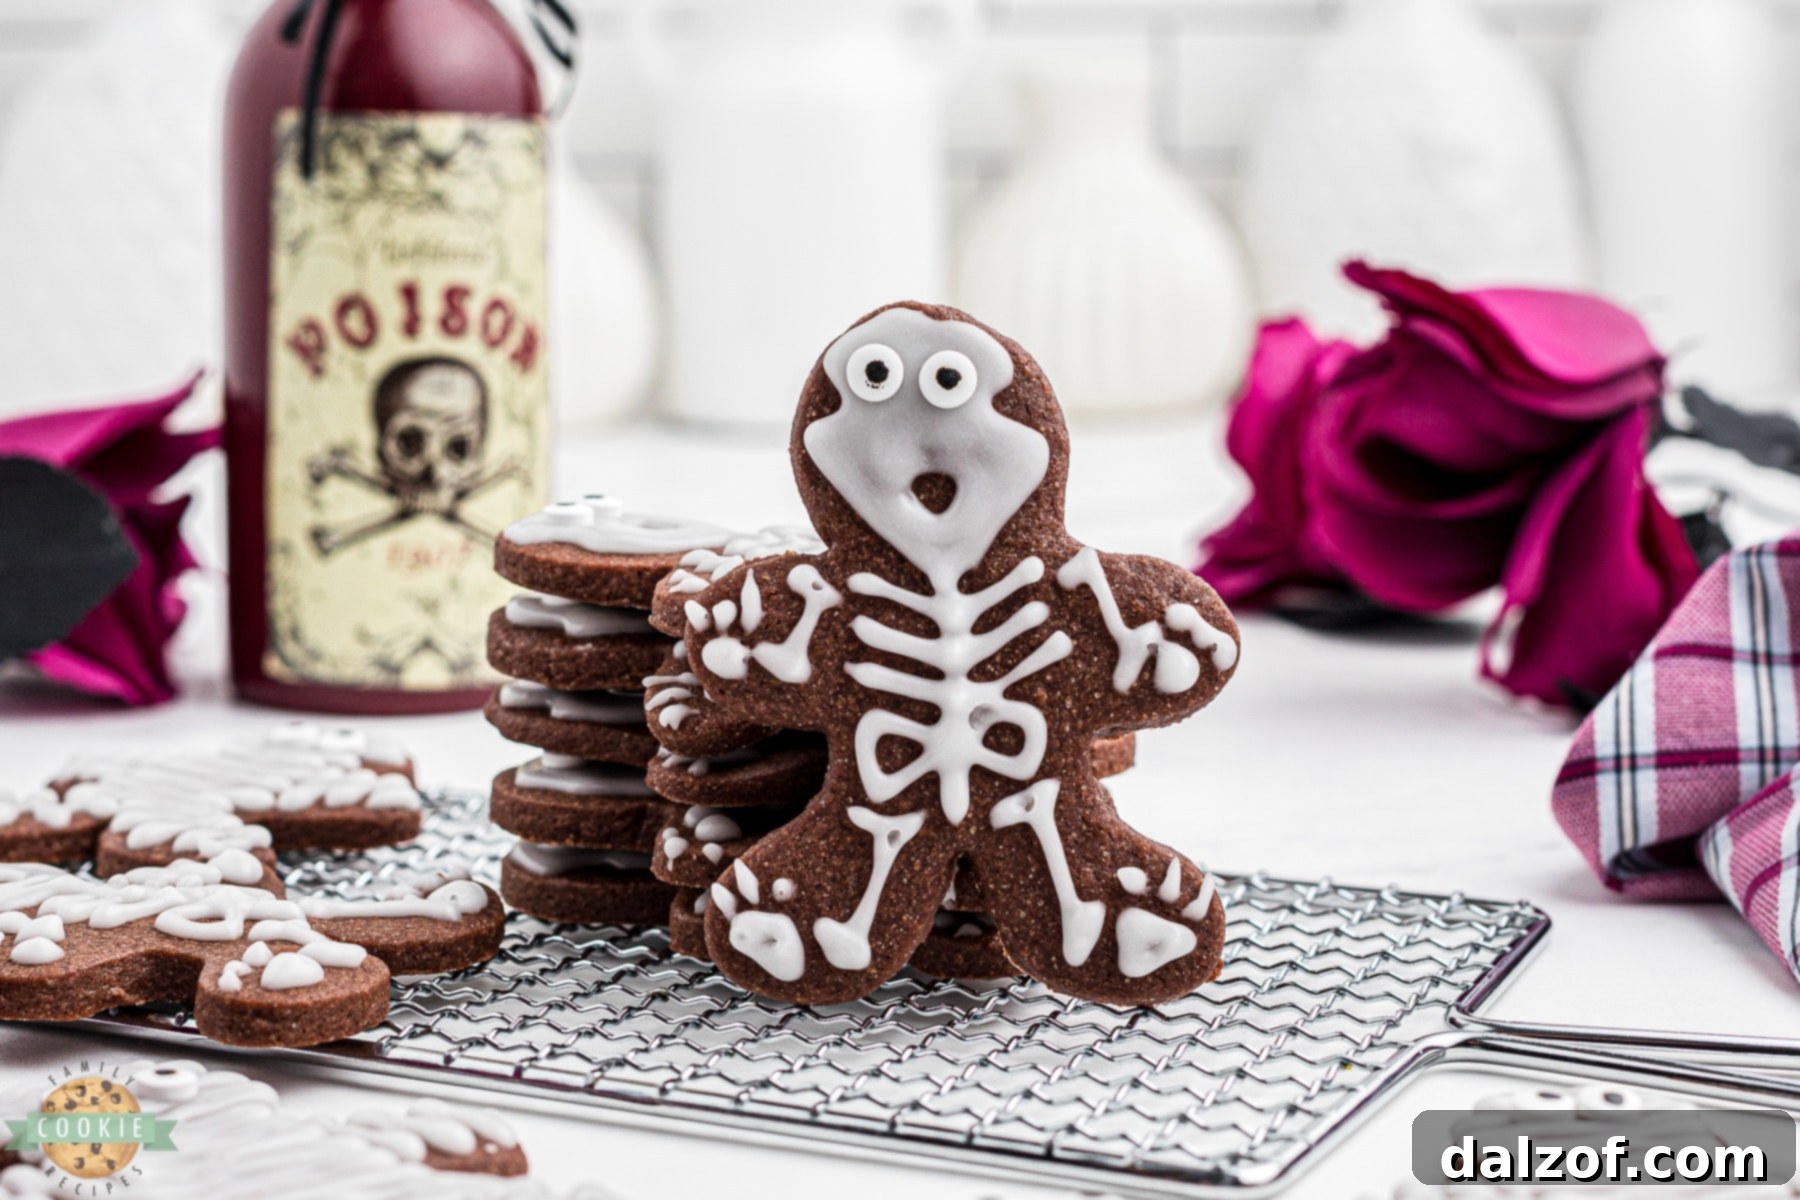
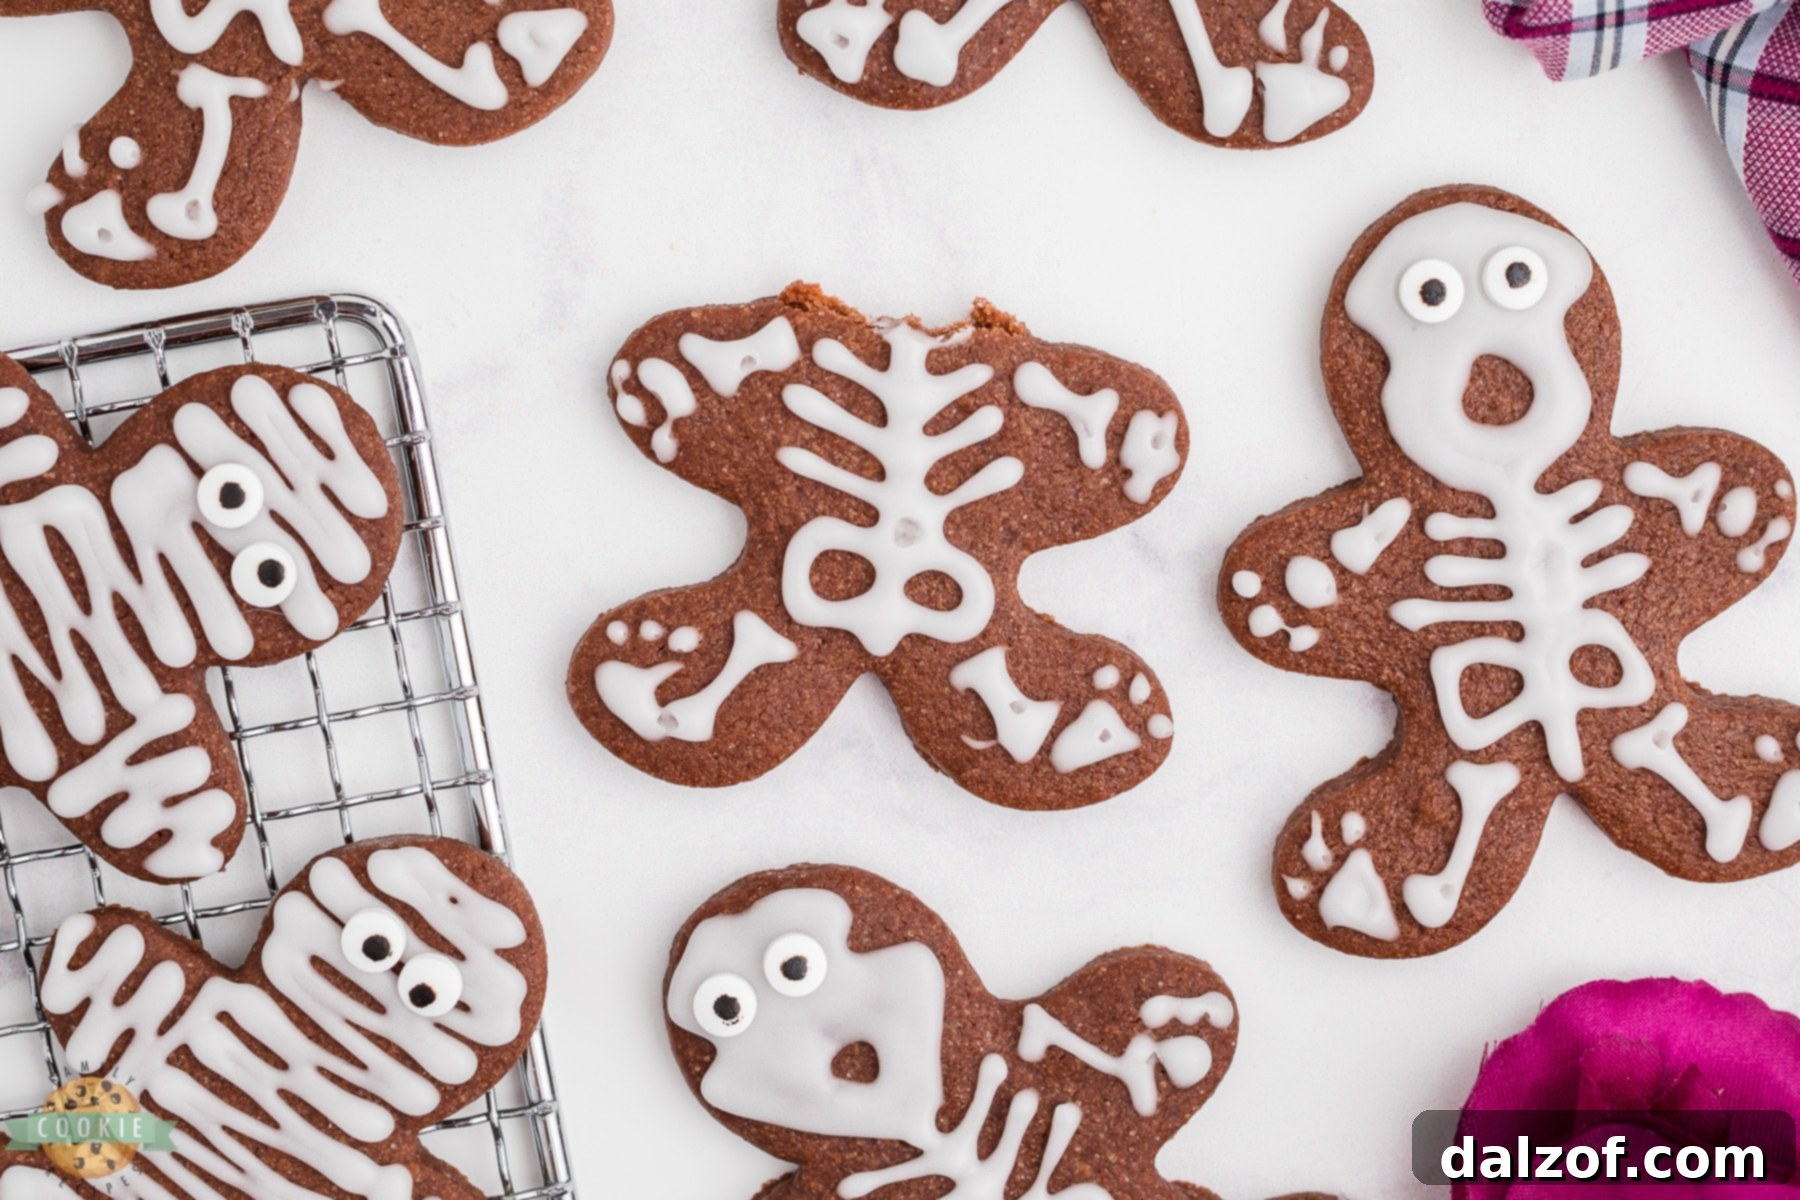
- Start with the Skull: Begin by piping a small circular hole where the mouth will be. Then, pipe an outline around this hole to create the basic shape of the skull. You can make it rounder or slightly elongated depending on your desired look.
- Fill in the Skull: Carefully fill in the piped outline with more icing. Use a clean toothpick or a small brush to gently spread the icing to the edges and fill in any small gaps or air bubbles, ensuring a smooth surface.
- Attach the Eyeballs: While the icing is still wet, gently press two candy eyeballs into position above the mouth hole on each skull. The wet icing will help them adhere firmly.
- Create the Rib Cage and Bones: Once the skull is set (this may take a few minutes), pipe thin lines down the body of the cookie to form the spine and ribs. Add small lines for arm and leg bones, remembering that simplicity often works best for a cute skeleton look. You can use a Wilton #1 or #2 piping tip for fine details.
Decorating Mummies:
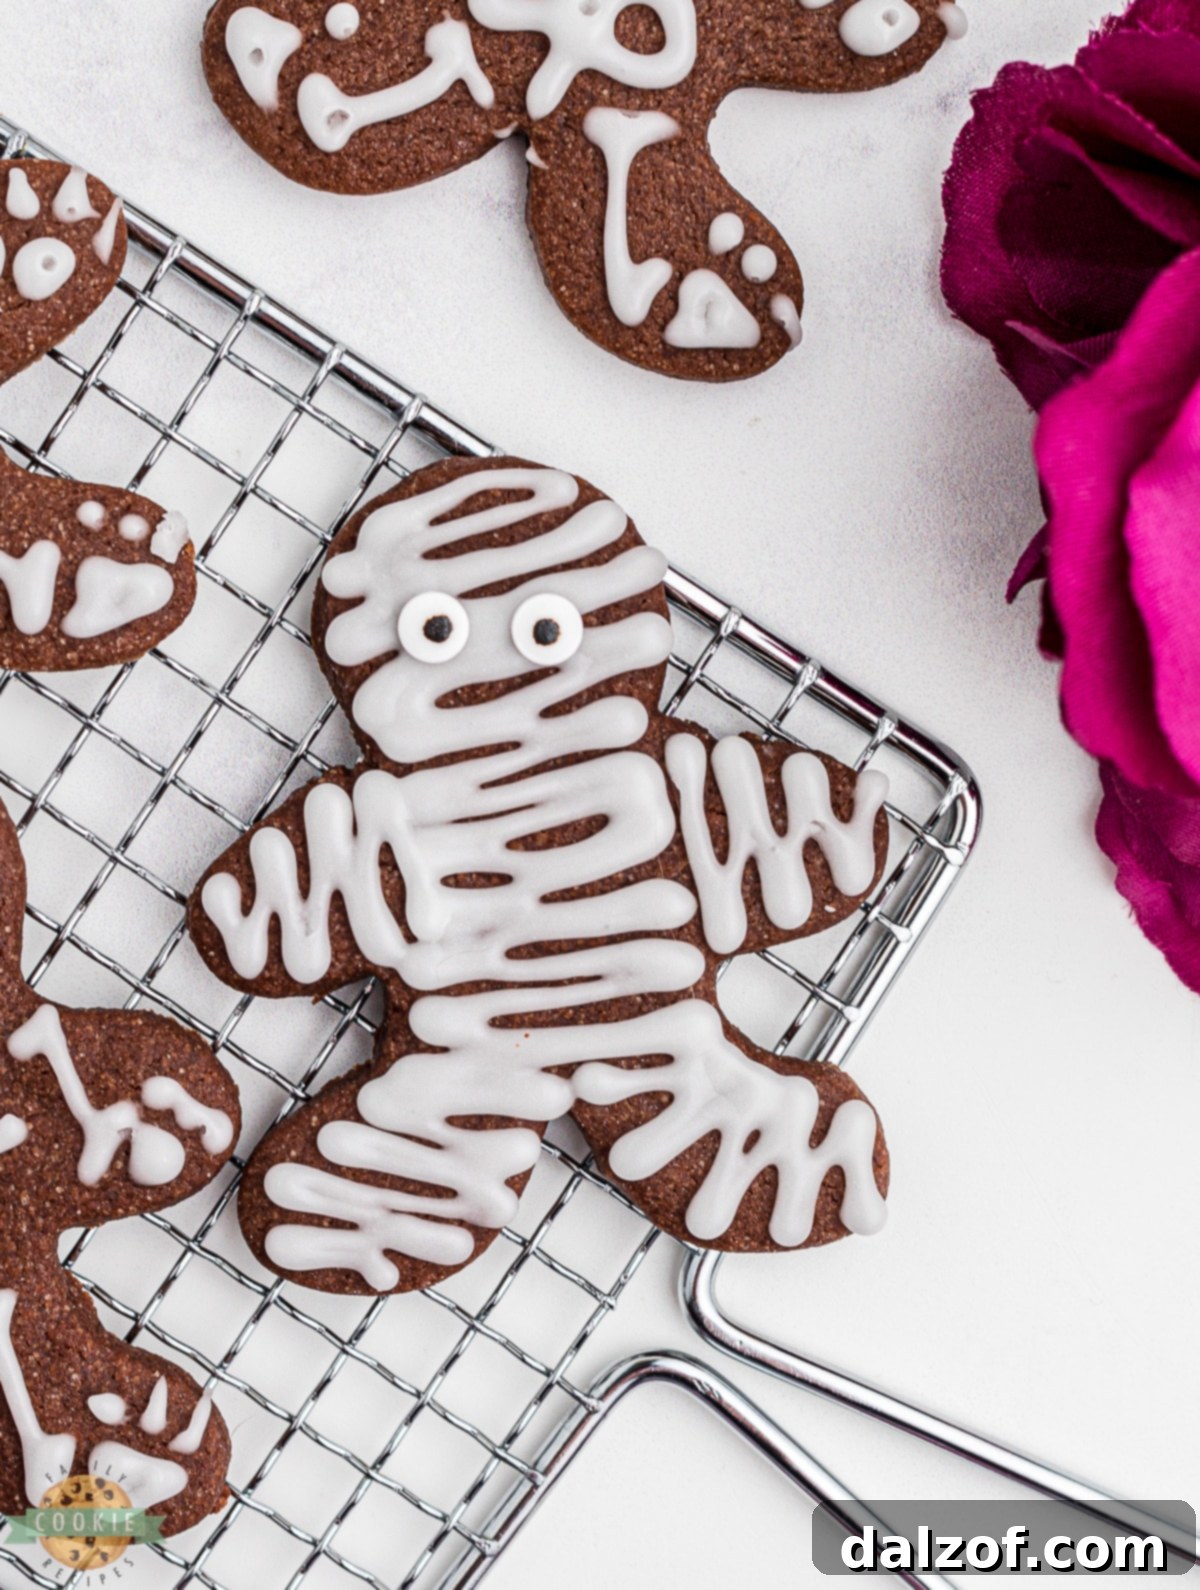
- Outline and Eyes: Pipe irregular, wavy outlines across the cookie, simulating mummy bandages. Don’t pipe them too close together, as you’ll want space to add depth later. Before the icing sets, attach two candy eyeballs peeking out from a gap in the “bandages.”
- Layer the Bandages: Allow the initial outlines and eyeballs to dry for several hours, or until the icing is firm to the touch. This prevents smudging when you add more layers.
- Add Depth with Edible Markers: Once thoroughly dry, use edible ink pens (preferably black or gray) to add shading or “dirt” lines between the white icing strips, creating a more realistic, aged mummy effect. You can also draw stitches or other creepy details.
Remember, practice makes perfect! Don’t be afraid to experiment with different piping techniques and designs. The goal is to have fun and create unique, personalized Halloween treats!
Pro Tips for Perfect Cut-Out Cookies
Achieving perfectly shaped, delicious cut-out cookies requires a few simple tricks. Follow these tips to ensure your Halloween Skeleton Cookies are a resounding success:
- Don’t Skimp on Chilling Time: This is arguably the most crucial step. Cold dough is stable dough. It prevents spreading in the oven, ensuring your cookies maintain their intricate shapes. If the dough becomes too warm during rolling, pop it back into the fridge for 10-15 minutes.
- Flour Your Surface (But Don’t Overdo It): A lightly floured surface and rolling pin prevent sticking. However, too much flour can make your cookies tough. Use just enough to keep the dough from adhering. A pastry mat can also be very helpful.
- Consistent Thickness is Key: Roll your dough to an even thickness (⅛ to ¼ inch is ideal). This ensures all cookies bake evenly. Thicker cookies will be chewier, while thinner ones will be crispier.
- Work Quickly: Especially when rerolling scraps, work efficiently to minimize the dough warming up. Combine scraps gently without overworking them, as this can develop the gluten and make cookies tough.
- Proper Baking Sheet Preparation: Always line your baking sheets with parchment paper or silicone mats. This prevents sticking, promotes even baking, and makes cleanup a breeze.
- Cool Completely Before Decorating: Patience is a virtue here. Warm cookies will melt or smudge your icing. Ensure they are fully cooled on a wire rack before you start any decorating.
- Achieving a Smooth Glaze: Sifting your powdered sugar is vital for a lump-free glaze. Adjust the milk gradually until you reach a consistency that drizzles smoothly but still holds its shape for a few seconds when dropped back into the bowl. This is the perfect consistency for outlining and flooding.
Recipe Card: Halloween Skeleton Cookies
HALLOWEEN SKELETON COOKIES RECIPE
Halloween Skeleton Cookies are festive & fun chocolate sugar cookies decorated in a perfectly creepy way! Simple cut-out skeleton cookies that are fun to make & enjoy!
Course: Cookies, Dessert | Cuisine: American | Keyword: HALLOWEEN SKELETON COOKIES
Prep Time: 30 minutes | Cook Time: 10 minutes | Chilling Time: 2 hours | Total Time: 2 hours 40 minutes
Servings: 36 cookies | Calories: 140kcal | Author: Jessica & Nellie
Ingredients
For the Cookies:
- 1 cup Unsalted Butter, room temperature
- 1 cup Granulated Sugar
- ½ tsp Clear Vanilla Extract
- ¼ tsp Almond Extract
- 1 Large Egg
- 2 cups All-Purpose Flour (+ 2 Tbsp for rolling dough out on)
- ½ cup Unsweetened Natural Cocoa
- ¾ tsp Baking Powder
- ¾ tsp Salt
For the Icing:
- 3 cups Powdered Sugar, sifted
- ¼ cup Milk
- 2 TBSP Light Corn Syrup
- ½ tsp Clear Vanilla Extract
- Candy Eyeballs
- Edible ink pens (optional)
Instructions
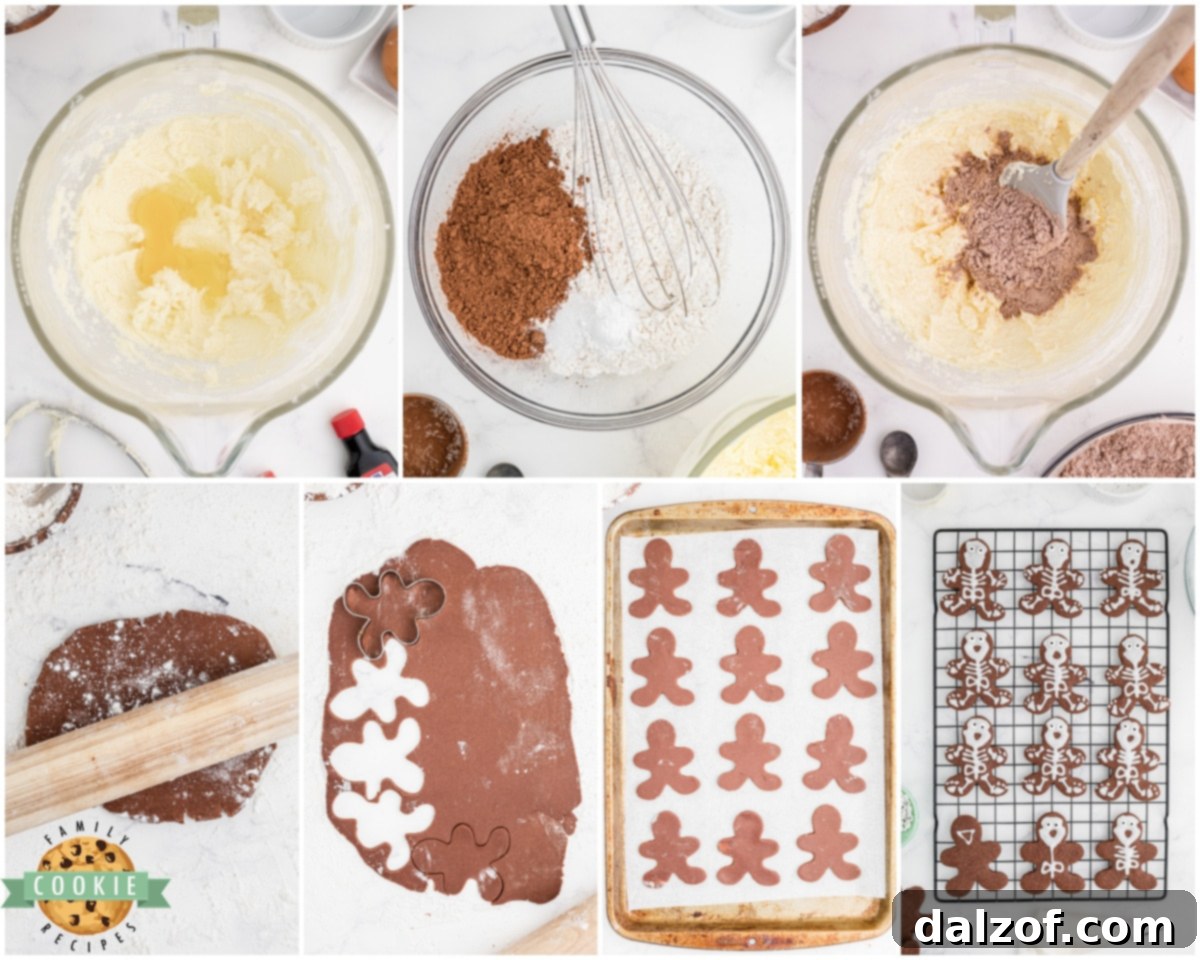
- In a stand mixer bowl, cream the butter and sugar together for about 5 minutes until light and fluffy. Add in the egg, vanilla extract, and almond extract. Beat again for about 1 minute to fully incorporate.
- In a separate bowl, combine the flour, cocoa powder, baking powder, and salt with a whisk. Gradually add the dry ingredients, in batches, to the creamed butter mixture. Mix until just incorporated, being careful not to overmix.
- Divide the dough in half. Spoon each half onto a piece of plastic wrap, cover it tightly, and press it into a disc shape. Place both discs of dough into the fridge to chill for at least 2 hours. This step is crucial for preventing the cookies from spreading during baking.
- Once the dough is adequately chilled, preheat your oven to 350 degrees F (175 degrees C). Line a cookie sheet with parchment paper or a silicone baking mat and set it aside.
- Take one disc of cookie dough from the fridge and unwrap it. Place it onto a liberally floured surface. Using a rolling pin, roll the dough out evenly so that it is between ⅛ and ¼ inch thick.
- Use a gingerbread man shaped cookie cutter to cut out your shapes. Carefully transfer the cut cookies onto the prepared baking sheet. Gather the dough scraps, gently re-roll them, and cut out more shapes until all the dough is used. Repeat this process with the remaining half of the chilled dough.
- Bake the cookies in the preheated oven for 8-10 minutes. Baking time may vary depending on your oven and cookie thickness. The cookies should be set but still soft. Remove the baking sheet from the oven and allow the cookies to cool on the sheets for 10 minutes before transferring them to a wire rack to cool completely. This prevents them from breaking.
- While the cookies cool, prepare the glaze. Sift the powdered sugar into a large mixing bowl to remove any lumps. Add the milk, corn syrup, and vanilla extract. Whisk until the icing is smooth and has a good, pourable consistency – it should drizzle back onto itself and hold its shape briefly before melting back into the mixture. Spoon your icing into a piping bag fitted with a small round tip (like a Wilton #1 or #2 piping tip and a coupler). Carefully pipe the icing onto the completely cooled cookies.
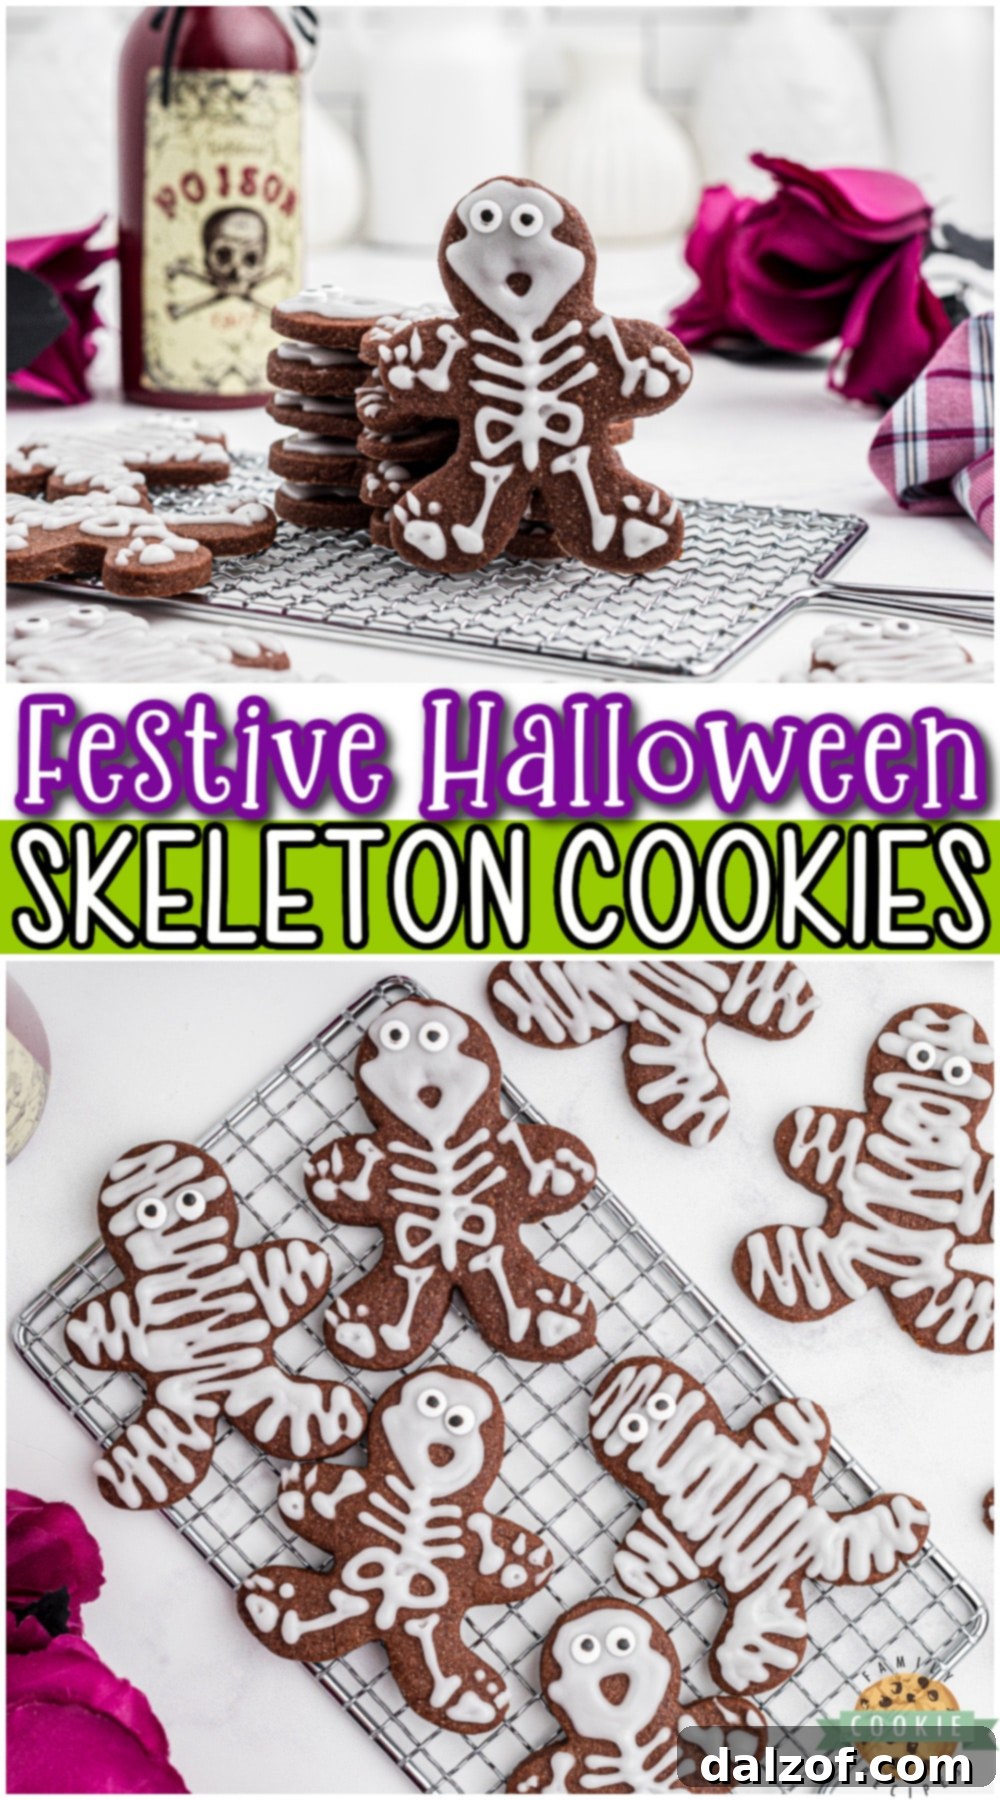
- For making skeletons: Start by piping a small circle for the mouth, then pipe an outline around it to create the skull shape. Fill in the skull with icing, using a toothpick to smooth and fill small gaps. Immediately attach two candy eyeballs to each skull while the icing is wet. Once the skull is slightly set, pipe thin lines down the body to create a rib cage and leg/arm bones.
- For making mummies: Pipe irregular, wavy outlines across the cookies, leaving gaps for “bandages.” Add the candy eyeballs peeking through one of the gaps. Allow the cookies to dry for several hours (or overnight) until the icing hardens. Once dry, you can use edible markers to add shading or finer details, if desired.
Notes
- These frosted cookies will stay fresh for up to 5 days if stored in an airtight container at room temperature.
- You can also freeze these cookies! Place them in an airtight container or freezer bag and freeze for up to 3 months. Thaw at room temperature before serving.
Nutrition
Serving: 1 cookie | Calories: 140kcal | Carbohydrates: 23g | Protein: 1g | Fat: 6g | Saturated Fat: 3g | Polyunsaturated Fat: 0.3g | Monounsaturated Fat: 1g | Trans Fat: 0.2g | Cholesterol: 18mg | Sodium: 93mg | Potassium: 40mg | Fiber: 1g | Sugar: 16g | Vitamin A: 167IU | Calcium: 11mg | Iron: 1mg
How Long Do Decorated Skeleton Cookies Stay Fresh?
Once the royal icing on your festive Halloween skeleton cookies has completely hardened – which usually takes several hours or even overnight, depending on humidity – you can store them in an airtight container at room temperature. They will remain wonderfully fresh and delicious for up to 5-7 days. For optimal freshness, consider placing parchment paper between layers of cookies to prevent any potential sticking or smudging of the delicate decorations.
Can You Freeze These Frosted Sugar Cookies? Absolutely!
Yes, freezing frosted sugar cookies is an excellent way to prepare ahead for parties or to simply enjoy them over a longer period. The trick is to ensure they are frozen correctly to protect the frosting from getting smudged, cracked, or damaged. Follow these steps for successful freezing:
- Allow Frosting to Fully Set: This is paramount. Ensure your royal icing decorations are completely dry and firm to the touch before attempting to freeze them. This can take anywhere from 6 to 24 hours.
- Flash Freeze for Protection: Arrange the cookies in a single layer on a baking sheet or tray. Place this sheet in the freezer for 1-2 hours, or until the cookies are completely solid. This “flash freezing” step prevents the frosting from sticking together when stacked.
- Layer with Care: Once your cookies are flash-frozen and solid, you can carefully stack them in an airtight freezer-safe container. Always place a sheet of parchment paper or wax paper between each layer of cookies to add an extra layer of protection.
- Seal Tightly: Ensure the container is sealed tightly to prevent any freezer burn or absorption of freezer odors.
- Gentle Thawing Process: When you’re ready to enjoy your cookies, transfer the container from the freezer directly to your countertop. Let them thaw at room temperature while still inside the sealed container. This is key because it allows any condensation to form on the container itself, rather than directly on the cookies, which can cause the icing to become sticky or bleed.
Unleashing Creativity with Edible Ink Pens
Edible ink pens are fantastic tools for adding fine details and personal touches to your Halloween cookies. If you want to enhance the skull design, a black edible marker can be used to draw intricate bone lines, add shading, or even create tiny stitches for a more Frankenstein-esque look. Beyond skeletons, you could ice the entire cookie with a base color and then use the pens to draw charming Halloween-themed pictures, like bats, spiderwebs, ghosts, or personalized messages, directly onto the hardened royal icing. They offer a level of precision that piping bags sometimes can’t, perfect for those detailed artistic flourishes.
Can I Make Classic Sugar Cookies Instead of Chocolate?
Absolutely! If you prefer a traditional sugar cookie base, it’s an easy modification. Simply omit the ½ cup of unsweetened natural cocoa powder from the recipe. To maintain the correct dough consistency, you will need to increase the all-purpose flour from 2 cups to 2½ cups. With a classic sugar cookie, your royal icing will be much more noticeable, so you might consider adding some vibrant food coloring to your glaze to create brightly colored skeleton or mummy effects!
Explore More Spooky & Sweet Halloween Cookie Recipes!
The fun doesn’t have to stop with skeletons and mummies! If you’re looking for more delightful treats to celebrate the season, check out these other fantastic Halloween cookie recipes:
- Halloween Sprinkle Cookies: Dive into soft, buttery brown sugar cookies tinted in delightfully spooky colors and generously coated in festive sprinkles. These are a fun and delicious treat, perfectly suited for any Halloween gathering!
- Perfect M&M Halloween Cookies: Indulge in soft, chewy treats crafted with a secret ingredient – pudding mix – combined with butter and sugar, then absolutely loaded with colorful Halloween M&M’s. A universally loved, festive, and crowd-pleasing cookie!
- Halloween Cobweb Cookies: These elegantly eerie cookies are topped with contrasting chocolate and vanilla icing, creatively decorated with a quick and impressive spider web design. A spooky yet delightfully simple treat that’s as enjoyable to prepare as it is to eat!
- Caramel Apple Snickerdoodles: Experience a cozy autumn twist on a classic! These cinnamon sugar cookies are lovingly filled with tender fresh apples and gooey, luscious caramel, making them a perfect fall treat.
- Pumpkin Pudding Cookies: Whip up a batch of these incredible cookies loaded with warm pumpkin spice flavor, sweet white chocolate chips, and the added benefit of pudding mix for an extra moist and utterly irresistible texture.
- Funfetti Halloween Cookies: Soft, vibrant, and bursting with flavor, these colorful treats are packed with festive sprinkles and boast an enhanced texture thanks to the addition of pudding mix. A truly spooky-fun cookie that’s both tasty and playful!
Ultimately, these Halloween Skeleton Cookies are more than just a dessert; they are an invitation to create, share, and celebrate the magic of Halloween. With their rich chocolate flavor and customizable skeleton designs, you can make them as cute or as spooky as your heart desires. This easy recipe, featuring simple ingredients you likely already have on hand, promises a fun-filled baking experience and delicious results that will be cherished by all your ghoulish guests!