
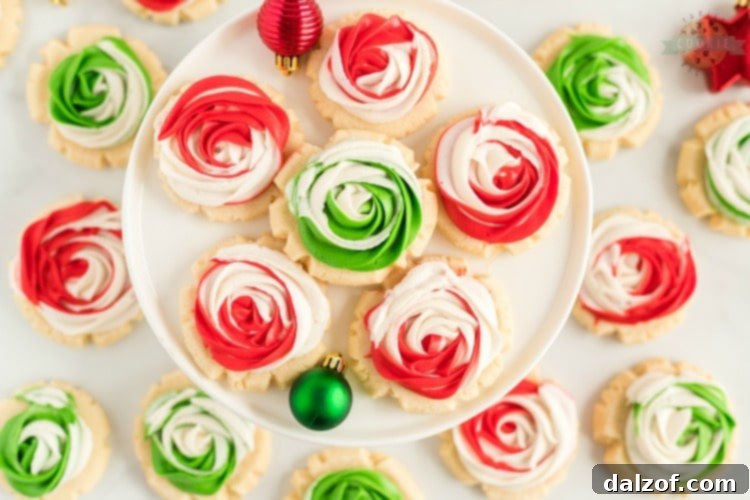
Elegant Frosted Rose Sugar Cookies: The Perfect No-Chill, No-Roll Recipe for Any Occasion
Discover the magic of making Frosted Rose Sugar Cookies – delightful, buttery, and incredibly soft sugar cookies adorned with stunning red and green swirled rosettes. This exceptional sugar cookie recipe is a game-changer for bakers, as it requires absolutely no chilling of the dough and eliminates the need for rolling, saving you precious time and effort. These elegant cookies, shaped and decorated like delicate roses, are not only a joy to bake but also make exquisite gifts and impressive centerpieces for any celebration, especially during the festive holiday season.
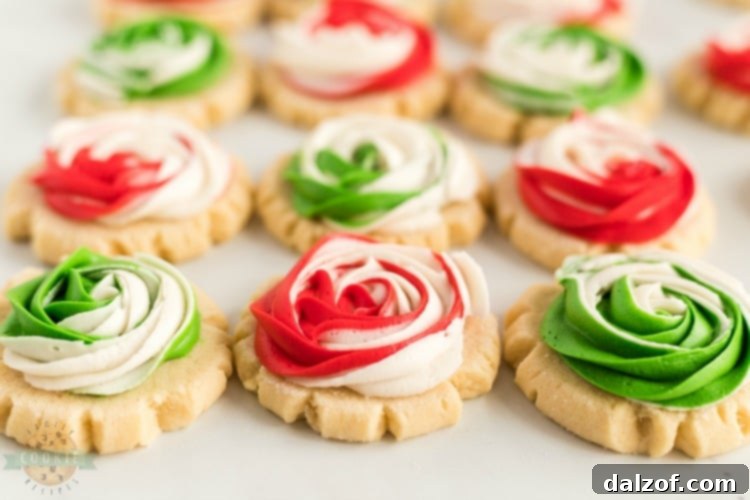
I absolutely adore these fancy Christmas cookies, particularly for their sophisticated appearance that belies their simple preparation. Forget the tedious steps of rolling out dough or waiting for it to chill. With this recipe, you simply scoop the dough, gently roll it into a ball, and then subtly flatten it with the bottom of a glass. After a quick bake, allow them to cool completely, and then crown each cookie with a simple, yet stunning, frosted rosette. It’s that easy to create a batch of beautifully decorated cookies!
Why You’ll Love This Easy Sugar Cookie Recipe
When it comes to holiday baking or preparing treats for special occasions, time is often of the essence. That’s precisely where our Frosted Rose Sugar Cookies shine. Unlike traditional sugar cookie recipes that demand hours of chilling and meticulous rolling, this recipe streamlines the process, making it accessible even for beginner bakers. The “no chill, no roll” method is a true revelation, allowing you to go from mixing bowl to baked cookies in under an hour. This efficiency doesn’t compromise on taste or texture; these cookies remain wonderfully soft, buttery, and rich, melting in your mouth with every bite. The signature slightly rough edge, reminiscent of popular Swig cookies, adds a unique rustic charm that complements the elegant frosted rosette design.
Beyond their ease of preparation, these Frosted Rose Sugar Cookies are incredibly versatile. While we’ve highlighted a festive red and green swirl, perfect for Christmas, the frosting colors can be customized for any event – pastels for Easter or baby showers, vibrant hues for birthdays, or sophisticated single colors for weddings. Their inherent elegance makes them ideal for gifting, party platters, or simply enjoying with a cup of coffee or tea. Each cookie is a miniature work of art, promising a delightful culinary experience that will impress both young and old. The combination of simple ingredients and a straightforward method means you can whip up a batch whenever you need a quick, impressive dessert.
CHRISTMAS FROSTED ROSE SUGAR COOKIES
These Frosted Rose sugar cookies are decorated with vibrant red and green swirls, making them an absolutely perfect addition to your Christmas celebrations!
Prep Time: 20 minutes
Cook Time: 10 minutes
Total Time: 30 minutes
Yields: 48 cookies
Calories: 202 kcal per cookie
Author: Jessica & Nellie
Ingredients for the Cookies
- 1 cup (226g) butter, softened
- ¾ cup (170g) shortening
- 1 ¼ cups (250g) granulated sugar
- ¾ cup (90g) powdered sugar
- 2 Tbsp milk
- 2 large eggs
- ½ tsp baking soda
- ½ tsp cream of tartar
- 1 tsp salt
- 5 ½ cups (660g) all-purpose flour
Ingredients for the Buttercream Frosting
- ½ cup (113g) butter, softened
- 2 Tbsp sour cream
- 4 cups (480g) powdered sugar
- 1 tsp vanilla extract
- 1-2 Tbsp milk, to reach desired consistency
Instructions: Crafting Your Rose Sugar Cookies
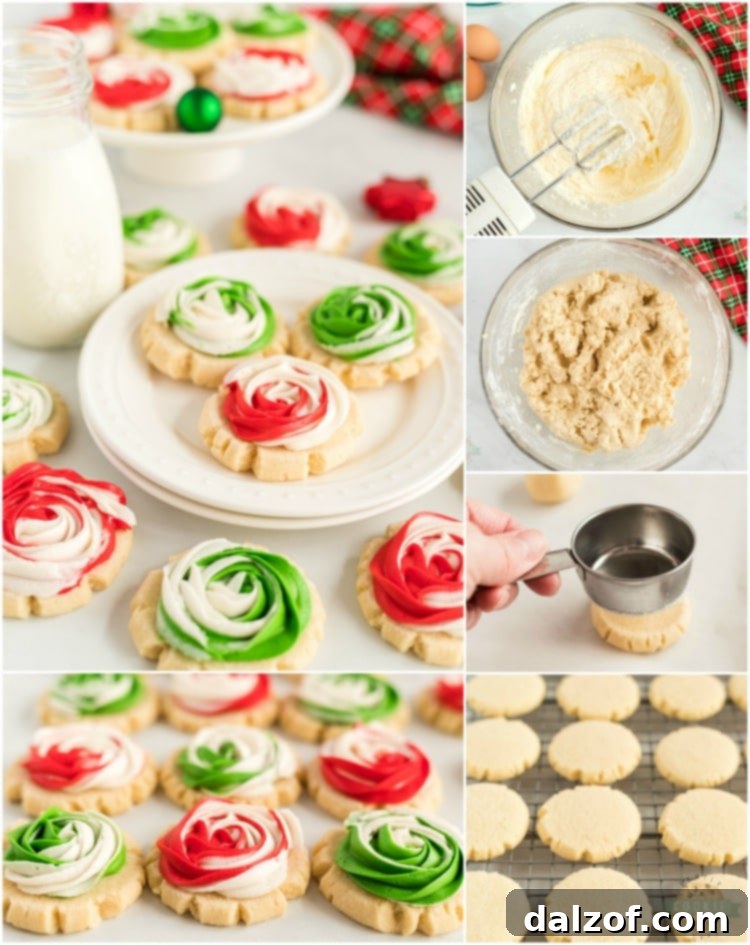
- In a large mixing bowl (or the bowl of a stand mixer fitted with the paddle attachment), combine the softened butter, shortening, granulated sugar, powdered sugar, and 2 tablespoons of milk. Cream these ingredients together on medium speed until the mixture is light, fluffy, and well aerated. This step is essential for incorporating air and ensuring your cookies have a tender, melt-in-your-mouth texture.
- Add the eggs to the creamed mixture, one at a time, mixing thoroughly after each addition until each egg is fully incorporated. Be sure to scrape down the sides of the bowl with a spatula to ensure all ingredients are evenly combined and there are no pockets of unmixed batter.
- In a separate medium-sized bowl, whisk together the dry ingredients: all-purpose flour, baking soda, cream of tartar, and salt. This ensures they are evenly distributed throughout the dough. Gradually add this dry flour mixture to the wet butter mixture, mixing on low speed until just combined and smooth. It’s important to be careful not to overmix the dough, as this can overdevelop the gluten, resulting in tougher, less tender cookies.
- Prepare your baking sheets by greasing them lightly or lining them with parchment paper. Roll the cookie dough into uniform 1-inch balls. For that distinctive “Swig cookie” look and a delightfully rough edge, spray the bottom of a drinking glass or a flat-bottomed measuring cup with non-stick cooking spray. Then, dip the sprayed bottom into a shallow plate containing a thin layer of granulated sugar. Use this sugared glass to gently press each dough ball down slightly. The goal is a cookie that’s still thick and soft, not flattened too thinly, as their generous thickness contributes significantly to their irresistible chewiness and keeps them from drying out during baking.
- Preheat your oven to 350°F (175°C). Carefully place the flattened cookie dough balls onto the prepared baking sheets, ensuring adequate space between each cookie for spreading. Bake for 8-9 minutes, or until the edges are very lightly golden and the centers appear just set. It’s crucial to avoid over-baking to maintain their signature softness. Once baked, remove from the oven and allow them to cool on the baking sheet for 3-4 minutes. This brief cooling period helps them firm up before transferring. Afterward, gently transfer the cookies to a wire rack to cool completely.
- Prepare the Buttercream Frosting: In a clean mixing bowl, cream together the softened butter, sour cream, 4 cups of powdered sugar, and vanilla extract using an electric mixer until the mixture is smooth, creamy, and well combined. Gradually add 1-2 tablespoons of milk, a little bit at a time, mixing until you achieve a smooth, spreadable, and pipeable consistency. The frosting should hold its shape without being too stiff or too runny.
- To create the festive red and green swirl, divide the frosting into three portions. Keep one portion white (approximately 1.5 cups). Dye about ½ cup of the remaining frosting red using gel food coloring, and the other ½ cup green. Adjust the amount of coloring to achieve your desired vibrancy for the holiday season.
- For the Swirled Rosette Decoration: Lay out two separate 14-inch long sections of plastic wrap on your counter. On the center of each plastic wrap section, place a distinct line of white frosting, about 6-7 inches long and 1 inch wide. On one plastic wrap segment, carefully layer a line of the red frosting directly on top of the white. On the other segment, layer the green frosting over the white.
- Gently fold the long edges of each plastic wrap section over to completely enclose the frosting, forming two distinct, tightly sealed tubes of plastic-wrapped frosting, one red and white, the other green and white. Snip one end of each plastic wrap tube with scissors.
- Fit a piping bag with an open star tip (a classic 1M tip works wonderfully for creating beautiful rosettes). Carefully insert one of the plastic-wrapped frosting tubes into the piping bag, with the snipped end facing down towards the piping tip. Push it through until it’s snug against the tip. Then, insert the second plastic-wrapped frosting tube alongside the first in the piping bag, again with the snipped end facing down. Snip the plastic wrap at the very end of the piping tip opening for both tubes. Squeeze the bag gently to ensure both colors are ready to pipe.
- Pipe a small star in the center of each cooled cookie. Continue piping directly around this star, creating a continuous spiral motion outwards until you reach the edge of the cookie. This will form a beautiful rosette. The two colors in the piping bag will naturally swirl together, creating a stunning dual-tone effect that mimics a delicate rose. Feel free to alternate which color is dominant or use different color combinations for variety.
- For an extra touch of holiday cheer, top your beautifully frosted rose sugar cookies with festive Christmas sprinkles, if desired, immediately after piping. Serve these exquisite treats to family and friends, and enjoy!
Nutritional Information (per cookie)
- Calories: 202 kcal
- Carbohydrates: 28g
- Protein: 2g
- Fat: 9g
- Saturated Fat: 5g
- Polyunsaturated Fat: 1g
- Monounsaturated Fat: 3g
- Trans Fat: 1g
- Cholesterol: 22mg
- Sodium: 109mg
- Potassium: 27mg
- Fiber: 0.4g
- Sugar: 17g
- Vitamin A: 192 IU
- Vitamin C: 0.005mg
- Calcium: 7mg
- Iron: 1mg
If you’ve tried this delightful recipe, we’d love to hear from you! Share your beautiful creations on Instagram by mentioning @familycookierecipes or tagging #familycookierecipes!
Frequently Asked Questions About Frosted Rose Sugar Cookies
Can I freeze frosted sugar cookies?
Absolutely! These beautiful Frosted Rose Sugar Cookies can be frozen, making them an excellent make-ahead option for busy holidays, unexpected guests, or future cravings. When stored correctly, they will maintain their delicious flavor and appealing texture for up to three months in the freezer. To freeze them effectively and preserve their delicate frosting, first arrange your freshly frosted cookies in a single layer on a baking sheet. Place the baking sheet in the freezer for approximately two hours, or until the frosting has become completely solid to the touch. This crucial initial step, known as “flash freezing,” prevents the frosting from sticking to other cookies or the container once they are stacked.
Once the frosting is firm, transfer the cookies to an airtight freezer-safe container. To further prevent sticking and protect the delicate rosette design, place a piece of parchment paper or wax paper between each layer of cookies. For ultimate convenience and portion control, you can also individually wrap each flash-frozen cookie tightly in plastic wrap or place them in separate small ziplock bags. This way, you can grab a single sweet treat whenever the mood strikes, without having to thaw an entire batch. When you’re ready to enjoy them, simply remove the desired number of cookies from the freezer and let them thaw at room temperature for an hour or two. They’ll be just as soft, buttery, and flavorful as the day they were freshly baked and frosted!
How long should I let these cookies cool before frosting or serving?
Proper cooling is a vital step in ensuring your cookies are perfect, both for structural integrity and optimal taste. Immediately after taking your Frosted Rose Sugar Cookies out of the oven, it’s best practice to leave them undisturbed on the hot baking sheet for 3-4 minutes. This brief period allows the cookies to continue cooking slightly from residual heat, firm up, and become less fragile, preventing them from crumbling or breaking when handled. Cookies are quite delicate and soft immediately after baking, and transferring them too soon can cause them to fall apart.
Once they’ve had a few minutes to set on the baking sheet, carefully transfer them to a wire cooling rack. A cooling rack is essential as it allows air to circulate around the entire cookie, ensuring even cooling and preventing the bottoms from becoming soggy due to trapped steam. For frosting, it is absolutely essential that the cookies are completely cool – typically about 30-60 minutes, depending on your kitchen’s temperature and the size of the cookies. Applying frosting to warm cookies will cause it to melt, slide right off, and ruin your beautiful rosette design. However, if you’re simply enjoying them unfrosted or with a light glaze, a few minutes on the cooling rack is usually enough for them to be cool enough to eat. There’s truly nothing quite like a warm, freshly baked cookie!
Tips for Baking and Decorating Perfect Rose Sugar Cookies
Achieving the Ideal Cookie Texture
- Softened Butter and Shortening: Ensure both your butter and shortening are properly softened to room temperature before you begin. This allows them to cream together effectively with the sugars, creating a light, airy base for your dough that results in tender cookies.
- Measure Flour Correctly: For the softest cookies, it’s crucial to measure your flour accurately. Always spoon the flour into your measuring cup and then level it off with a straight edge, rather than scooping it directly from the bag. This prevents compacting the flour and adding too much, which can lead to dry, dense cookies.
- Don’t Overmix: After you’ve added the dry ingredients to the wet mixture, mix just until the flour streaks disappear and the dough is uniform. Overmixing can overdevelop the gluten in the flour, leading to tougher, less delicate cookies.
- Thick Cookies are Key: As the recipe suggests, pressing the dough balls slightly rather than flattening them thinly is crucial for maintaining a soft and chewy texture. Thicker cookies retain more moisture, resulting in a more satisfying bite.
- Watch Your Bake Time Closely: Oven temperatures can vary, so keep a close eye on your cookies during baking. They should be just lightly golden at the edges, with centers that look set but still feel soft. Under-baking slightly is often better than over-baking for achieving truly soft and tender sugar cookies.
Mastering the Swirled Rosette Frosting
- Buttercream Consistency is Paramount: The key to successful piping is a perfect frosting consistency. It should be firm enough to hold its intricate rosette shape but soft enough to pipe smoothly without tearing. Adjust with a tiny bit more powdered sugar for stiffness or a tiny bit more milk for softness, adding only ½ teaspoon at a time.
- Use Quality Gel Food Coloring: Gel food colorings are highly concentrated and produce vibrant, rich colors without adding excess liquid to your frosting. Liquid food colorings can thin out your buttercream, making it difficult to pipe.
- Practice Your Piping Bag Technique: If you’re new to piping rosettes, practice on a piece of parchment paper first. Start in the center of your imaginary cookie and pipe a continuous spiral outwards, maintaining even pressure on the piping bag for a consistent flow and a beautifully formed rose.
- The Swirl Method with Plastic Wrap: This technique, while seemingly intricate, is easier than it sounds! Ensure your distinct frosting colors are clearly separated on the plastic wrap strips. When you fold the plastic wrap into a tube, try to keep the colors as separate as possible until they naturally merge at the piping tip, which creates that beautiful, clear swirl effect.
- Creative Color Combinations: While red and green are perfect for Christmas, don’t limit yourself! Consider other festive pairings like gold and silver for New Year’s Eve, delicate pink and white for Valentine’s Day or baby showers, or vibrant blues and yellows for spring celebrations.
Serving and Gifting Your Frosted Rose Sugar Cookies
These elegant cookies are almost too pretty to eat, but their delicious taste ensures they won’t last long! For serving, arrange them artistically on a festive platter to proudly showcase their beautiful rosette designs. They make a stunning and appealing addition to any holiday dessert table, a charming highlight at a brunch spread, or a sophisticated accompaniment to afternoon tea. Pair them with a warm cup of rich cocoa, a fragrant spiced chai, or simply a refreshing glass of cold milk for a truly delightful and comforting treat.
As homemade gifts, Frosted Rose Sugar Cookies are truly special and convey thoughtfulness. Package them carefully in decorative cookie boxes, clear cellophane bags tied with a festive ribbon, or gently stack them in attractive tins. They are perfect for thoughtful teacher gifts, appreciative hostess gifts, warm neighborly gestures, or as a heartfelt homemade present for cherished friends and family. The added benefit that they freeze exceptionally well means you can bake ahead of time, significantly reducing holiday stress, and still have beautiful, ready-to-gift treats whenever needed.
Conclusion
Baking these Frosted Rose Sugar Cookies is more than just making a delicious treat; it’s about creating edible art that brings joy, elegance, and a touch of homemade warmth to any occasion. With a straightforward “no-chill, no-roll” cookie base, this recipe takes away the usual hassle associated with sugar cookies, making it an enjoyable and rewarding baking experience. The fun and creative approach to frosting, especially the unique swirled rosette technique, will leave you amazed at how easily you can produce such visually stunning and utterly delicious cookies. Whether you’re a seasoned baker looking for a new holiday favorite or just starting your culinary journey, this recipe offers a fulfilling and successful outcome. Embrace the festive spirit with every swirl of frosting and savor the buttery softness of these homemade masterpieces. Happy baking, and may your cookies bring smiles and delight to all who enjoy them!