

Easy & Adorable Iced Gnome Cookies: Your Guide to Whimsical Baking
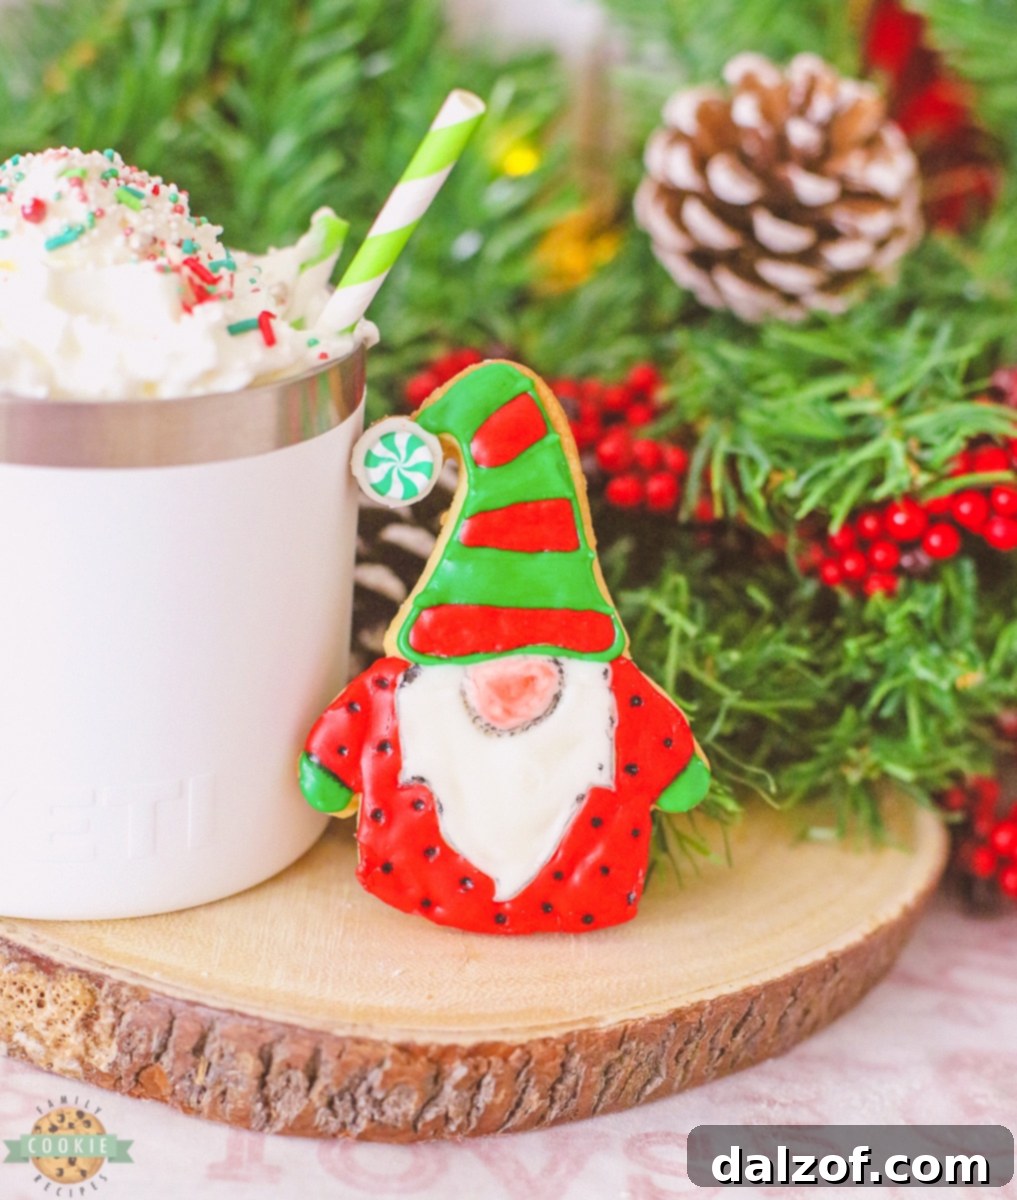
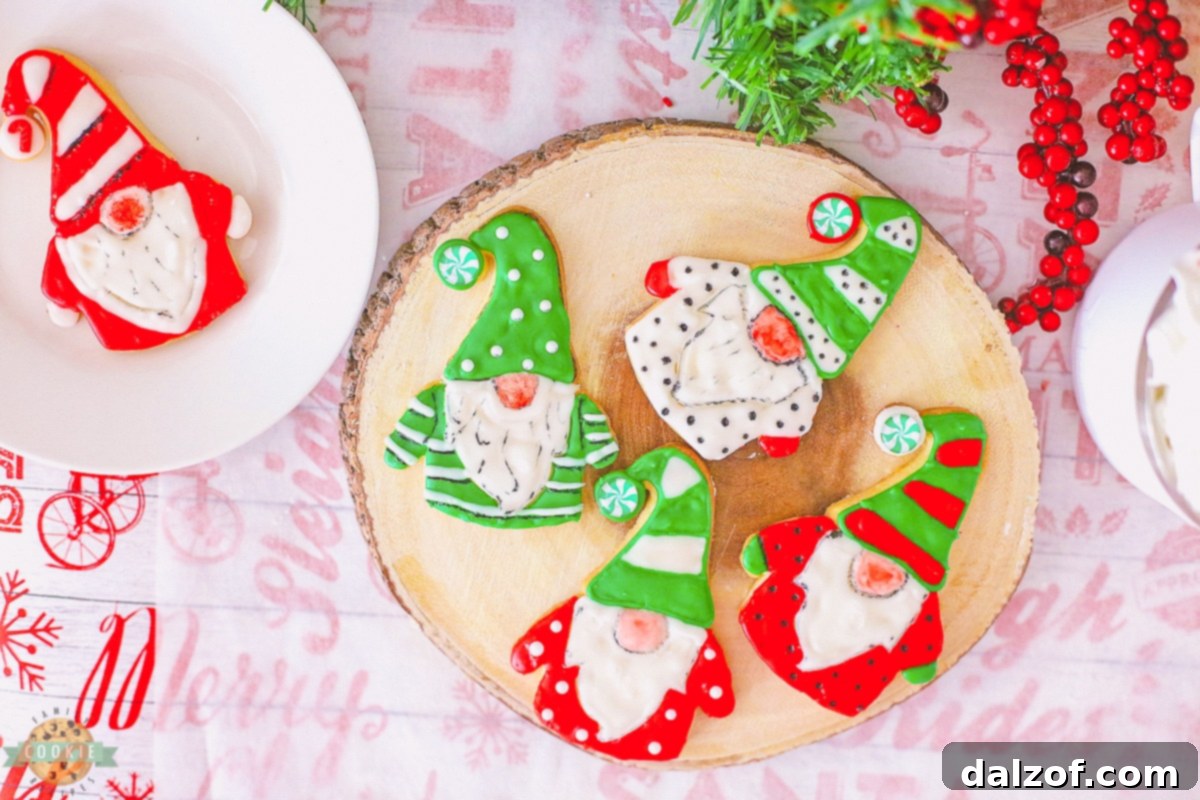
Step into a world of culinary charm with these enchanting iced gnome cookies! Surprisingly simple to create, yet yielding irresistibly cute results, these magical little gnomes almost come to life with every bite. Crafted from a perfectly buttery shortbread and decorated with vibrant royal icing, they’re more than just a treat – they’re a miniature work of art and a delightful activity for the whole family. Whether it’s for a holiday celebration, a special occasion, or simply to add a touch of whimsy to your day, these decorated gnome cookies are guaranteed to bring smiles and spark joy.

Imagine the delight on faces young and old as these colorful characters emerge from your kitchen. Their bright hues and charming personalities make them a fantastic centerpiece for any festive gathering. Get your children involved in the decorating process, transforming baking into a cherished family event filled with creativity and laughter. These gnome Christmas cookies are not just desserts; they’re an experience, a memory in the making, and a testament to the joy of homemade treats.
What Are Gnome Cookies? Unveiling the Magic Behind These Edible Garden Friends
Gnome cookies are an adorable, edible tribute to those beloved, short-statured figures often found gracing gardens and yards. With their signature bright red hats, long white fluffy beards, and undeniable magical essence, these cookies offer a wonderfully fun and creative way to invite the spirit of garden gnomes indoors, no matter the season. Every aspect of these treats, from the melt-in-your-mouth shortbread cookie dough to the smoothly piped royal icing on top, is designed to be completely homemade and surprisingly accessible for bakers of all skill levels.
While the assembly and decoration do require a touch of patience and a sprinkle of artistic flair, watching these little fellas take on their unique personalities is truly a labor of love. The intricate details, from their rosy cheeks to the whimsical patterns on their hats, come together to create a cookie that’s as delightful to look at as it is to eat.
To achieve the most authentic and endearing shapes, we highly recommend using a dedicated gnome-shaped cookie cutter. However, if you find yourself without one in a pinch, don’t despair! You can still create charming gnome-like figures by cutting your dough into simple triangles. Use the point of the triangle as the hat and gently round down the base to form the body and a more face-like structure. This adaptability ensures that everyone can enjoy the magic of these whimsical gnome cookies.
Gathering Your Magical Gnome Cookie Ingredients
Crafting these delightful gnome cookies requires a selection of common baking ingredients, divided into two main categories: the foundation of the shortbread cookies and the vibrant components for the royal icing. Quality ingredients are key to ensuring both delicious flavor and a stunning appearance.
For the Buttery Shortbread Cookies:
- Butter: You will need 1 cup of softened unsalted butter. Softened butter is crucial for creaming smoothly with sugar, creating that rich, tender texture characteristic of a perfect shortbread cookie. Ensure it’s at room temperature, but not melted.
- Sugar: Use 1 cup of granulated sugar. This provides the essential sweetness and contributes to the cookie’s delicate crispness.
- Egg: A single large egg acts as a binder, helping to hold the dough together and giving the cookies a slight richness and structure.
- Flour: You will need 2 ½ cups of all-purpose flour. This is the main structural component of your cookie dough. Sifting it can help ensure a lighter texture, though it’s not strictly necessary.
- Vanilla Extract: Two teaspoons of pure vanilla extract elevate the flavor profile of the cookies, adding a warm, aromatic note that complements the butter perfectly.
For the Vibrant Royal Icing:
- Powdered Sugar: Use 2 cups of powdered sugar (confectioners’ sugar). This finely milled sugar is essential for creating a smooth, lump-free, and sweet icing that sets beautifully.
- Meringue Powder: Adding 3 tablespoons of meringue powder is a game-changer for royal icing. It provides stability, structure, and a crisp finish, safely replacing raw egg whites while ensuring the icing holds its shape perfectly once set.
- Milk: You’ll need ¼ cup of milk (whole milk works best for richness, but any milk will do). This liquid component helps achieve the perfect consistency for piping and flooding your cookies.
- Food Coloring Gel: Red and green food coloring gel are recommended for their ability to create bright, vibrant colors without diluting the icing’s consistency. Liquid food colorings can add too much moisture, so gels or pastes are preferred.
Essential Decorating Tools & Whimsical Additions:
- Black Edible Cookie Marker: An indispensable tool for adding fine details like eyes, mouth, or outlines after your icing has dried. It allows each gnome cookie to have its own unique personality and expression.
- Cookie Paint Brush: A small, clean paintbrush is perfect for adding delicate touches, such as rosy cheeks or subtle shading, bringing your gnomes even more to life.
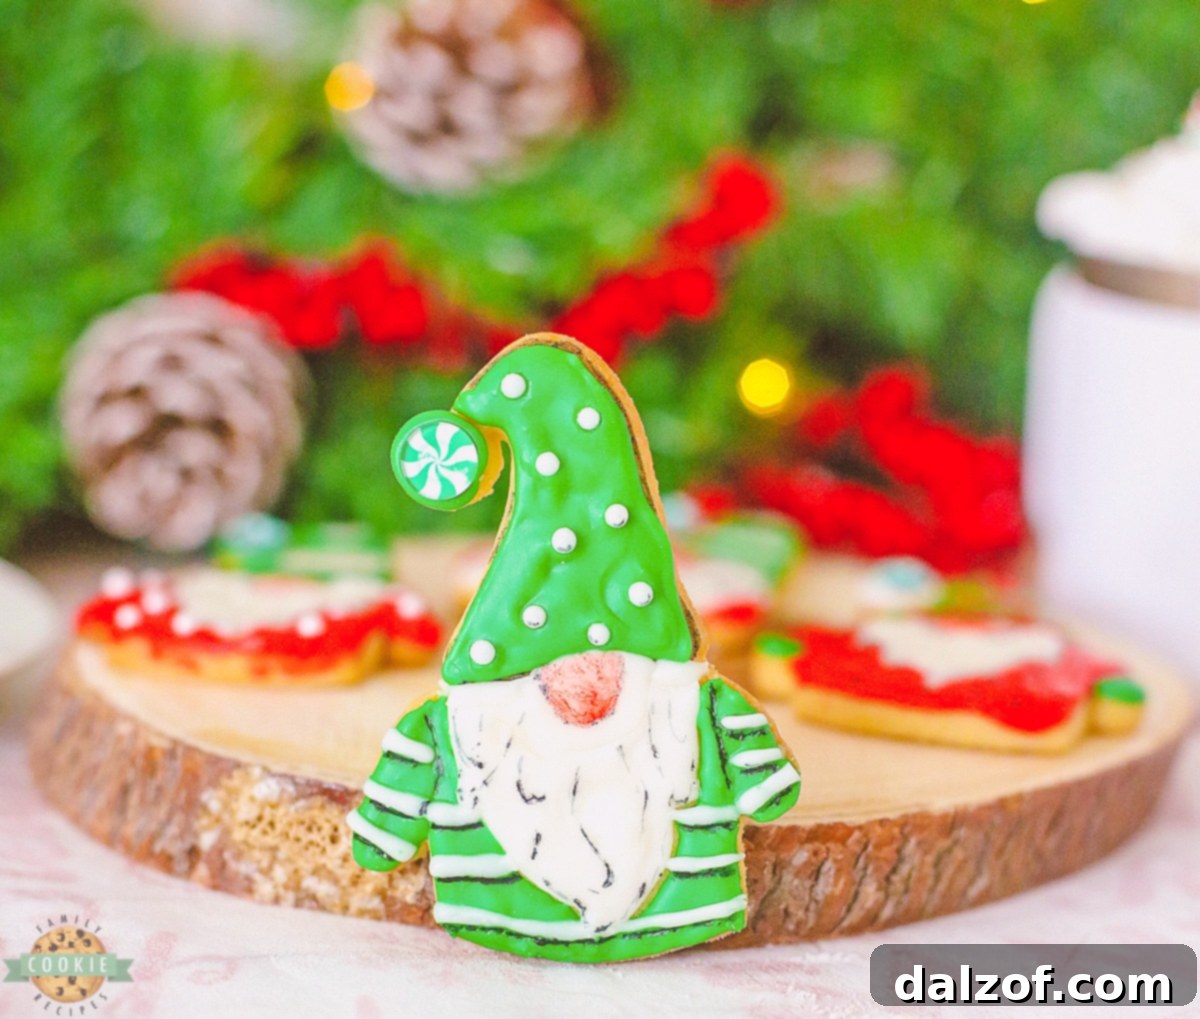
- Candy: For an extra dash of charm, consider using white sugar pearls for polka dots or small peppermint swirl candies for hat embellishments. These small additions truly elevate the festive look.
Choosing the Perfect Gnome Cookie Cutters
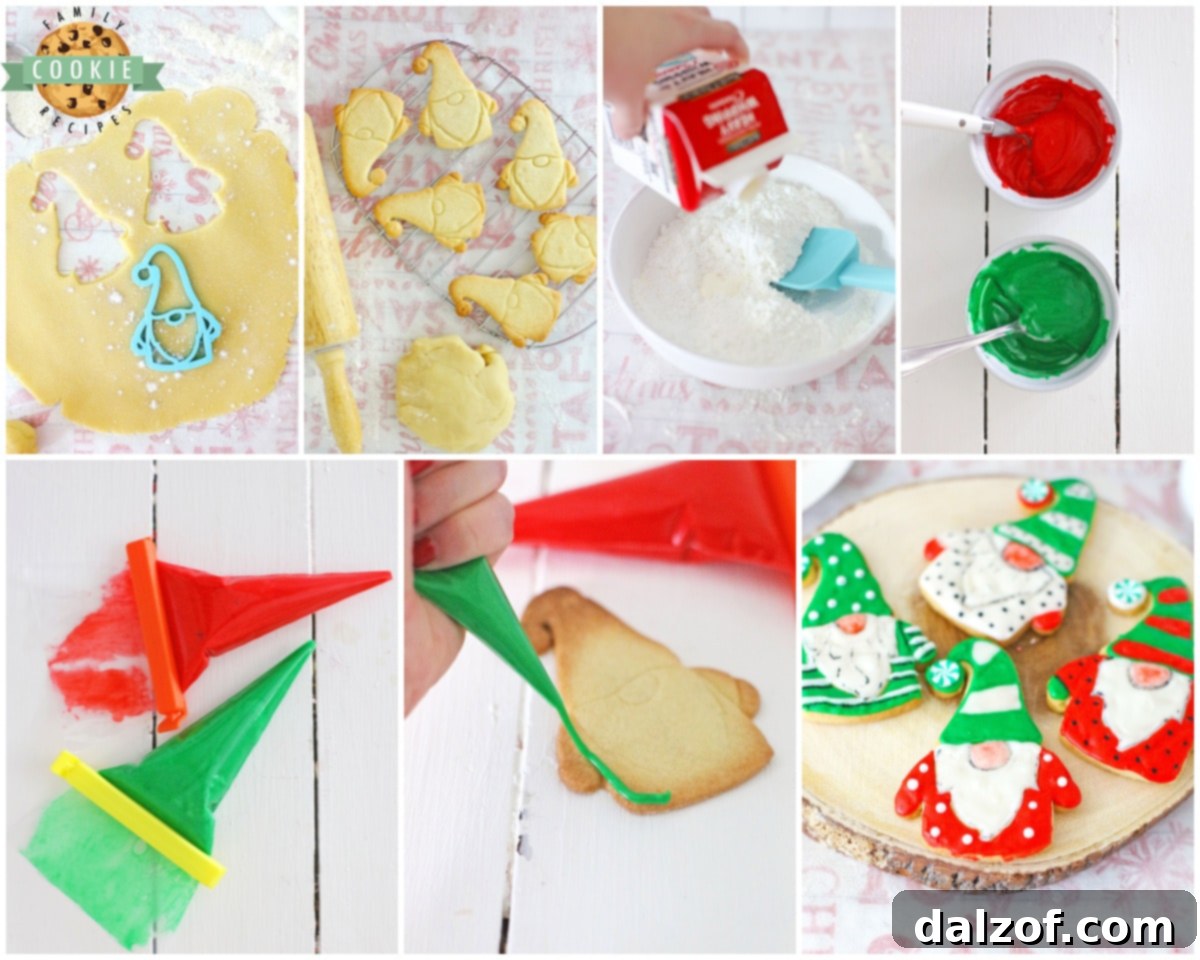
The right cookie cutter is paramount to creating those instantly recognizable and adorable gnome shapes. While any gnome-shaped cutter will work, I highly recommend seeking out those that also feature subtle indents for key features like the hat, nose, and beard. These small details provide a fantastic guide for your icing, making the decorating process significantly easier and ensuring consistent, professional-looking results even for beginners.
You can often find these specialized cookie cutters at most craft stores, such as Michael’s or Joann’s, especially during the holiday season. Keep an eye out in specialty kitchenware shops or even unique home goods stores like Cost Plus World Market – you might just discover the perfect one when you least expect it! Their popularity has grown, so they are becoming increasingly available in various retail locations, making it easier than ever to start your gnome cookie adventure.
Step-by-Step Guide: How to Bake and Decorate Iced Gnome Cookies
Creating these magical gnome cookies is a rewarding process, broken down into manageable steps for both baking and decorating. Follow these instructions carefully to ensure your cookies are as delicious as they are delightful.
Crafting the Buttery Shortbread Dough:
- Begin by preheating your oven to 350°F (175°C). Line a large baking sheet with parchment paper to prevent sticking and set it aside.
- In a spacious mixing bowl, combine the softened butter and granulated sugar. Beat them together with an electric mixer until the mixture is light, creamy, and fluffy. This aeration process is key for a tender cookie.
- Next, crack in the egg and add the vanilla extract. Continue to beat until these wet ingredients are thoroughly incorporated and the mixture is smooth.
- Gradually add the all-purpose flour, about half a cup at a time, mixing well on low speed between each addition. Be careful not to overmix the dough, as this can lead to tough cookies. Mix only until the flour is just combined and a soft dough forms.
- For easier handling, you can briefly chill the dough for 20-30 minutes. This helps prevent the dough from sticking and makes rolling more manageable.
Baking Your Gnome Shapes to Golden Perfection:
- Lightly flour a clean work surface and your rolling pin. Take your dough and roll it out evenly to approximately ¼ inch thickness. Ensure the thickness is consistent across the entire sheet of dough for uniform baking.
- Using your gnome-shaped cookie cutter, cut out as many cookie shapes as possible. Dip your cutter in flour occasionally to prevent sticking. Carefully transfer the cut-out cookies to your prepared parchment-lined baking sheet, leaving about an inch between each cookie.
- Bake in the preheated oven for 13-15 minutes, or until the edges are lightly golden. The baking time can vary depending on your oven and the thickness of your cookies, so keep a close eye on them.
- Once baked, remove the baking sheet from the oven and allow the cookies to cool on the sheet for a few minutes before transferring them to a wire rack to cool completely. Cooling thoroughly is essential before icing to prevent melting.
Preparing Your Colorful Royal Icing:
- While your cookies are cooling, it’s time to prepare the royal icing. In a bowl, combine the 2 cups of powdered sugar, ¼ cup of milk, and 3 tablespoons of meringue powder. Mix with an electric mixer on low speed, gradually increasing to medium, until the icing is smooth and has reached a desirable piping consistency. It should be thick enough to hold its shape but fluid enough to flow smoothly from a piping bag.
- You will need three separate piping bags for decorating. Divide the prepared white icing evenly into three small bowls.
- Color one bowl of icing red using your food coloring gel, another bowl green, and leave the remaining bowl white. Stir each color thoroughly until a vibrant, uniform hue is achieved.
- Carefully fill each piping bag with its respective color of frosting. Snip a tiny corner off the tip of each bag, ready for decorating.
Bringing Your Gnomes to Life: The Art of Decorating:
- Pick up a cooled gnome cookie. Using the green icing, carefully outline and then flood (fill in) the base of his hat, his shirt, and his sleeves. Be mindful to trace precisely around the long beard section, as this area will remain white.
- Next, fill in the beard section with white icing. Allow this white icing to dry and set for at least 15-20 minutes before proceeding, to prevent colors from bleeding.
- Once the beard is partially set, gently place a peppermint swirl candy on the very tip of his hat. Then, arrange small white sugar pearls on his hat to create a polka dot pattern or any other design you prefer.
- With the white icing, add stripes to his shirt and sleeves for added detail. Fill in his nose area with white frosting, ensuring it’s a smooth, plump shape.

Adding the Finishing Touches & Personal Flair:
- For charming rosy cheeks and a hint of color on his nose, take your clean cookie paintbrush. Dip the tip lightly in a tiny amount of water, then gently touch it to a small dab of red icing to pick up some color. Very lightly brush this diluted red icing onto the white nose area until you achieve a delicate pink shading.
- Allow the decorated cookies to dry and set for another 10-15 minutes. This is crucial for the icing to harden sufficiently before adding fine details.
- Once the icing has dried, retrieve your black edible food marker. Use it to carefully draw outlines under the white stripes on his shirt, around his beard, and to define the edges of his nose. You can also add tiny dots for eyes or other facial expressions.
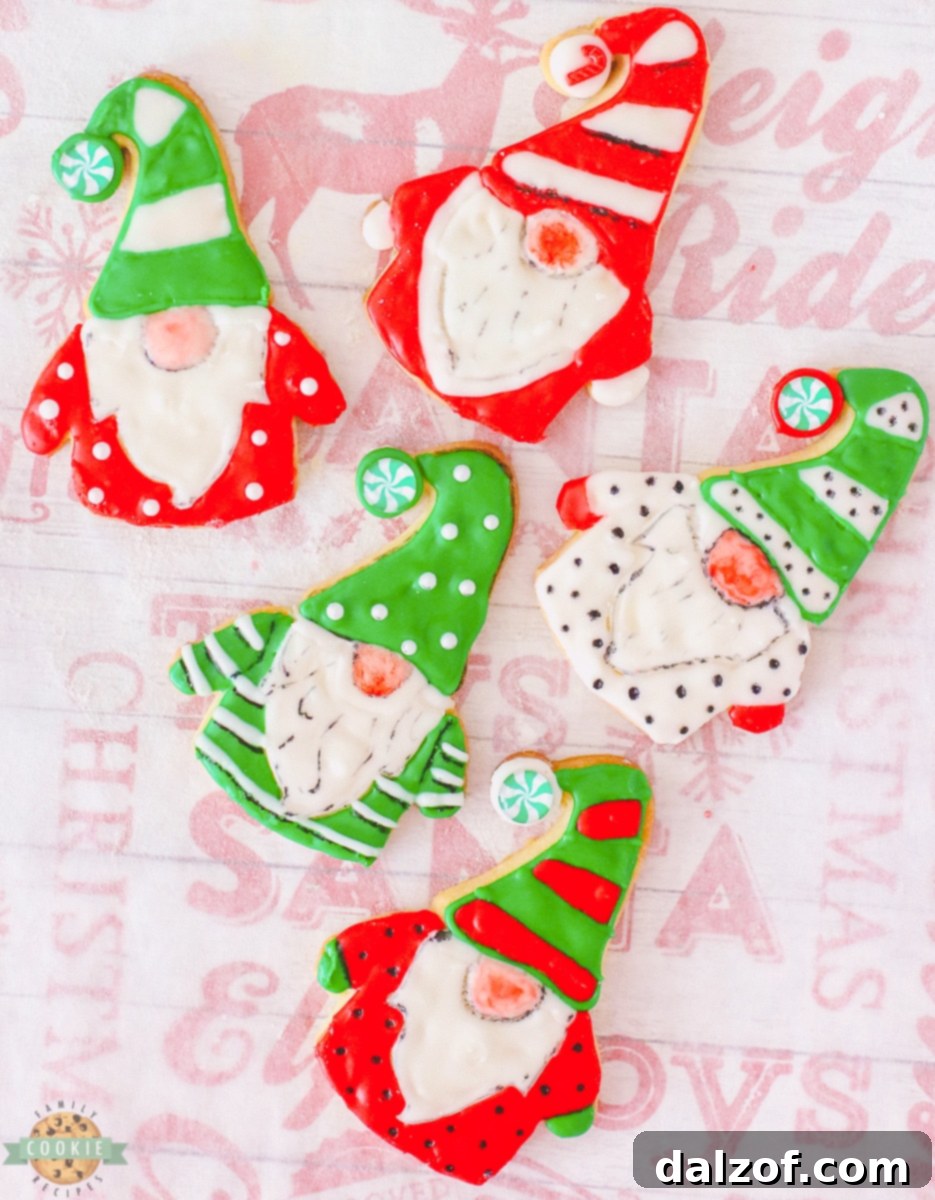
- Repeat this entire decorating process, experimenting with different colors and designs for each cookie to give them individual character. No two gnomes need to be exactly alike!
- When all cookies are completely decorated, allow them to set and dry thoroughly for several hours (or even overnight) at room temperature before stacking or serving. This ensures the royal icing hardens completely, preventing smudging. Enjoy your adorable, homemade gnome cookies!
Tips for Achieving Flawless Iced Gnome Cookies
- Use Quality Ingredients: Fresh, good-quality butter and vanilla can make a significant difference in the flavor of your shortbread.
- Don’t Overmix the Dough: Overmixing can develop the gluten in the flour, resulting in tough cookies. Mix only until ingredients are just combined.
- Chill Your Dough: A brief chill (20-30 minutes) before rolling helps prevent the dough from becoming too sticky and spreading during baking, ensuring sharp gnome shapes.
- Achieve Correct Icing Consistency: Royal icing for outlining should be thicker (like toothpaste), while flooding icing should be thinner (like honey). Adjust with small amounts of milk or powdered sugar.
- Layer Icing with Drying Time: Always allow each color or layer of icing to partially dry before adding the next. This prevents colors from bleeding into one another and gives a cleaner finish.
- Practice Piping: If you’re new to piping, practice on a piece of parchment paper first to get a feel for the pressure and flow.
- Get Kids Involved Safely: Assign age-appropriate tasks. Younger children can help with mixing dough, placing candies, or simple flooding. Older kids can handle more detailed piping and marker work.
Common Questions About Iced Gnome Cookies
How long do iced sugar cookies stay fresh?
These delightful iced gnome cookies will maintain their freshness and flavor for approximately 3 to 4 days when stored in an airtight container at room temperature. While they might technically last up to a week, for the absolute best taste and texture, it’s recommended to enjoy them within the first few days. If you wish to extend their shelf life, undecorated shortbread cookies can be frozen for up to 3 months. Once thawed, you can then proceed with the icing process.
Why use meringue powder in royal icing?
Traditional royal icing recipes historically called for raw egg whites, which, while effective, pose potential food safety risks. Meringue powder is a fantastic and much safer alternative. It’s essentially a dried, pasteurized egg white product that, when reconstituted, provides all the necessary properties of raw egg whites without the safety concerns. Meringue powder helps to create the iconic crisp, stable, and quick-setting royal icing consistency that bakers love. It ensures your icing holds its piped shape beautifully, dries hard, and adds a lovely sheen, making it perfect for intricate cookie decorating.
More Enchanting Cookie Recipes to Explore
If you loved creating these whimsical gnome cookies, you’ll surely enjoy exploring other festive and fun cookie recipes. Expand your baking repertoire with these delightful options:
- SPICED REINDEER COOKIES
- VANILLA GLAZED SPICED APPLE COOKIES
- CHRISTMAS LIGHTS CUT OUT COOKIES
- BEST GINGERBREAD CUT OUT COOKIES
- CHRISTMAS JELLO SUGAR COOKIES
- SPICED CHRISTMAS SHORTBREAD COOKIES
- CHRISTMAS CUT OUT COOKIES
Cherished Moments & The Joy of Homemade Treats

Baking, much like the little adventures of childhood, creates memories that sparkle long after the last crumb is gone. I often love looking back at old pictures and remembering those fun, spontaneous moments. There was one time the kids found a salamander in the backyard – oh heavens, it was the BEST thing ever! They named him Sammy. They ran around, showed him to all their friends, played with him gently, and even meticulously built him a little house. Yes, it was a sad day when cute Sammy the Salamander opted to vacation the house and move back to his own dwelling, wherever that was. But in the meantime, he was SO MUCH FUN, and the joy on their faces was priceless.

That same spirit of wonder and simple delight is exactly what these iced gnome cookies recipe brings. With this whimsical recipe on hand, you’ll always have a fun and engaging activity ready for family and friends. Whip them up for any season, major holidays, or just because, and they’re sure to be a hit every single time, creating lasting memories just like our adventures with Sammy. Let these adorable gnomes be a symbol of shared laughter and sweet moments in your home!

Recipe Card: Easy & Adorable Iced Gnome Cookies
These Iced Gnome Cookies are made EASY and are ADORABLE! Crafted with a buttery shortbread and iced to perfection, these magical little gnomes almost come to life!
- Course: Cookies, Dessert
- Cuisine: American
- Keyword: Iced Gnome Cookies, Christmas Cookies
- Prep Time: 25 minutes
- Cook Time: 18 minutes
- Decorating Time: 2 hours
- Total Time: 2 hours 43 minutes
- Servings: 24 cookies
- Calories: 193 kcal
- Author: Jessica & Nellie
Ingredients for the Shortbread Cookies:
- 1 cup Butter, softened
- 1 cup Sugar
- 1 Egg
- 2 ½ cups Flour
- 2 tsp Vanilla Extract
Ingredients for the Royal Icing:
- 2 cups Powdered Sugar
- 3 TBSP Meringue Powder
- ¼ cup Milk
- Red and Green Food Coloring Gel
Recommended Tools:
- 1 Black edible cookie marker
- 1 Cookie paint brush
- 1 Gnome Cookie Cutter
Instructions:
- Preheat oven to 350°F (175°C). Line a cookie sheet with parchment paper and set aside.
- Make the Cookies: In a large bowl, cream together the softened butter and sugar until light, fluffy, and well combined. Add the egg and vanilla extract, stirring until thoroughly mixed. Gradually add the flour, a little at a time, mixing well between additions until a soft dough forms. Avoid overmixing.
- On a lightly floured surface, roll out the dough to about ¼ inch thick. Use a gnome-shaped cookie cutter to cut out the cookies. Carefully place the cut-out cookies on your parchment-lined cookie sheet.
- Bake for 13-15 minutes at 350°F (175°C), or until the edges are lightly golden. Remove from the oven and cool on a wire rack completely before icing.
- Make the Icing: In a bowl, mix 2 cups of powdered sugar, ¼ cup of milk, and 3 tablespoons of meringue powder until smooth and of desired piping consistency.
- Divide the white frosting into three small bowls. Color one bowl red with food coloring gel, another bowl green, and leave the remaining bowl white. Fill three separate piping bags with each color of frosting and set aside.
- Decorate the Gnomes: Take one cooled gnome cookie. Using the green icing, outline and then fill the base of his hat, his shirt, and sleeves, being careful to trace around his long beard section, which will be white.
- Fill in his beard with white icing. Allow this section to dry for 15-20 minutes before continuing to prevent colors from bleeding. Place a peppermint swirl candy on the tip of his hat and small white sugar pearls on his hat like polka dots.
- Next, use the white icing to create stripes on his shirt and sleeves. Fill in his nose area with white frosting.
- Take your paintbrush, dip the end in water, then gently touch it to a small amount of red icing. Lightly paint his nose area until you achieve a delicate light pink color, mimicking rosy cheeks. Let dry for 10-15 minutes.
- Once dried, use your black edible food marker to draw outlines under the white stripes on his shirt, around his beard, and to define his nose. Add any other desired facial details or expressions.
- Repeat the decorating process for all cookies, experimenting with different colors and designs for each. When all cookies are finished and the frosting is completely dry and set (this may take several hours), serve and enjoy!
Nutrition Information (per cookie, approximate):
- Calories: 193 kcal
- Carbohydrates: 28g
- Protein: 2g
- Fat: 8g
- Saturated Fat: 5g
- Polyunsaturated Fat: 1g
- Monounsaturated Fat: 2g
- Trans Fat: 1g
- Cholesterol: 27mg
- Sodium: 78mg
- Potassium: 29mg
- Fiber: 1g
- Sugar: 18g
- Vitamin A: 250IU
- Calcium: 9mg
- Iron: 1mg